IMPORTANT SAFETY PRECAUTIONS
ASSEMBLING AND INSTALLATION
1. Before wiring the paddle fan, turn o the electric power supply at the main fuse box or main
circuit breaker and leave it o until installation is complete.
2. The oulet box and support structure must be securely mounted and capable of reliably
supporting a minimum af 35 pounds . Use only metallic outlet boxes.
3. Do not install paddle dan less than 7 feet between floor and lowest edge of ban blades.
4. All wiring must be in accordance with the National Electrical Code and local electrical codes.
Electrical installation should be performed bya a qualified lecensed electrician.
5. Do not operate reversing switc while fan blades are in motion. Fan must be turned o and blades
stopped before reversing blade direction.
6. Avoid placing objects in the path of the blades.
7. Do not use water or detergents when cleaning the fan or fan blades. A dry dust cloth or lightly
dampened cloth will be suitable for most cleaning.
1. We recommend removing the power supply from the main electrical panel before making
connections.
2. Verify all parts against part list and diagram.
3. Remove motor from packing. To avoid damage to finish assemble motor on soft paded surface.
4. Check hanging location in order to assure adequate clearance with adjacent walls, furnitures,
etc.
5. It is essential that the outlet box or structural member from which the far is to be suspended will
safety support the fan. In view of the torque and weight factors involved some outlet boxes will
reguire additional strengthening by securing more firmly to wood beams of steel supports.
6. Attach the mounting bracket to the ceiling with the screws provided.
7. Making sure the canopy is properly seated with molded groove engaged with the tab on canopy
be certain that hanging canopy is fully locked into position.
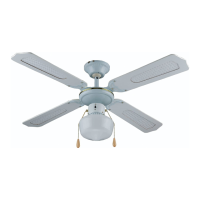
8. Attach blades to blade brackets using screws, nuts and washers. The three screws per blade are
profunded from bottom of the blade bracket, through the blade bracket into the blade. Then place
the washer and nut on top of the screw, holding the nut, thread the screw to tighten the blade
and the blade bracket. Repeat instruction for fixing all blades to blade brackets.
9. Secure the blades to the fan motor with screws and washers.
10. Make the electrical connections respecting the indications shown in the connection diagram.
Make sure that fan is properly grounded. Carefully pus hall wiring inside wiring box after
splices are made. The blue wire is provided for the connection of optional light kit. Do not
connect this wire if light is not installed.