28
First installation
Once all the connections have been made, and after having carefully checked the
exactness, it is possible to turn on the TV and then the device via the supplied remote
control. The display will show the writing Strt.
In this menu you can:
● [Region] press the Vol-/Vol+ keys to select the country where the device will be
used. This choice is critical because for a correct reception of the channels.
● [Language] press the Vol-/Vol+ buttons to select the language used by the device.
● [Display Mode] press OK then the CH-/CH+ buttons to select the video resolution
used by the device. The device will start in 576p in Scart or 720p@50Hz in HDMI.
We recommend that you select 1080p_50 for FULL HD televisions or 720p_50 for
HD TVs.
● [Aspect Mode] select Auto.
● [Antenna Power] select the option On to supply the signal on the antenna output.
Highlight the word OK in the OSD and then click the OK button on the remote control.
Automatic channel tuning will start immediately. This process is completely automatic
but can last several minutes. After tuning, you can watch TV.
In the lower part, in menu mode, there is a legend with the active
keys on the displayed page.
● Use the [arrows Vol-/Vol+ and CH+/CH- to move through
the menus and change their settings.
● Tap on thebutton OK to confirm the selection.
1.6 PlayBack
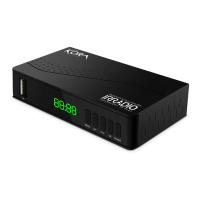
Please connect a USB memory (already formatted) to the USB port of the device. See
the following figure.
Press the button USB then tap on button 1 (move to Video/Music/Images) to view the
list of what was recorded. Alternatively, press the button Menu, then move to the menu
MediaPlayer, then Video/Music/Image. Select the file from the video to play and
touch OK. Press Stop to stop playback.