- 2 -
Parts of the AW-OTG/AW-OTB
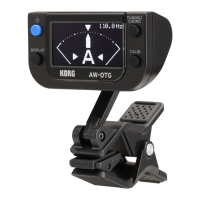
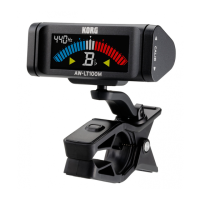
AW-OTG
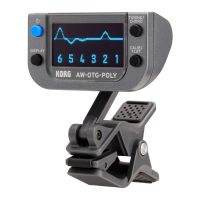
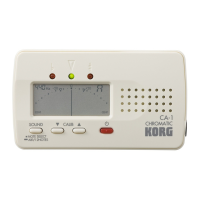
AW-OTB
a. Power button b. DISPLAY button
c. Display d. Battery compartment (Rear)
e. TUNING/CHORD button (AW-OTG)
TUNING/TEMPO button (AW-OTB)
f. CALIB button
Installing the battery
When the battery is running
low, a battery symbol will ap-
pear in the display for a few
seconds. Immediately replace
the battery with a new one.
1. Open the battery compartment
cover on the rear of the tuner in
the direction of the arrow.
2. Insert the battery, making sure to
observe the correct polarity, and
then close the cover.
Attaching to the instrument
and range of motion
The AW-OTG/AW-OTB tunes by picking up the vibrations of
the instrument. Therefore, attach the AW-OTG/AW-OTB to the
headstock of your instrument in order to tune it. Additionally,
the AW-OTG/AW-OTB can be freely moved so that the display is
easy to read.
The AW-OTG/AW-OTB may be damaged if you apply exces-
sive force within its range of motion, or attempt to move it
beyond its intended range of motion.
15°
15°
100°
180°
360°
Please carefully attach the AW-OTG/AW-OTB to your instru-
ment. Leaving the AW-OTG/AW-OTB attached for a long
time may damage or mark the instrument's surface.
Depending on various factors such as age-related change or
the surface nish, there is a possibility that your instrument
may be damaged by attaching this product.
Turning on/o
Press the power button to turn on the AW-OTG/AW-OTB. To turn
it o, press the power button again.
When there has been no sound input for approximately three
minutes, the AW-OTG/AW-OTB will automatically turn o (Auto
power-o function).
Tuning
1. If necessary, change the reference pitch and display type
settings. For details on the setting procedures, refer to the
following descriptions.
2. Play a single note and tune the string.
The display indicating when the string is in tune diers de-
pending on the selected display type. (
¬
Setting the display
type)
Example: Type 1 on AW-OTG
6E
5A
4D
1E
2B
3G