4
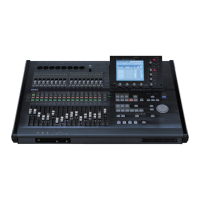
Warning dialog box added to Format
and Partition
When you execute the Format or Partition operations, a warn-
ing dialog box will now appear if the drive contains any pro-
tected songs.
(→Manual: p.88, 89, 127, 128)
If you want to override the song protect setting, press the
Force button (highlighted) in the dialog box and then press
the Yes button.
Change in PC drive size
You can now choose 2 GB, 4 GB, or 8 GB as the size for the
PC (USB) drive. (→Manual: p.88, 127)
If connected to a Windows 98 computer, only 2 GB can be de-
tected for a PC (USB) drive. The drive will not be detected if it is
4 GB or 8 GB in size.
When you execute a change in the PC (USB) drive size, the data
of the PC (USB) drive and all song drives will be lost, but the
“User Data” (→Manual: p.82, 129) and SYSTEM “Control”
tab page data will be preserved.
(1)Access the SYSTEM “DiskUtility” tab page, and press
the Partition button to display the Partition dialog box.
(2)Press the PC Drive list button and choose the desired
size for the PC (USB) drive.
(3)
(2)
(3)Execute the change in the PC (USB) drive size.
When you press the “Yes” button a message of “Are You
Sure?” will appear; press the Yes button once again to
execute.
If the song drive contains any protected songs, a warning
dialog box will appear. In the dialog box, press the Force but-
ton and then press the Yes button to execute.
When you change the size of the drive, all data on the PC
(USB) drive and all other song drives will be erased.
When the operation has been completed, the display will
indicate “Completed”; press the OK button to return to the
“DiskUtility” tab page.
You can also specify the number of partitions at the same
time that you select the PC (USB) drive size.
If you select 2 GB as the size of the PC (USB) drive, it will be
managed as a FAT16 drive. If you select 4 GB or 8 GB, the drive
will be managed as a FAT32 drive.
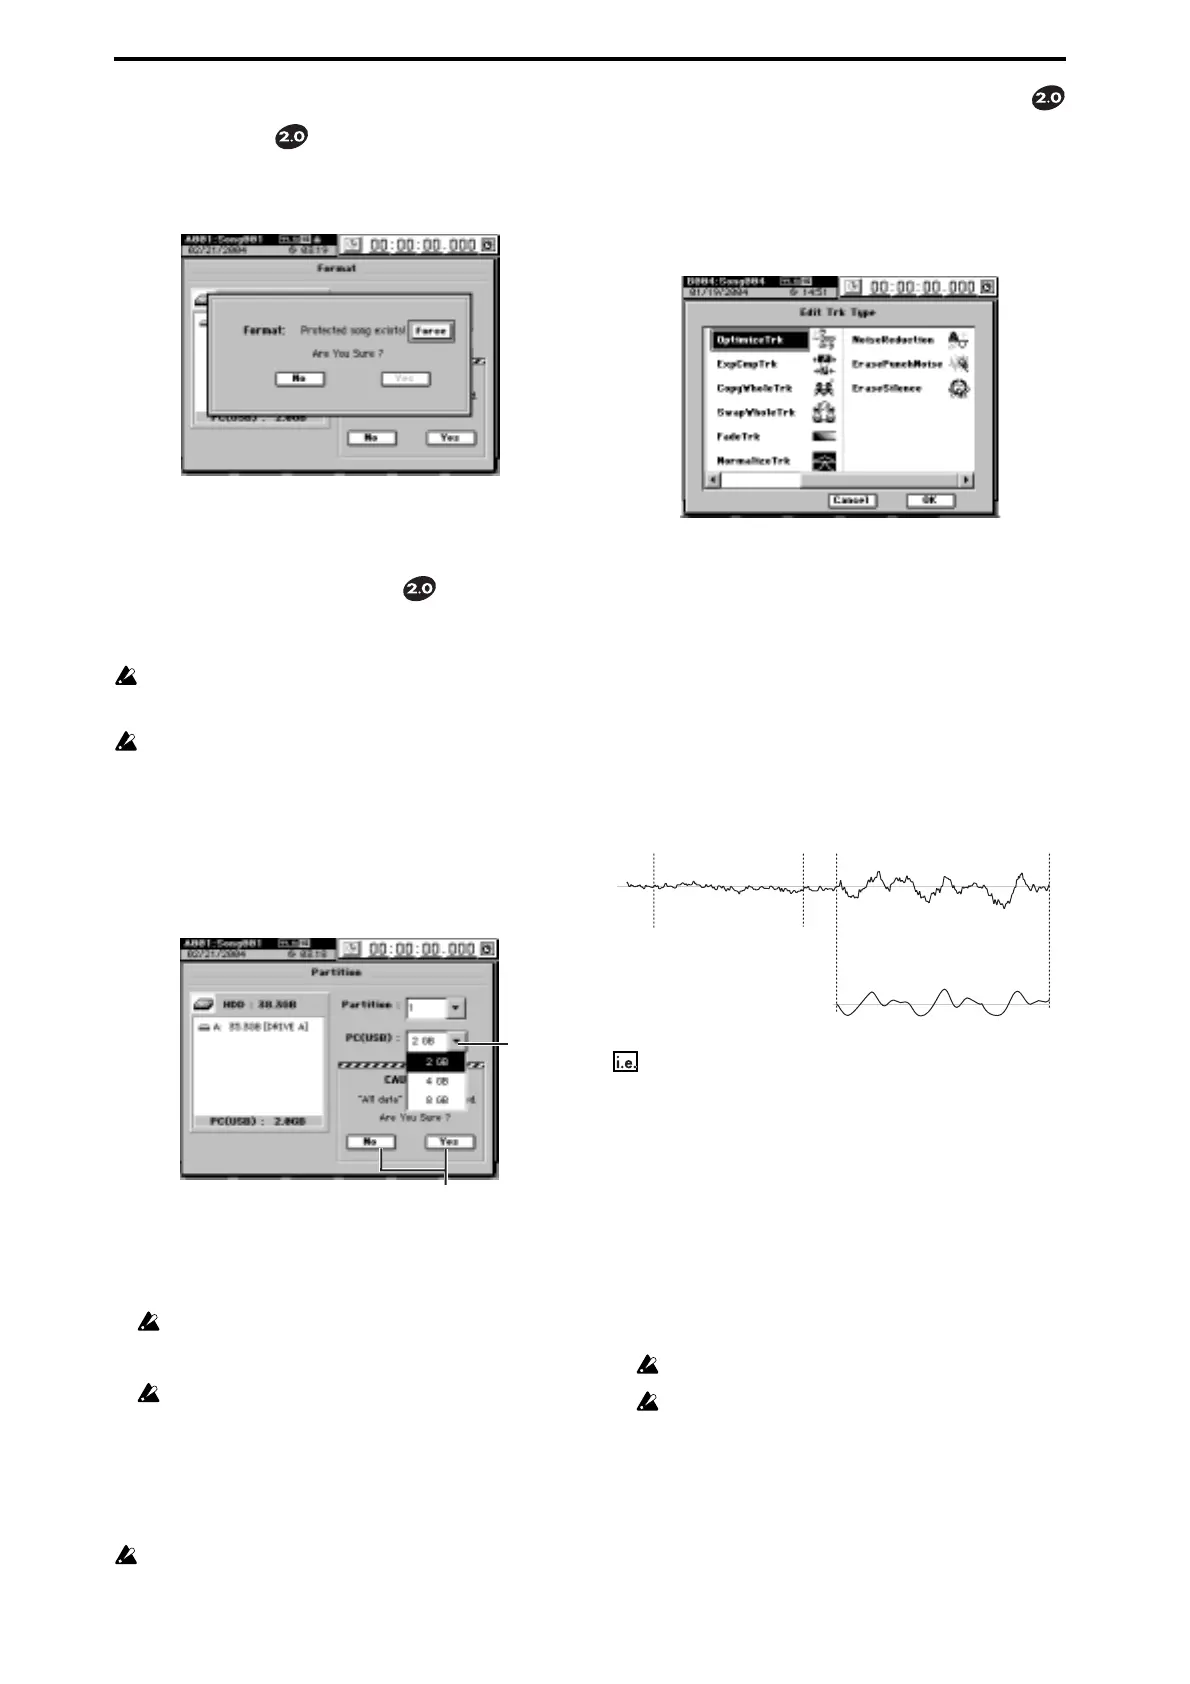
Changes and additions to Edit Track
The Mode button has been removed from the track edit type
OptimizeTrk; allowing EraseSilence, ErasePunchNoise, and
Optimize (normal) to be offered as individual track edit
types. (→Manual: p.73, 142)
In addition, a new NoiseReduction operation has been
added, which can learn the signature of a noise signal and
automatically remove the noise from a musical passage.
Optimizing a track (OptimizeTrk)
This operation now functions only to optimize the track data.
Step (3) of “Optimizing track data” (
→Manual: p.73) is now
unnecessary. Also, the Reference section OptimizeTrk
A3.Mode
(→Manual: p.142) is now unnecessary; the section
“Normal” is now the overall explanation for this
OptimizeTrk command.
Eliminating noise (NoiseReduction)
On the desired track, specify a region (IN-OUT) containing
only noise which the D32XD/D16XD will use to analyze and
“learn” the noise component. This noise component will then
be eliminated from the data in the other region you specify
(TO-END) of the same track.
IN
After execution
OUT
TO
END
The region from which you want
to remove noise (Destination)
Before execution
A region of only noise
(Learn Noise)
Eliminate noise from the TO-END region of track 1
(1)Specify the region containing the noise that you want
the D32XD/D16XD to analyze, and the region from
which this noise will be removed.
You will need to set the following locations (→Manual:
p.69).
•IN location: the beginning of the Learn (noise analysis)
region
•
OUT location: the end of the Learn (noise analysis) region
•TO: the beginning of the Destination (noise removal)
region
•END: the end of the Destination (noise removal) region
You must set IN-OUT to a region that contains only noise.
There is a lower limit on the size of the regions you specify.
The IN-OUT region must be at least one second long, and the
TO-END region must be at least 0.5 seconds long.
(2)Select“NoiseReduction.”
In the TRACK, “EditTrk” tab page, press the Edit Trk
Type cell. In the Edit Trk Type dialog box, select
“NoiseReduction” and press the OK button.
 Loading...