EasyManua.ls Logo

Kozyard Victoria - User Manual

Default Icon
14 pages
Print Icon
To Next Page IconTo Next Page
Loading...
Victoria 10’x12’ Gazebo
Assembly Manual
Kozyard LLC Products
www.kozyard.com
© Copyright 2016 - 2019 Kozyard LLC. | All Rights Reserved.
Question and Answer IconNeed help?

Do you have a question about the Kozyard Victoria and is the answer not in the manual?

Summary

Safety Information

General Safety Warnings

Warnings about permanent structure, weather, flame resistance, ground installation, and material care.

Assembly Area Precautions

Keep children/pets away, maintain distance from obstructions, wear gloves for sharp edges, and ensure sufficient personnel.

Care Instructions

Tool Required

Personnel and Support Tools

Requires two or more people, stepladders, protective gloves, and possibly a safety hat.

Fastening and Assembly Tools

Use hex keys, Phillips screwdriver, avoid fully tightening screws initially, consider a drill for ease.

Step 1: Pole Assembly

Connect Connector to Pole

Attach Connector (Part G) to Pole (Part A) using Screw 1#.

Link Poles Together

Link Pole (Part A) to Pole (Part A1) using Screw 1#.

Attach Poles to Base Plates

Attach Pole (Part A1) to Plate (Part B) using Screw 1#.

Step 2: Beam Assembly

Connect Beam C to C1

Connect Beam (Part C) to Beam (Part C1) using Screw 3#.

Connect Beam D to D1

Connect Beam (Part D) to Beam (Part D1) using Screw 3#.

Step 3: Frame Construction

Attach Beams to Poles

Connect finished beams (C, C1, D, D1) to poles (A) using Screw 1#.

Step 4: Roof Bar Assembly

Attach Roof Bar H to Roof Bar E

Attach Roof bar (Part H) to Roof Bar (Part E) using Screw 2#.

Insert Roof Bar E1 into Roof Bar E

Insert Roof bar (Part E1) to Roof Bar (Part E).

Insert Roof Bar F1 into Roof Bar F

Insert Roof bar (Part F1) to Roof Bar (Part F).

Overall Roof Structure Assembly

Upward View of Roof Bars

Diagram showing upward arrangement of roof bars connected to the roof connector.

Downward View of Roof Bars

Diagram showing downward arrangement of roof bars connected to the roof connector.

Step 5: Attach Roof Bars to Frame

Attach Roof Bar F1;F2 to Beams

Attach Roof bar (Part F1) or (Part F2) to finished beams using Screw 1#.

Attach Roof Bar E1 to Poles

Attach Roof bar (Part E1) to finished poles using Screw 2#.

Step 6: Install Roof Fabric

Attach Roof Fabric K and K1

Put Roof Fabric (Part K & Part K1) onto the roof frame.

Step 7: Hang Netting and Secure Base

Hang Netting L

Hang Netting (Part L) on finished beams.

Secure Base Plate B

Secure the plate (Part B) to the ground using Spike (part M).

Step 8: Secure Gazebo with Rope

Anchor Gazebo with Rope P

Measure out from post, secure Rope (Part P) and Anchor (Part Q) to ground at 45 degrees.

Support and Contact Information

Overview

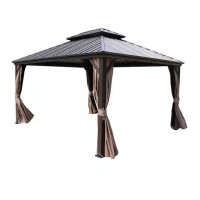
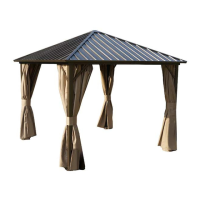
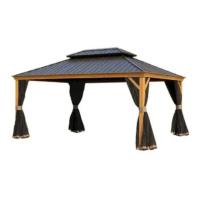
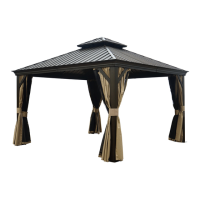
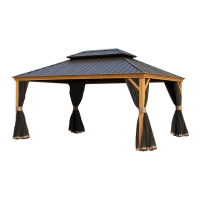
This document is an assembly manual for the Kozyard Victoria 10'x12' Gazebo, designed to provide shade and privacy.

Function Description:

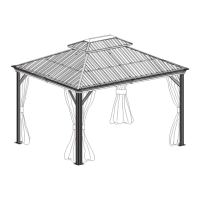
The Kozyard Victoria 10'x12' Gazebo is a garden structure intended for outdoor use, offering a shaded area and a degree of privacy. It is designed for use under normal weather conditions. The gazebo features a fabric canopy and a frame structure, complete with netting for added protection or aesthetic appeal. It is not a permanent structure and requires disassembly in severe weather conditions.

Important Technical Specifications:

  • Dimensions: 10'x12'
  • Frame Material: Not explicitly stated, but implied to be metal (poles, beams, roof bars) based on the assembly diagrams and the need for screws and an Allen key.
  • Canopy Material: Fabric, which meets CPAI-84 specification for flame resistance but is not fireproof. It is water-resistant but not waterproof and may leak during precipitation. The fabric is also subject to fading from direct exposure to sunlight.
  • Hardware: Includes M6x16, M6x35, and M6x58 screws, along with an Allen key (S4).
  • Anchoring: Designed to be secured to the ground using spikes (Part M, N) and ropes (Part P) at a 45-degree angle. It should not be permanently anchored to a wood deck or concrete surface.

Usage Features:

  • Assembly: Requires at least two or more people and one or more stepladders for safe assembly. Protective gloves and a safety hat are recommended. A Phillips screwdriver and a drill may be useful. Screws should not be fully tightened until complete assembly.
  • Canopy: The fabric canopy provides shade and privacy. It is recommended to remove the fabric canopy in windy conditions to prevent damage, as gazebos can catch wind like umbrellas.
  • Netting: The gazebo includes netting (Part L) that can be hung on the finished beams.
  • Stability: Must be installed on level ground and secured using tie-down cords and ground stakes. The manual specifies securing the plate (Part B) to the ground using spikes (Part M) and further anchoring with ropes (Part P) and additional spikes (Part N) at a 45-degree angle from the post.
  • Weather Conditions: Intended for normal weather conditions. It must be completely disassembled prior to severe weather conditions such as thunderstorms, hurricanes, or heavy wind and rain to prevent structural damage or collapse.
  • Safety: Keep all frame and heat sources away from the tent fabric. The fabric will burn if in continuous contact with a flame source. Applying foreign substances to the fabric may reduce its flame-resistance properties. Keep children and pets away from the assembly area. Begin assembly at least 6 feet from obstructions like fences, garages, houses, overhanging branches, clotheslines, or electrical wires. Some parts may have sharp edges, so wearing protective gloves is advised.

Maintenance Features:

  • Cleaning: Before using, wipe the gazebo with a clean, dry cloth. Do not use bleach or solvents.
  • Frame Protection: Treat the frame with a one-step liquid wax for maximum protection against UV light and salty damp air.
  • Canopy Cleaning: Wash the canopy with a mild solution of soap and water, rinse thoroughly, and air dry completely.
  • Hardware Inspection: Perform periodic inspections during usage for cracked welds and properly tighten all hardware.
  • Disassembly: The unit must be disassembled in severe weather conditions.

Parts List Overview:

The manual includes a detailed parts list with diagrams and quantities for each component, categorized as follows:

  • Structural Poles and Beams: Poles (A, A1), Beams (C, C1, D, D1).
  • Roof Structure: Corner Roof Bars (E, E1), Roof Bars (F, F1, F2), Roof bar (H), Connector (J).
  • Base and Anchoring: Plate (B), Connector (G), Spike (M, N), Rope (P).
  • Fabric Components: Roof Fabric (K, K1), Netting (L).
  • Hardware and Tools: Allen key (S4), Screws (M6x16, M6x35, M6x58).

The assembly process is broken down into 8 steps, starting from connecting poles and beams, forming the main frame, attaching roof bars, and finally installing the roof fabric, netting, and securing the gazebo to the ground.

Kozyard Victoria Specifications

General IconGeneral
BrandKozyard
ModelVictoria
CategoryOutdoor Furnishing
LanguageEnglish

Related product manuals