Do you have a question about the Kozyard Rosana and is the answer not in the manual?
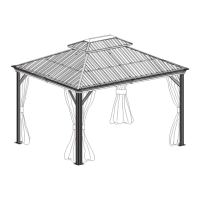
Assemble poles (Part A) with stand palettes (Part B) using screws AA.
Add hooks to sidewall tracks (C, C1, C2, C3) and connect them into beams using screws AA.
Use screws AA to connect poles and beams together as shown in the diagram.
Finish connecting beams using corner covers (Part M) and screws I, affixing middle beams with joint covers (L&W).
Affix the frame with corner solidifying bars (Part J and J1) using screws AA.
Connect the inside roof connector (Part N1) with the corner roof bar (Part D) using screws AA.
Attach roof bar (Part D1) to inside roof connector and roof bars (D1&D) to the main frame using screws AA.
Connect outside roof connector (Part N) to inside roof connector (Part N1) using screw AA.
Affix solidifying bars (Part G & G1) to roof bar (Part D1) and corner roof bar (Part D) using screws (AA&T).
Cover metal bracket (Part X,X1&X2) to roof panels (Q, Q1, Q2, Q3, Q4, Q5) as shown.
Cover metal bracket (Part X,X1&X2) to roof panels (R, R1, R2, R3, S, S1, S2, S3) as shown.
Final assembly of the roof panels by connecting them together.
Affix roof panels using screws and spacer (Part U) as shown in diagram.
Attach finishing bars (Part E & E1) by (Part P & P1) using screws AA to roof bar and corner roof bar.
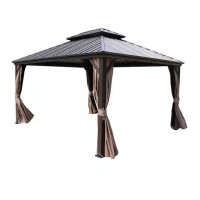
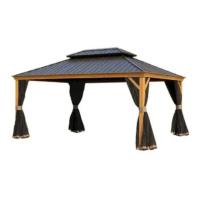
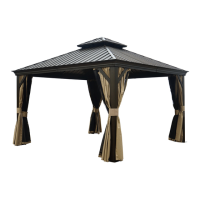
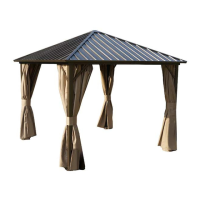
Hang up solid sidewall (Part T) and check all screws are fixed tightly.
| Brand | Kozyard |
|---|---|
| Model | Rosana |
| Category | Outdoor Furnishing |
| Language | English |