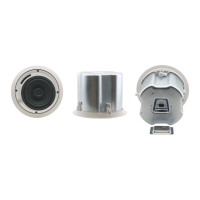
Figure 4: Mounting the Galil 4-C Closed-back Ceiling Speaker
2. Place the tile rails on the tile and snap them into the two tabs on the C-ring.
Align the rails so that the ends extend over the T-channel grid.
3. Insert a screw through each tab on the C-ring to secure the rails.
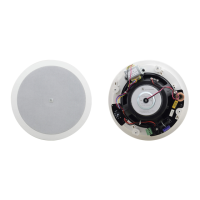
4. Connect the speaker wires to the appropriate connector terminals:
PIN 1 and PIN 2 are connected internally and are positive (+)
PIN 3 and PIN 4 are connected internally and are negative (-)
Screw the hold-down screws on the connector until tight, using a small
screwdriver.
You can connect the speakers in the two following possible layouts:
Wiring in parallel: connect the amplifier directly to each of the
speakers. When one input connector is removed, subsequent
speakers will remain connected (see Figure 3)
Daisy-chaining: connect the wire pair (+ and -) of the speaker to the
subsequent speaker + and -. When one input connector is removed,
subsequent speakers will be disconnected (see Figure 3)
5. Plug the connector into the socket (see Figure 5).
6. Run the wires through the opening in the input terminal cover and then
connect to the speaker terminal block connector.