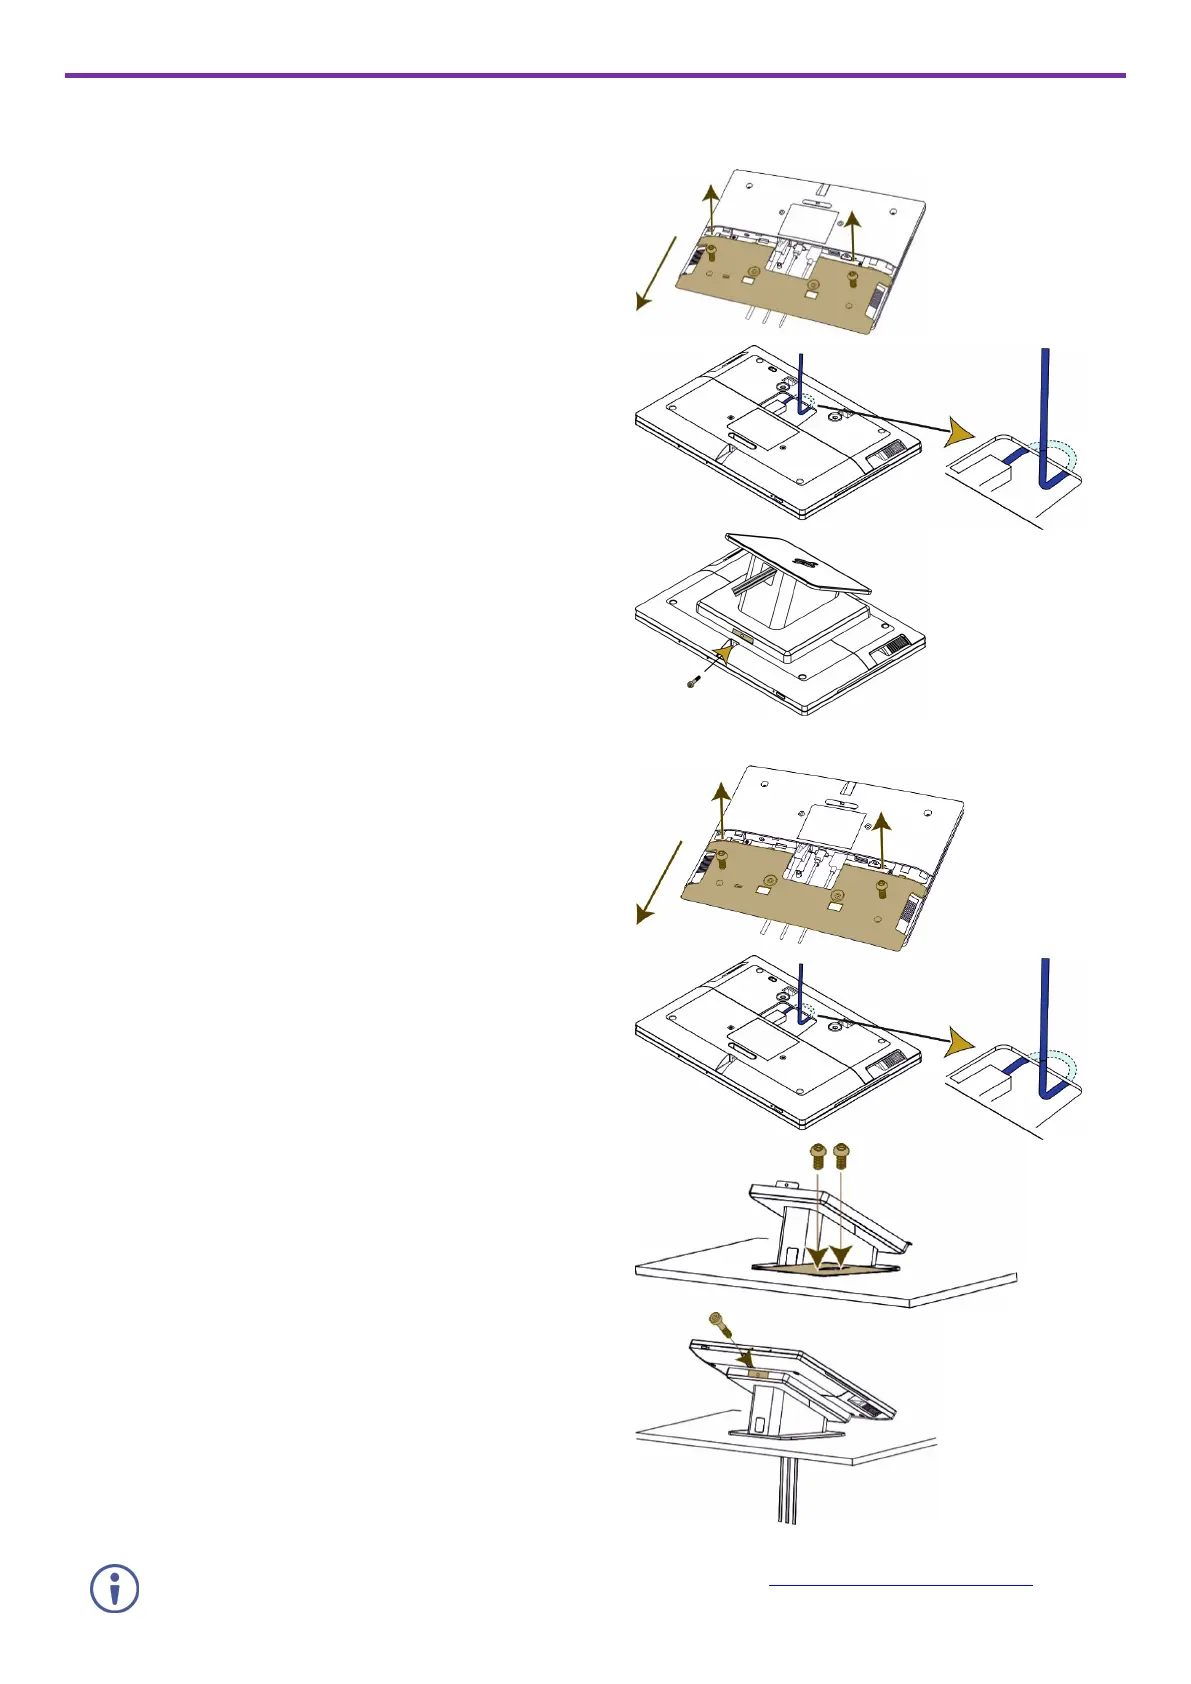
Step 3: (Option 1) Mount KT-2010 on a Table
Simple Mounting (moveable table stand)
1. Remove the I/O cover:
Take out the 2 M2 screws.
Insert fingers into the two slots and slide the cover down.
2. Connect any necessary cables, running them through the table
stand to the KT-2010.
3. Replace the I/O cover, taking care to prevent pressure on the
RJ-45 cable:
Use a cable without a hood.
Curl the cable under the cover.
4. Close the cover with the 2 M2 screws.
5. Lay the KT-2010 face-down and mount the table stand on it.
6. Insert and fasten the provided M3 screw that secures the bottom
of the KT-2010 to the table stand.
touch panel are now ready for use.
Secure Mounting (fixed table stand)
1. Remove the I/O cover:
Take out the 2 M2 screws.
Insert fingers into the two slots and slide the cover down.
2. Connect any necessary cables, running them through the table
stand to the KT-2010.
3. Replace the I/O cover, taking care to prevent pressure on the
RJ45 cable:
Use a cable without a hood.
Curl the cable under the cover.
4. Close the cover with the 2 M2 screws.
5. Lay the KT-2010 face-down and mount the table stand on it.
6. Secure the stand to the table using the two provided 5/32”
screws.
7. Mount the KT-2010 on the stand and secure it with the provided
M3 screw.
touch panel are now ready for use.
For optimum range and performance use the recommended Kramer cables available at www.kramerav.com/product/KT-2010.
Using third-party cables may cause damage!
 Loading...