Step 4: (Option 2) Mount KT-2010WM on a Wall
To mount the device on a one gang box:
1. Remove the I/O cover:
Take out the 2 M2 screws.
Insert fingers into the two slots and slide the cover down.
2. Connect any necessary cables to the KT-2010WM.
3. Replace the I/O cover, and close with the 2 M2 screws.
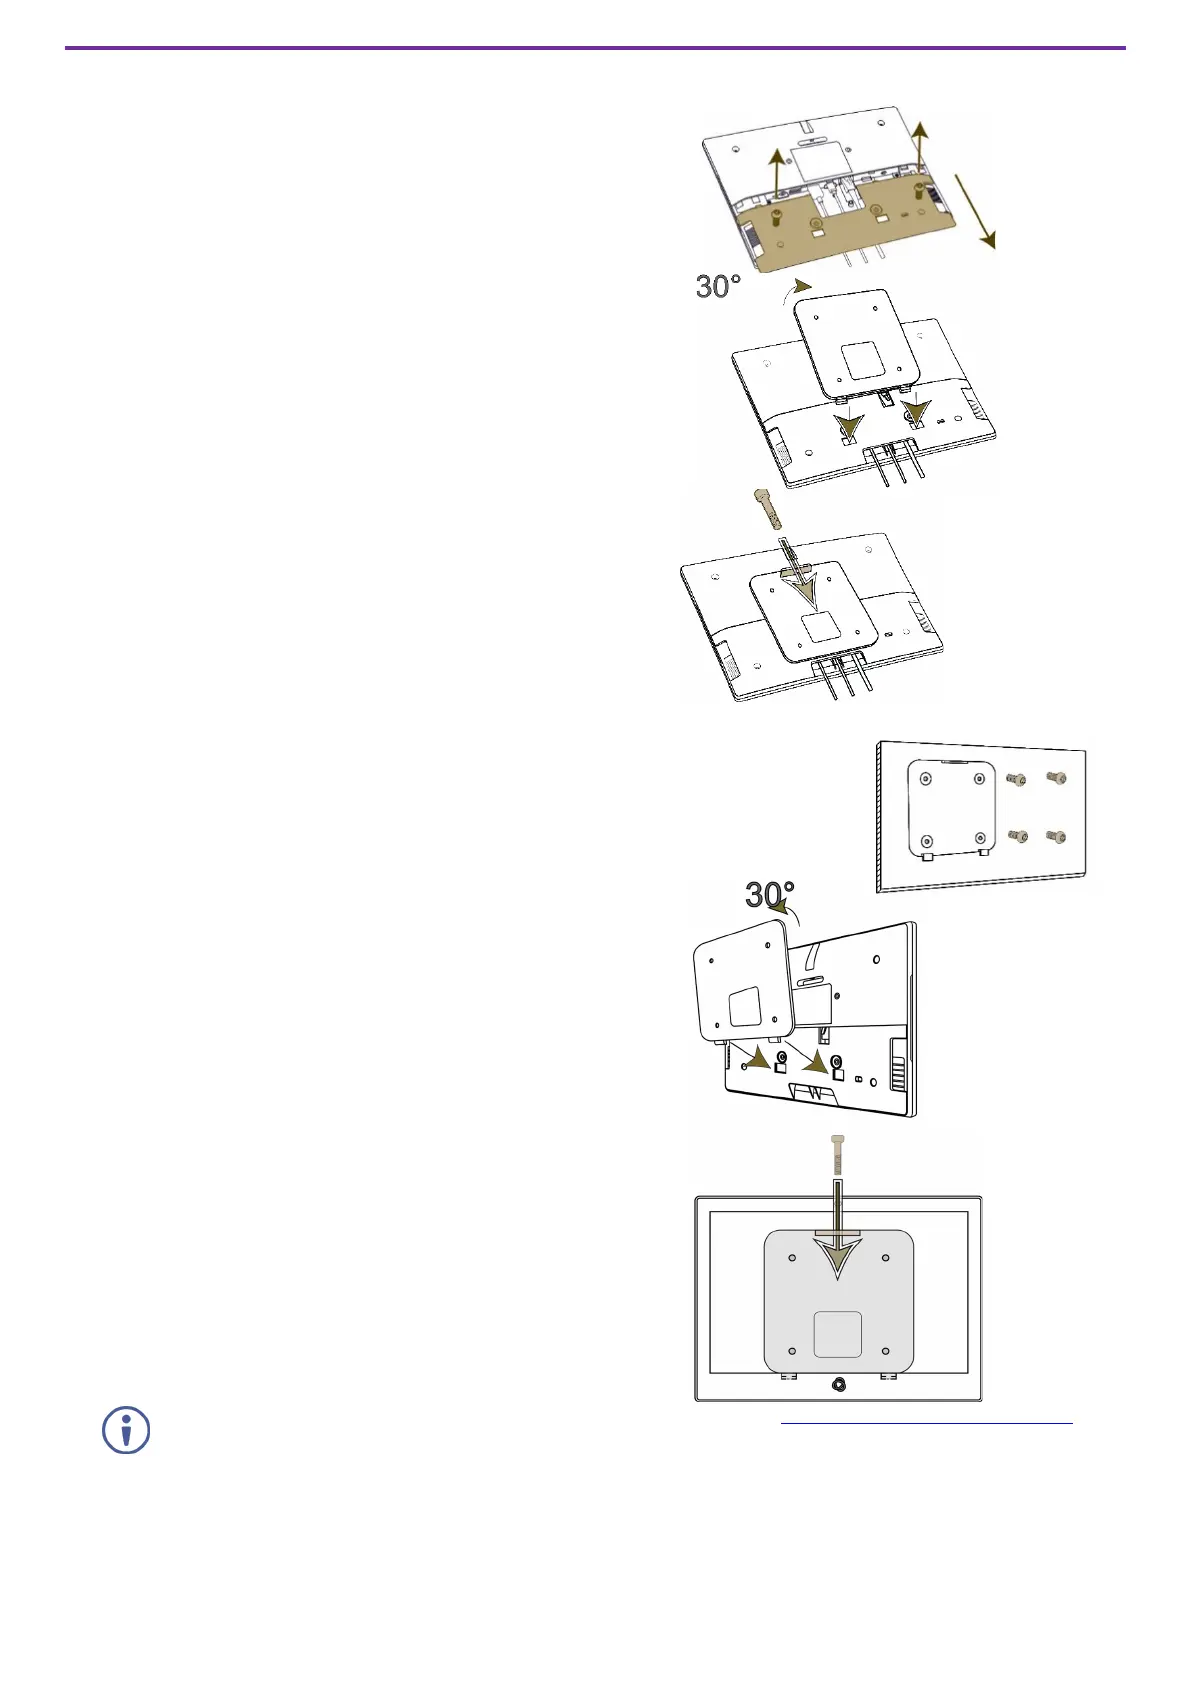
4. Click the wall bracket onto the back of the I/O cover (push the bracket
into place while holding its top slightly outward).
Note: The bracket may look slightly different and have additional
screw holes.
5. Secure the wall bracket to the touch panel cover using the M3 screw.
The touch panel is mounted.
To mount the device on a secured wall bracket:
1. Mount the wall bracket on to the installation point (screws not provided). The
bracket may have additional screw holes not shown here.
2. Connect the touch panel to the wall bracket (lift it into place while
holding the top of the touch panel slightly outward).
3. Use the provided M3 screw to secure the touch panel to the wall
and back cover.
The touch panel is mounted.
For optimum range and performance use the recommended Kramer cables available at www.kramerav.com/product/KT-2010WM.
Using third-party cables may cause damage!
 Loading...