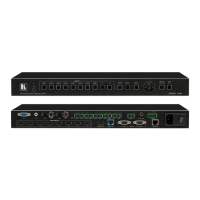
For optimum range and performance use the recommended Kramer cables available at
www.kramerav.com/product/VP-551X.
Connect the Audio
To a balanced stereo audio input/output:
To an unbalanced stereo audio input/output:
Step 5: Connect the power
Connect the power cord to VP-551X and plug it into the mains electricity.
Safety Instructions (See www.kramerav.com for updated safety information)
Caution:
• For products with relay terminals and GPI\O ports, please refer to the permitted rating for an external connection, located next to the terminal or in the User Manual.
• There are no operator serviceable parts inside the unit.
Warning:
• Use only the power cord that is supplied with the unit.
• Disconnect the power and unplug the unit from the wall before installing.
• Do not open the unit. High voltages can cause electrical shock! Servicing by qualified personnel only.
• To ensure continuous risk protection, replace fuses only according to the rating specified on the product label which located on the bottom of the unit.
Step 6: Set operation parameters via OSD menu
Enter the OSD menu via the MENU button on
the front panel or the IR remote control
transmitter. Select a menu item and set
parameters as required.
Set the contrast, brightness and color. Fine-tune the PC
and video settings.
This menu is not available in bypass mode
If you cannot see any video output, verify that
the display, TV, or projector is in good working
order, is connected to the VP-551X, and that
the VP-551X is selected as its source. If you
still cannot see any image, press and hold the
RESET TO XGA/1080p button for 3 seconds to
reset the output to XGA or 1080p resolution.
Set device to bypass mode (ON/OFF), when not in
bypass mode, select the image size and the resolution.
Select the input volume for each input; set the output
volume and speaker volume; set the audio source;
adjust audio settings (delay, DRC, bass, treble and
loudness) and mute/unmute line and speaker outputs
separately. Adjust microphone settings and volume and
set the embedding mode (DSP or bypass).
Note that the mute features are not available in the
audio bypass mode.
Set the position of the OSD on the screen, the OSD
timeout and so on.
Set the EDID on the inputs.
Set HDCP on the input and output, set auto sync off and
auto switching mode. Set the Ethernet parameters and
lock modes. Define daily reset time. View the device
lifetime timer (in hours).
Display the device information.
Select to reset the device to its factory default settings,
including Ethernet parameters or perform a soft reset,
keeping current Ethernet parameters.

 Loading...