Do you have a question about the Kraus Viva KCV-200 and is the answer not in the manual?
Inspect sink for damage, ensure compliance with codes, and prepare floor/walls for installation.
Lists essential tools including safety goggles, drill, silicone adhesive, hole saw, pencil, and tape measure.
Provides visual diagrams and measurements for various sink models (KCV-200, KCV-201).
Position the sink and mark the countertop for drain and faucet hole centerlines.
Cut the drain opening in the countertop using a 4" hole saw on the marked area.
Apply a bead of clear silicone around the underside of the sink for sealing.
Carefully place the sink onto the countertop and press firmly; allow sealant to set.
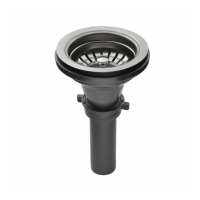
Connect drain, trap, and water supply lines, then test for leaks.
Details the lifetime warranty on structure and finish for personal household use.
Excludes damage from misuse, improper installation, or lack of professional installation.
Covers industrial, commercial, and business use for one year, excluding consequential damages.
Provides contact details for homeowners, contractors, and partners for service and inquiries.
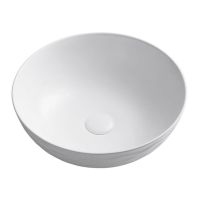
This document is an installation manual for the Kraus Viva™ Series Ceramic Vessel Bathroom Sinks, covering models KCV-200, KCV-201, KCV-202, KCV-203, KCV-204, and KCV-205. It provides instructions for installation, dimensions, warranty information, and customer support contacts.
The Kraus Viva™ Series Ceramic Vessel Bathroom Sinks are designed to be installed on a countertop, serving as a basin for washing in a bathroom setting. These sinks are characterized by their ceramic construction and vessel-style design, meaning they sit above the countertop rather than being recessed. The manual guides users through the process of marking the faucet and drain hole locations, drilling the countertop, applying silicone adhesive, installing the sink, and connecting plumbing fixtures. The various models offer different shapes and dimensions to suit diverse aesthetic and spatial requirements in a bathroom.
The manual provides detailed dimensions for each model:
All models require a 4" hole saw for cutting the drain opening in the countertop. The recommended minimum clearance from the wall to the edge of the sink for faucet placement is 3 1/2". The drain opening itself is 1 1/2" from the center of the faucet hole, and the faucet hole is 2" from the back edge of the sink (as depicted in the diagram for marking faucet and drain hole location). The sinks are made of ceramic material.
The Viva™ Series sinks are designed for personal household use. Their vessel design offers a contemporary aesthetic, making them a focal point in bathroom decor. The installation process involves standard DIY tools such as safety goggles, a drill, silicone adhesive, a 4" hole saw, a pencil, and a tape measure. The manual emphasizes the importance of proper alignment and sealing during installation to ensure functionality and prevent leaks. Users are advised to check for leaks after connecting plumbing fixtures. The product is fragile and requires careful handling during installation to prevent chipping or cracking.
While the manual does not explicitly detail a "maintenance features" section, it provides crucial information regarding care and warranty that implicitly guides maintenance. The warranty section explicitly states what voids the warranty, which serves as a guide for proper care:
The manual directs users to download the Kraus Care & Maintenance Guide at http://www.kraususa.com/maintenance for more detailed care instructions. This suggests that specific cleaning agents and methods are recommended to preserve the ceramic finish and extend the product's lifespan. The lifetime warranty on the ceramic sink's structure and finish under normal usage further encourages proper care to benefit from the warranty coverage.
| Brand | Kraus |
|---|---|
| Model | Viva KCV-200 |
| Category | Plumbing Product |
| Language | English |