8) Fine-tune the cursor setting by moving the miter gauge back
to 0 deg. Then move the stop in about an inch and cut a
board to length. Measure the cut board.
9) Without moving the stop or the fence settings, loosen the
cursor and adjust it to read this exact measurement.
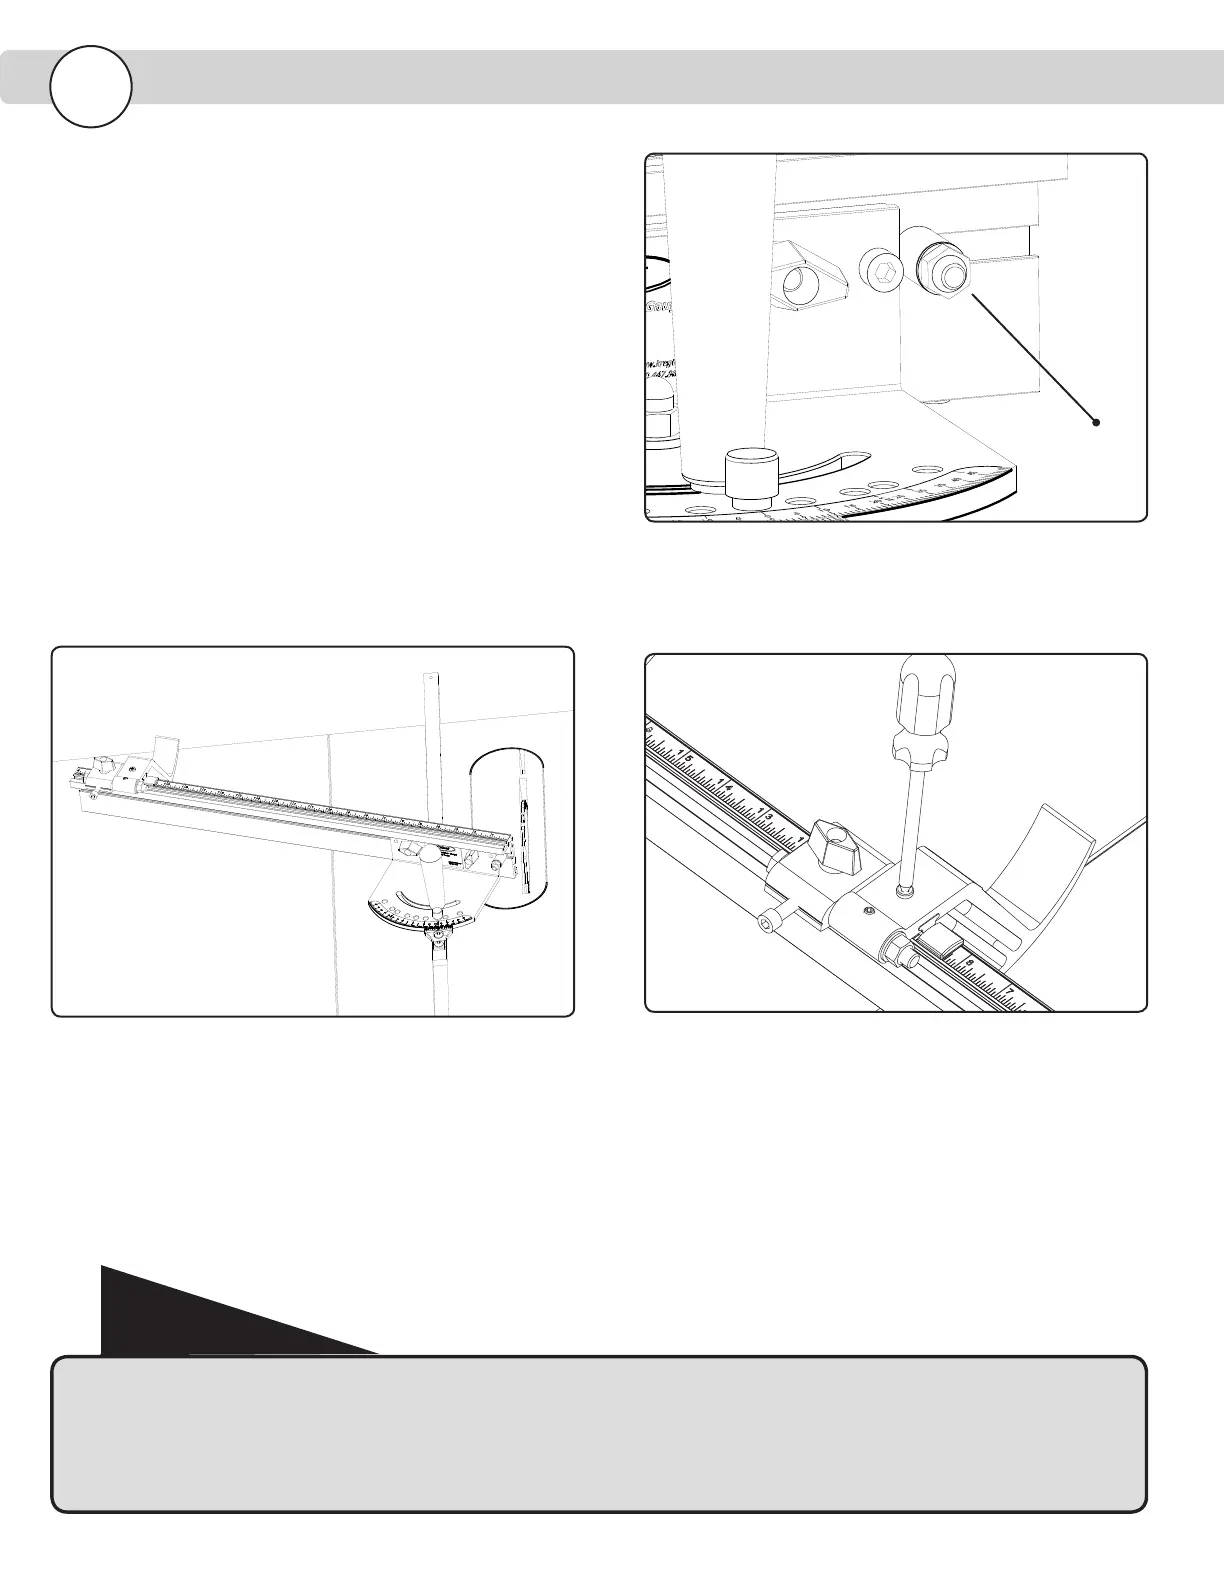
10) Set the Positioning Stop tight against the right edge of the
miter gauge head. The Positioning Stop allows you instantly
return the fence to it’s zero point where the scale reads
accurately. This allows you to reposition the fence for bevel
cuts, even remove it from the miter gauge, without losing
your zero point.
Setting-up the Miter Gauge
9
Positioning block set against the right hand side of the
gauge head.
Swing miter gauge to make sure fence clears blade at
45 degrees.
Make fine-tune adjustment to cursor lens with lens
setscrew as shown.
Positioning
Stop
Warning
It is
especially important to double-check the fence position before using the miter gauge when blade is tilted. Move the fence away from the
blade when it is tilted towards the miter gauge. The scale is not accurate on beveled cut anyway. Always check to see if the miter gauge will
hit the saw blade with the saw off!
Left Tilt Saws!