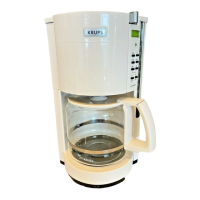
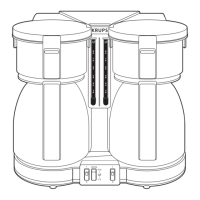
Your new Krups coffemaker has the
following features:
0
Exclusive “Crystal Clear” vegetable based
cocoa filter destroys up to 82% of un-
wanted chlorine taste from water for
smooth rich coffee without any hint of
bitterness. Important minerals such as
calcium are left behind.
0
Unique hermetically designed carafe and
lid keep coffee hotter up to 20 % longer
than conventional carafes, without
sacrificing aroma or taste.
0
Filtration indicator lets you know when
the “Crystal Clear” filter needs to be
changed, and when coffeemaker needs
decalcifying.
0
Flavor selector button (model #398) lets
you select 1-3 cups or 4-10 cups for the
fullest flavor.
0
24-hour programmable timer (model
#458)
lets you program the coffeeemaker
for convenient “wake-up” coffee.
0
Programmable auto shut-off (model
#458)
lets coffee stay hot from 1-5 hours before
turning itself off.
0
Filter holder conveniently lifts out for easy
cleaning.
0
“Stop’n Serve” feature lets you pour a
cup or two while brewing. The automatic
filter seal will allow you to remove the
carafe for 20 seconds without dripping
coffee onto the warming plate.
0
Hinged water container lid will protect the
water from dust and dirt.
0
Water level indicator is easy to read.
0
Automatic warming plate has a non-stick
coating for easy cleaning. Raised edges
keep carafe firmly in place.
l
Hidden cord storage allows you to set the
cord length you need.
1. Plug in the KRUPS “Crystal Arome Time’.
Make sure the selector panel
(i)
is on the
“off” position.
2. The LCD display will be flashing
intermittently (sea figure
1).
This is your
signal to set the digital clock.
3. Turn the selector switch to position
0
.
Set the hour and minutes by pressing the
‘h’
and “min.” buttons respectively
(see figure 2). The time is now set.
Before making your first pot of delicious
coffee, we recommend operating the
coffeemaker one or twice with water only,
without ground coffee or a paper filter to
remove any possible dust.
0
Be sure that the water container is
empty. Remove literature, etc. if inserted
in the water container.
0
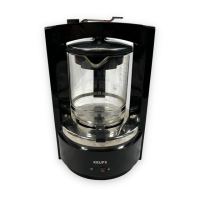
The lid of the glass carafe must be
properly positioned during the brewing
process. Position the lid over the carafe
and snap into place (see figure
3).
0
Place carafe directly underneath brewing
spout (see figure
4).
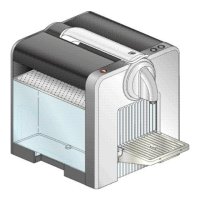
Filling the water chamber
Open the hinged lid (see
figure
5). Using the
glass carafe, pour in the desired quantity of
water (see
figure
6).
The water level
indicator shows how much water you are
filling into the container.
The amount of freshly brewed coffee
delivered after the brewing process will
always be slightly less than the amount of
put into the water container. This is due to
the minimum absorption of the water by the
ground coffee.
7