Do you have a question about the Kuat Racks Sherpa 2.0 and is the answer not in the manual?
Use rack packaging as an assembly fixture and read unboxing instructions.
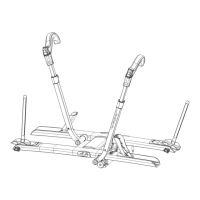
Remove parts box and bracing; open the parts box.
Remove trays from the hitch assembly without detaching the hitch.
Place trays into their designated build position.
Connect trays using the provided hardware.
Secure the rear tray with the M10x95 bolt and washer.
Insert the rack into the vehicle's hitch receiver.
Attach the locking hitch pin and tighten the hitch cam mechanism.
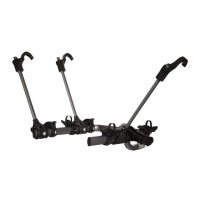
Pivot the tray assembly down using the handle to release it.
Open the front tire cradles for bicycle placement.
Fold out the front tire hooks to secure the bicycle's front.
Place the front tire hook as close to the fork as possible.
Ensure the rear bicycle tire is seated and the strap is tightened.
Loop lock cable around frame and insert into the tray lock.
Periodically check bolts, lubricate locks, clean rack, and ensure tire inflation.
Follow assembly, mounting, loading, and usage precautions.
Details on warranty terms, limitations, and liability.
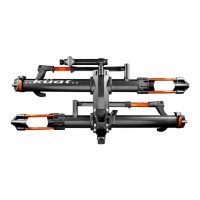
| Weight Capacity | 40 lbs per bike |
|---|---|
| Weight | 29 lbs |
| Material | Aluminum |
| Bike Capacity | 2 bikes |
| Tilt Feature | Yes |
| Foldable | Yes |
| Max. Tire Width | 3 inches |
| Number of Bikes | 2 |
| Integrated Cable Lock | Yes |
| Tool-Free Installation | Yes |
| Compatibility | 2-inch hitch receivers |
| Max. Bike Weight | 40 lbs |
| Hitch Size | 1.25" and 2" |