Use the following steps to convert the KA-10HB to a counting scale.
1. Power down the KA-10HB and open cover on indicator.
2. Remove the four screws from metal backplate covering the CPU
board and remove the backplate.
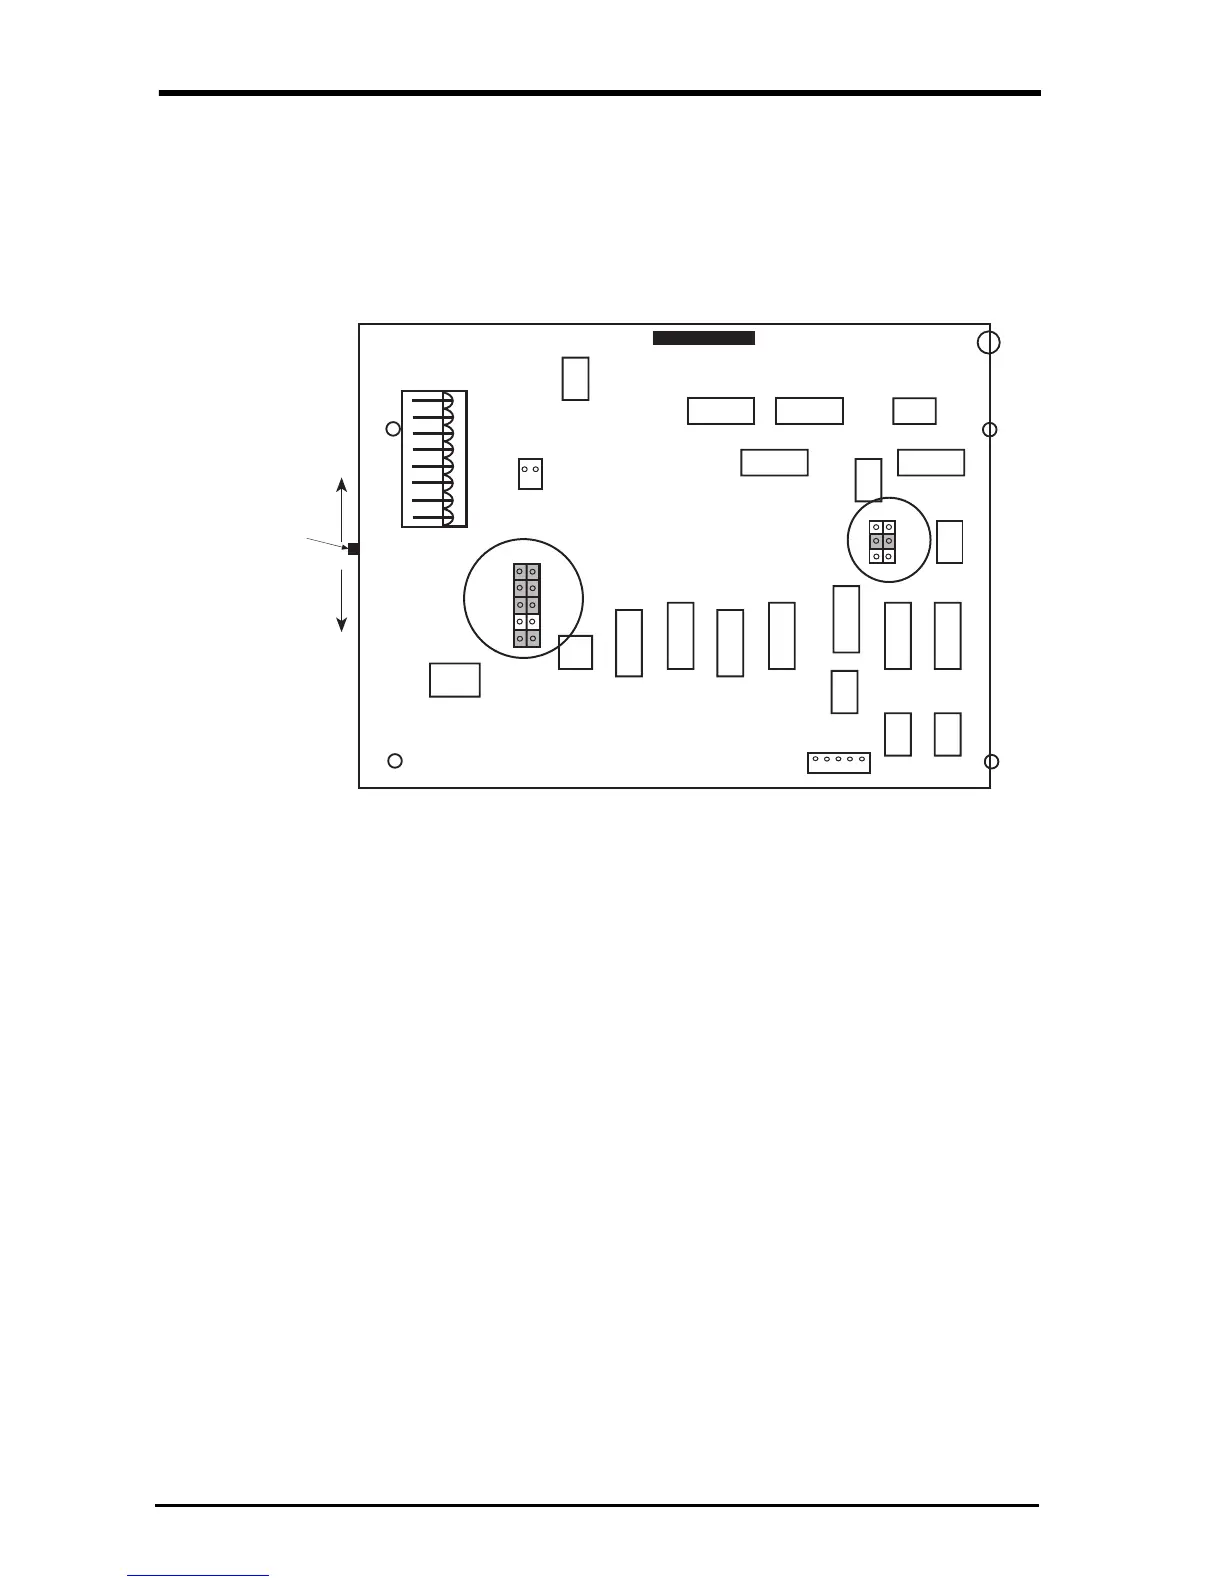
3. Locate JP-1 on board (see Figure 1 below). Remove the jumper from
JP-1 and put jumper on JP-2.
4. Make sure the two ground wires are not touching the CPU then turn
the indicator on.
5. Press select/unit key. Indicator goes into parameter mode.
6. Press select/unit key to advance parameters until parameter A2 is
shown.
7. Press S key to change parameter:
A2-0=HB-44
A2-1=Counting (Not-Legal-For-Trade)
8. Turn indicator off. Locate J-2 and remove jumper and place on J-1.
9. Turn indicator back on and press select/unit key to check operation.
10. Turn the indicator off. Screw the back plate on, making sure that
ground wires are in correct position, unless a zero and span
adjustment, or a dead load adjustment need to be done.
11. Close indicator cover.
Note: When the counting scale is enabled, the scale is no longer
legal-for-trade according to Handbook 44. Stickers provided are to be
applied over HB portion of model number on the front and back of the
indicator
KDC-KL-10-CPU-
NORMAL
SPAN
SLIDE SWITCH
TC4052BPTL064CN
TC4052BP
DC10
TL061LC
TC4052BP
KUBOTA
TC4572BP
TC4001BP
DIC9
DIC8
DIC11
TC404BP
TC4082BP
DIC10
OP6
C21
IC5
OP4
IC4
J
IC3
IC2
TC4053BP
TC4053BP
TC4052BP
IC1
OP1
TL062CP
OP0
OP2
T9539
TL01CP
CN2
CN1
TO 9V DC
POWER SUPPLY
TO LOAD CELL
TO PRINTER
JP
5
4
3
2
1
3
2
1
OP3
 Loading...