12
2.2.6. Installing and changing the sewing needle
To extract and install the sewing needle, please turn the machine off
and comply with the following steps:
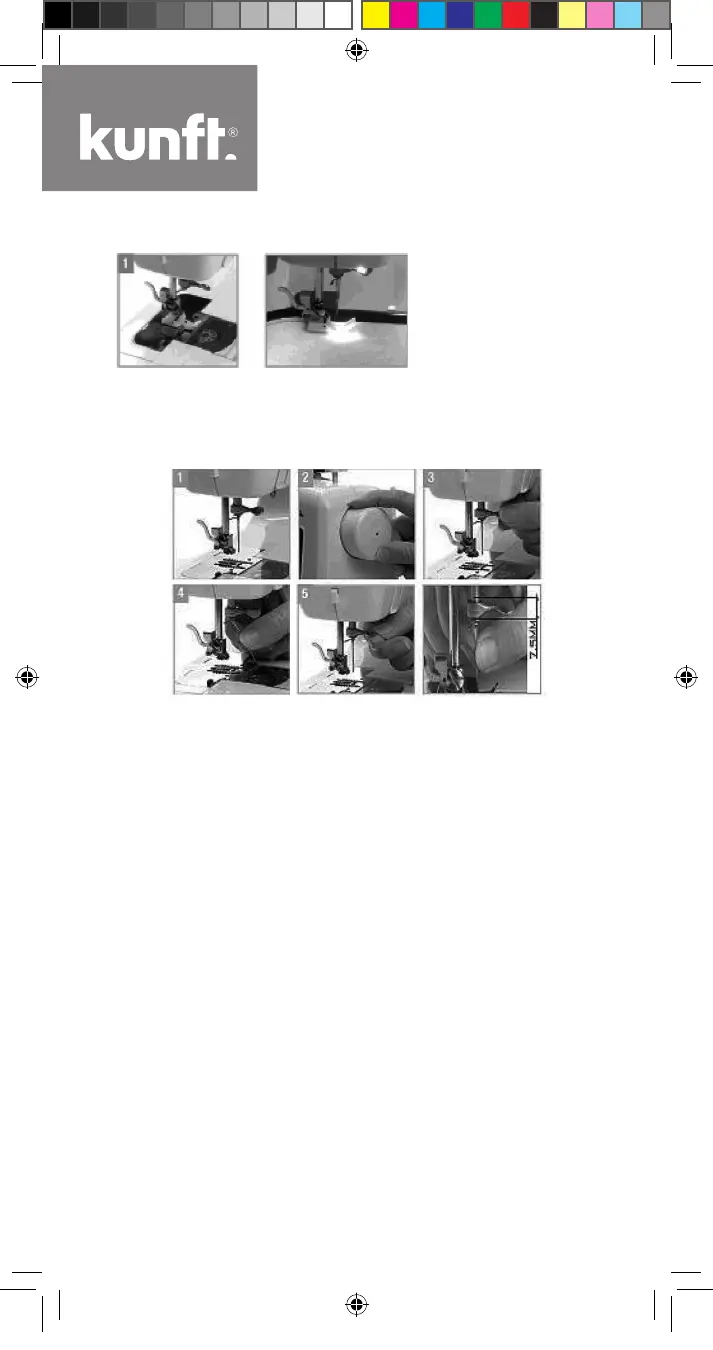
1. Turn the power OFF and rotate the hand wheel [27].
2. Lift the needle bar [16] and sewing needle [17] to the height shown
in Fig. 1. Afterwards, rotate the hand wheel [27], and then stop it to
keep it in a static position.
3. Unscrew counter clockwise to unscrew the thimble screw [14].
4. Take out the sewing needle [17] to be replaced.
5. Pass the sewing needle [17] through the thread guiding spring
2 [15] by sliding it bottom-up and insert the needle bar [16] to its
bottom. Then screw clockwise to screw the thimble screw.
6. Make sure you install the sewing needle in place until it cannot
be inserted further in. To install a normal sewing needle [17] you
must insert 7.5 mm into the end of the needle bar [16] [as shown in
Fig. 5]. Otherwise, it will cause damage or skipped stitches.
Attention:
Pay attention to the following points during the installation of the
sewing needle:
1. Make sure the sewing needle is in perfect conditions.
The sewing needles shown in Fig. 1 below will cause problems:
A: curved needle
B: blunt needles
C: needle with damaged pinpoint
Maq-Costura-KSM2612-Manual-2.indd 12 18/02/19 18:34
 Loading...