16
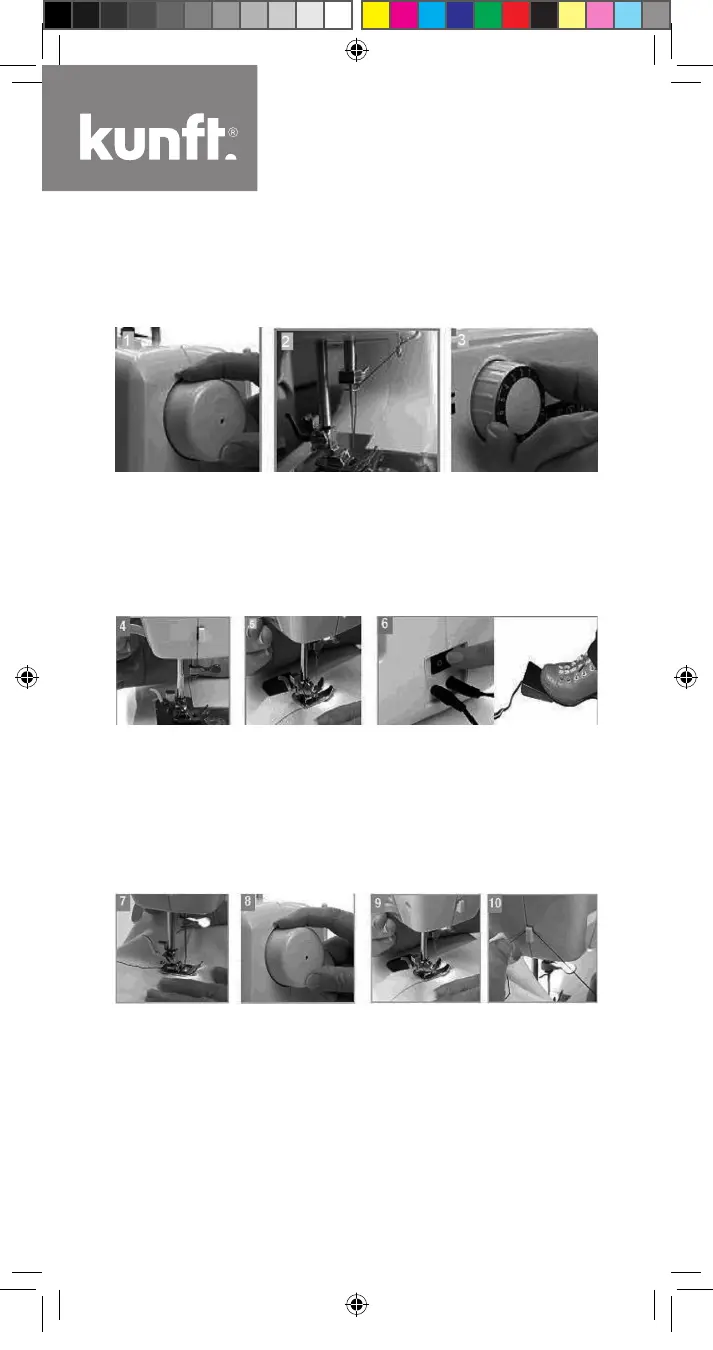
2.2.12. Straight sewing
It requires adjusting the function adjustment wheel [3] to function 1
or 2 for straight sewing.
1. Rotate the hand wheel [27] counter clockwise, as shown in Fig. 1.
2. Rotate the hand wheel [27] counter clockwise to lift the pinpoint
of the sewing needle [27] above the presser foot [21], as shown
in Fig. 2.
3. Adjust the function adjustment wheel [3] to function 1 or 2, as
shown in Fig. 3.
4. Move the presser bar lifter [32] upward, lift the presser foot [21]
and pull the bobbin thread and upper thread backwards for about
10 cm, as shown in Fig. 4.
5. Put the fabric under the presser foot [21] and move the presser bar
lifter [32] downward to hold the fabric, as shown in Fig. 5.
6. Turn the power switch [28] “ON” and stamp the foot switch [35]
gently to start sewing, as shown in Fig. 5.
7. Guide the fabric gently during sewing, as shown in Fig. 7.
8. Rotate the hand wheel [27] counter clockwise after nishing sewing
to lift the sewing needle to the highest position, as shown in Fig. 8.
9. Move the presser bar lifter [32] upwards and lift the presser foot
[21], as shown in Fig. 9.
10. Move out the fabric and cut the thread with the thread cutter [26],
as shown in Fig. 10.
Maq-Costura-KSM2612-Manual-2.indd 16 18/02/19 18:34
 Loading...