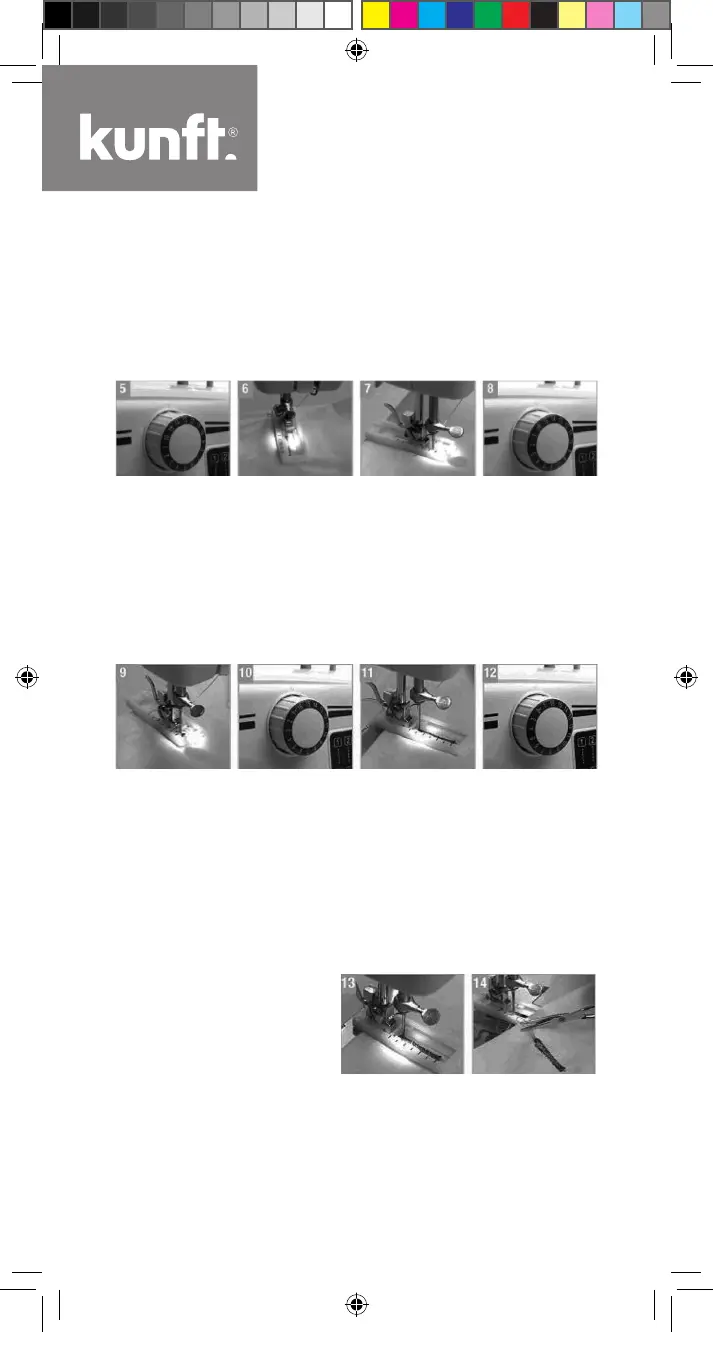
18
2. Measure the diameter of the button.
3. Draw a straight line a little longer than the button diameter on the
fabric where the button hole sewing is needed.
4. Lift the presser foot and put the fabric with the straight line under
the presser foot, make the straight line on the fabric correspond to
the sewing needle [17] as well as the button hole presser foot [38].
5. Rotate the hand wheel [27] to lift the sewing needle [17] to the
highest position and then adjust the function adjustment wheel [3]
to function 13.
6. Stamp the foot switch [35] gently to start sewing.
7. The sewing machine will sew at medium speed. Release the foot
switch until the end of the marking line to stop sewing.
8. Rotate the hand wheel [27] to lift the sewing needle [17] to the
highest position and then adjust the function adjustment wheel [3]
to function 14.
9. Stamp the foot switch [35] gently to start sewing. Finish by sewing
for 5-6 stitches horizontally and then release the foot switch to
stop sewing.
10. Rotate the hand wheel [27] to lift the sewing needle [17] to the
highest position and then adjust the function adjustment wheel
[3] to function 15.
11. Stamp the foot switch [35] gently to start the right hole sewing and
the sewing needle will move further and further from the button
hole. Release the foot switch until the end of the marking line to
stop sewing.
12. Rotate the hand wheel
[27] to lift the sewing
needle [17] to the highest
position and then adjust
the function adjustment
wheel [3] to function 16.
13. Stamp the foot switch [35] gently to start sewing. Finish by sewing
for 5-6 stitches horizontally and then release the foot switch to
stop sewing.
14. Lift the presser foot, take out the fabric and cut the thread.
Maq-Costura-KSM2612-Manual-2.indd 18 18/02/19 18:34
 Loading...