PAGE
2
STEP 2
Remove the stock peg from the clevis. Pay attention to any spacers or washers
installed between the male mount on the peg and the clevis, it may be helpful
later. Set this hardware aside, it will not be reused.
NOTE:
The normal orientation of the pegs is with the row of four ISO-Pads
towards the front of the bike.
STEP 3
Install the new peg using any spacers or washers removed in Step 2. Line up the
hole on the male mount on the new peg with the hole in the clevis.
STEP 4
Secure the peg in the clevis using the included 3/8”-16 X 1-1/2” hex head cap
screw and nylock nut. Check that the peg is installed correctly and the peg is able
to fold upward.
FOOTPEGS MUST BE INSTALLED SO THEY WILL FOLD UPWARD AND
REARWARD IF HIT BY ANY OBJECT. FAILURE TO ADJUST THE FOOTPEGS
TO OPERATE IN THIS MANNER COULD RESULT IN SERIOUS INJURY OR
DEATH.
STEP 5
Position the rubber footpeg pad as desired. Using the included 1/4” Hex Wrench, tighten the
5/16”-18 socket head cap screw located on the end of the peg. The male mount will seat itself into
the peg and keep it from rotating.
CHECK TO MAKE SURE THAT THERE IS PROPER GROUND CLEARANCE
WHEN CORNERING. LOSS OF CONTROL OF THE MOTORCYCLE AND
SERIOUS INJURY MAY OCCUR IF THE FOOTPEG IS NOT POSITIONED
PROPERLY. REPOSITION THE FOOTPEG IF NECESSARY SO THAT THERE IS
ADEQUATE CORNERING CLEARANCE.
STEP 6
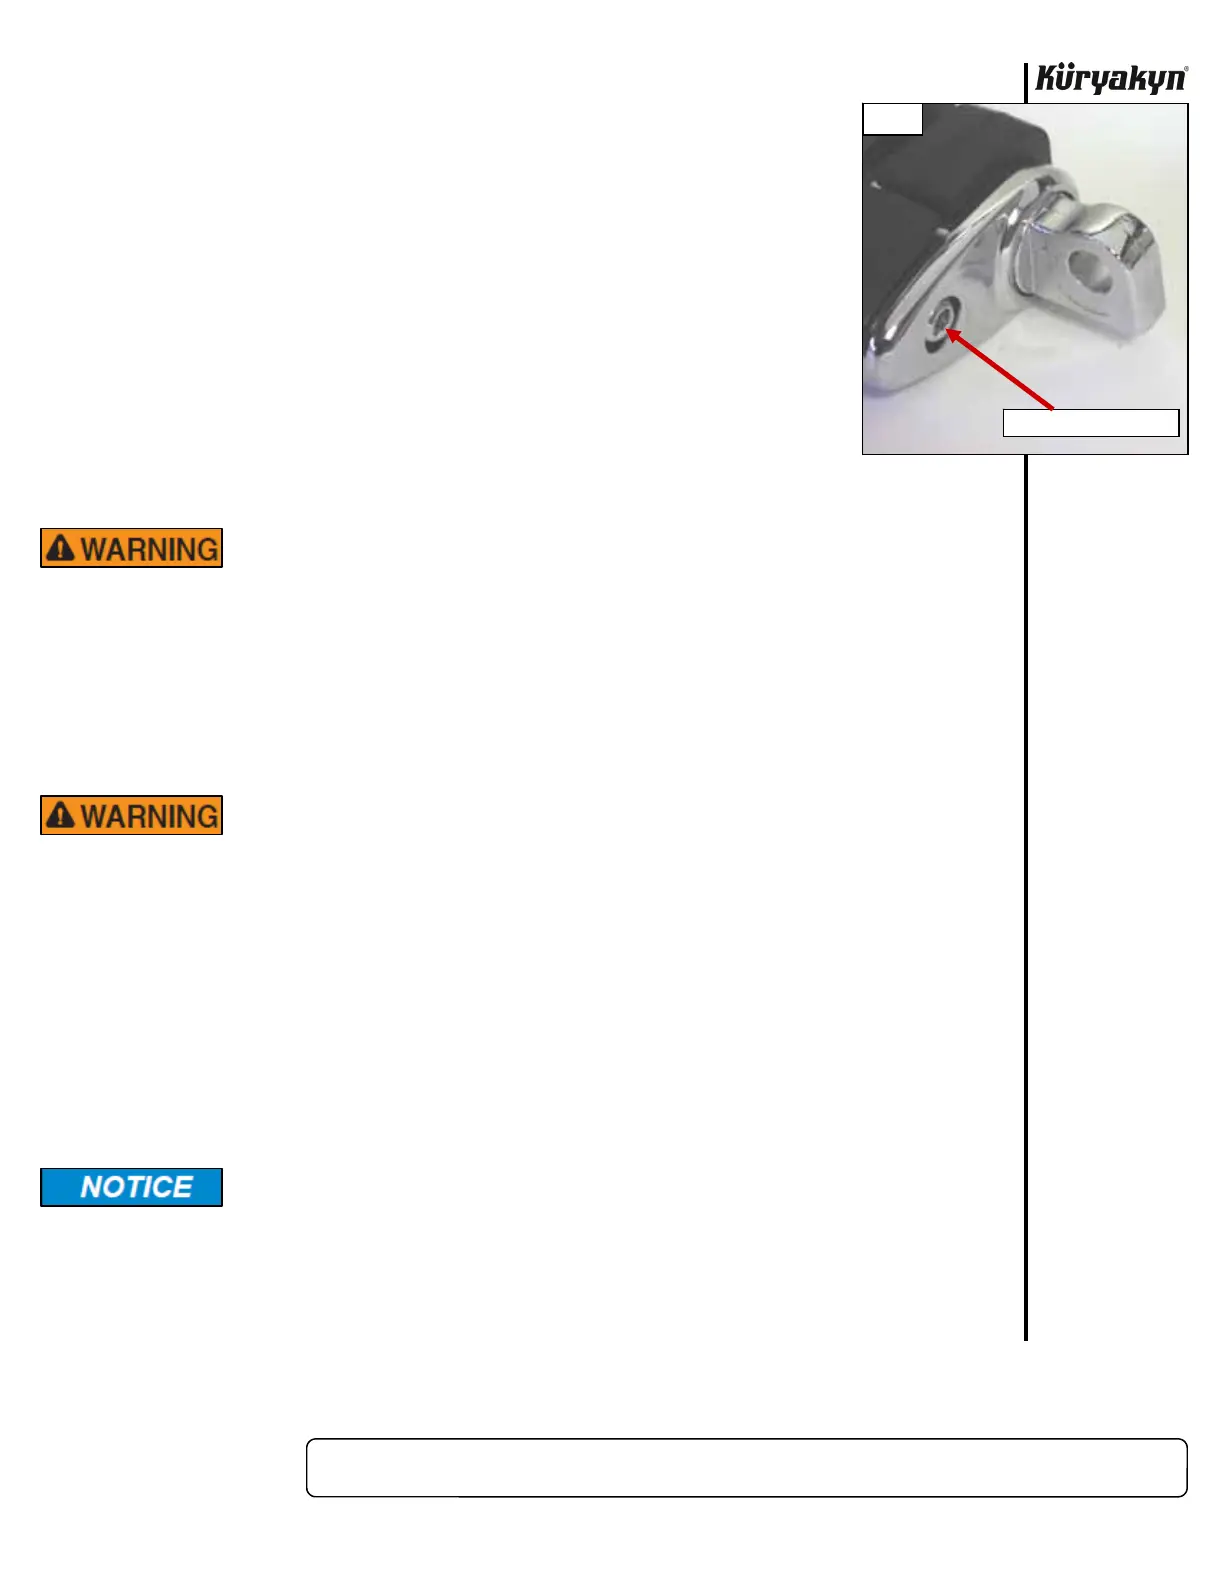
Tighten all hardware, including the rear rubber pad retaining fastener (PIC 1), securely. Insert one
of the included 5/16” Hot Spots in the end of the 5/16”-18 socket head cap screw in the end of
the peg.
STEP 7 Repeat Steps 2 through 6 for the other peg.
It is the installer’s responsibility to ensure that all of the fasteners (including
pre-assembled) are tightened before operation of the motorcycle. Küryakyn will
not provide warranty coverage on products or components lost due to improper
installation or lack of maintenance. Periodic inspection and maintenance are
required on all fasteners.
Ride On!
DUALLY ISO PEGS—MALE MOUNT INSTALLATION
PIC 1
TIGHTEN THIS FASTENER