INSTALLATION
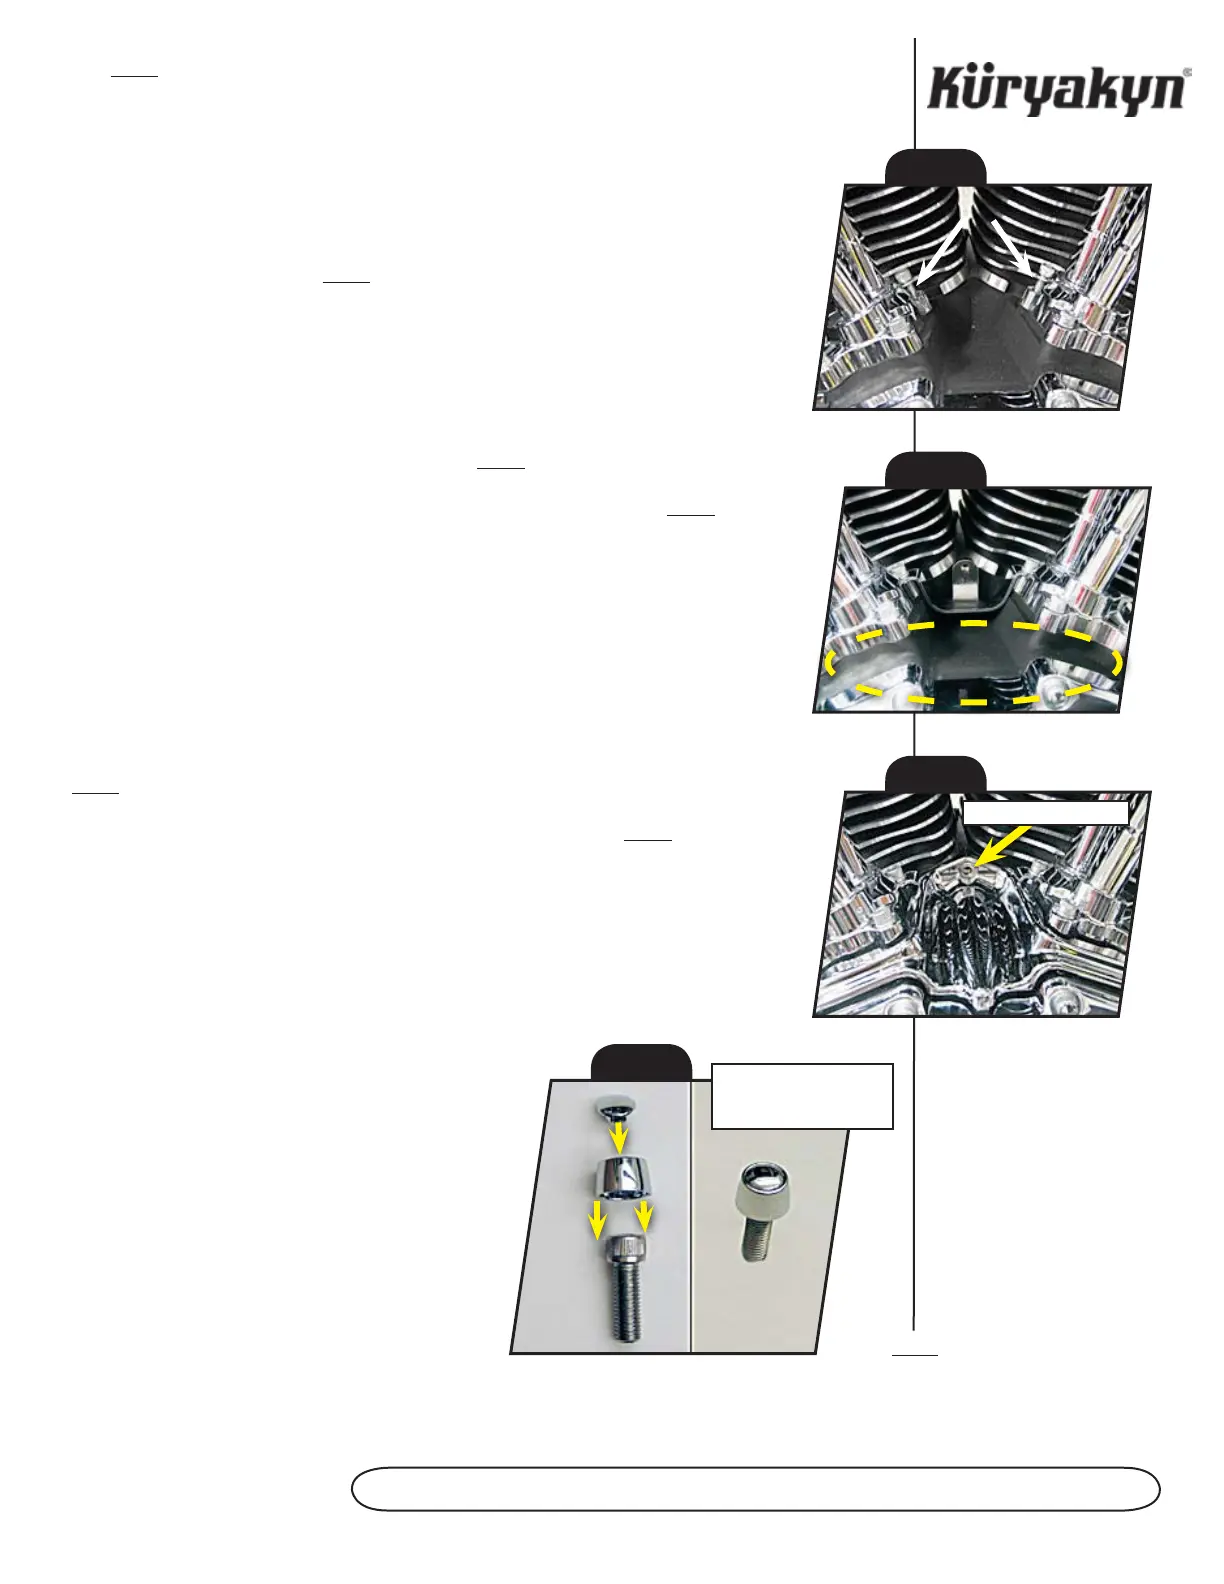
STEP 4 Remove any grease or debris from the area in front of the tappet covers
(See PIC. 2) with soapy water and a clean rag; allow the area to dry completely.
ATTENTION!
Thoroughly clean the area of grease, oil, dirt, or other debris to ensure proper
adhesion. Küryakyn WILL NOT warranty any parts lost due to improper
installation.
ATTENTION!
The adhesive may not correctly bond if applied at temperatures less than
50° F. Do not attempt this installation in temperatures less than 50° F.
STEP 5 Clean the area (See PIC. 2) with an alcohol cleaning pad; allow the area to dry
completely.
STEP 6 Rub the backing on the adhesive strips to activate the adhesive before
applying.
STEP 7 Remove the adhesive backing from all of the adhesive strips.
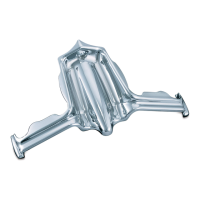
STEP 8 Position the Tappet Accent as shown in PIC. 3.
STEP 9 Insert the included 10-24 screw through the Tappet Accent (See PIC. 3) and
into the bracket; thread the screw into the bracket. Finger tighten the screw at this time.
STEP 10 Press into place for 1 minute to ensure proper adhesion. Full bonding strength
will occur within 24 hours.
STEP 11 Align the Tappet Accent and tighten the 10-24 screw.
STEP 12 Torque the two stock socket cap head screws (from STEP 3) to 90-120 in.
lbs (10.3-13 Nm).
STEP 13 Push the Hollow Point Sleeves onto all eight tappet cover screws as shown in
PIC. 4.
STEP 14 Push the Hot Spots into all eight screws from STEP 12. See PIC. 4.
STEP 15 Ensure proper clearance and operation before riding the motorcycle.
ATTENTION!
It is the installer’s responsibility to ensure that all of the fasteners (including
pre-assembled) are tightened before operation of the motorcycle. Küryakyn
will not warranty components lost due to improper installation. Periodic
maintenance may be required.
Ride On!
PAge
2
TAPPeT bLOck AcceNT
PIC. 1
PIC. 2
PIC. 3
10-24 Screw Here
PIC. 4
S c r e w S H Av e b e e N
remOveD frOm bIke
fOr cLArITy
 Loading...