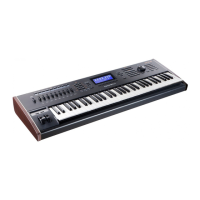
PC88 Made Easy
change to show Zone:1 Mpressure, Ctrl Num: None. The MPressure (Mono Pressure)
controller is also referred to as aftertouch. After you strike a key, as you press down on
the key, a pressure strip senses how hard you are pressing and generates controller data.
Aftertouch is similar to the pitch wheel, in that it functions like a spring - it returns to 0
as you let go of the key. Like the sliders, wheels, and continuous control pedals, you can
assign any MIDI controller number to aftertouch. However typically, aftertouch is
assigned to Pressure, which is a separate MIDI message. Press 130, then Enter to assign
Pressure to the MPressure controller.
One final thing to understand: There are actually two different types of aftertouch -
Mono Pressure and Poly Pressure. Mono Pressure has a single strip running across the
keyboard, so pressing down on any note will generate controller info that will affect
ALL the notes played on that MIDI channel. Poly Pressure has a separate sensor for
each key so pressing down on a key only affects that key. The PC88 uses Mono
Pressure.
5. Press the Arpeggiator button, then press the >> button once to get to the Key Range
display and >> once more so that the cursor is on the High Note parameter. Hold Enter
and strike Middle C to set the High Note to C4. Now play a chord in the bass and a
melody in the treble. Notice that any notes up to C4 are arpeggiated but all notes above
that are played as normal. The Key Range parameter lets you set a range of notes which
will be affected by the arpeggiator while others can be played regularly.
Hold Enter and strike the top note on the PC88 to put the arpeggiator back to playing
across the keyboard.
6. Press the >> button. You are now on the Zone Enable parameter. This allows you to
have some zones in your Setup which are arpeggiated while other zones play normally.
Several of the preset Setups utilize this parameter. For example, Setup 3 Rhythm Pad
has an arpeggiated Marimba layered with Electric Piano and Strings that do not
arpeggiate.
7. Press the >> button. The next parameter is Latch Mode, which we will cover in
Tutorial #16.
8. Press the >> button. The Play Order parameter lets you determine how the notes are
arpeggiated. The current setting should be Played, which is the default. As we noticed
before, the notes arpeggiate in the order in which you hold them down. Try changing this
parameter to each of its possible values and play the keyboard to hear the difference. It
should be obvious how most of the possibilities work, but for definition of the various
values, see pages 6-3 & 6-4 of the manual.
9. Press the >> button. You can set the beat subdivision for the arpeggiated notes. This
is based on Tempo, which is measured in Beats Per Minute. So if your clock is set to 120
BPM and you set the Beats to 8th notes, you will hear the equivalent of 240 arpeggiated
notes in one minute.
10. Press the >> Button. You can set the Tempo for the arpeggiation here. However,
more control is possible. Hold the Controllers Button and move Slider D. Press 131, then
Enter to assign Tempo for the slider. (You might want to check the Scale, Offset, and
Curve parameters for Slider to make sure they are at their defaults of 100%, 0, and
Linear).

 Loading...

