16
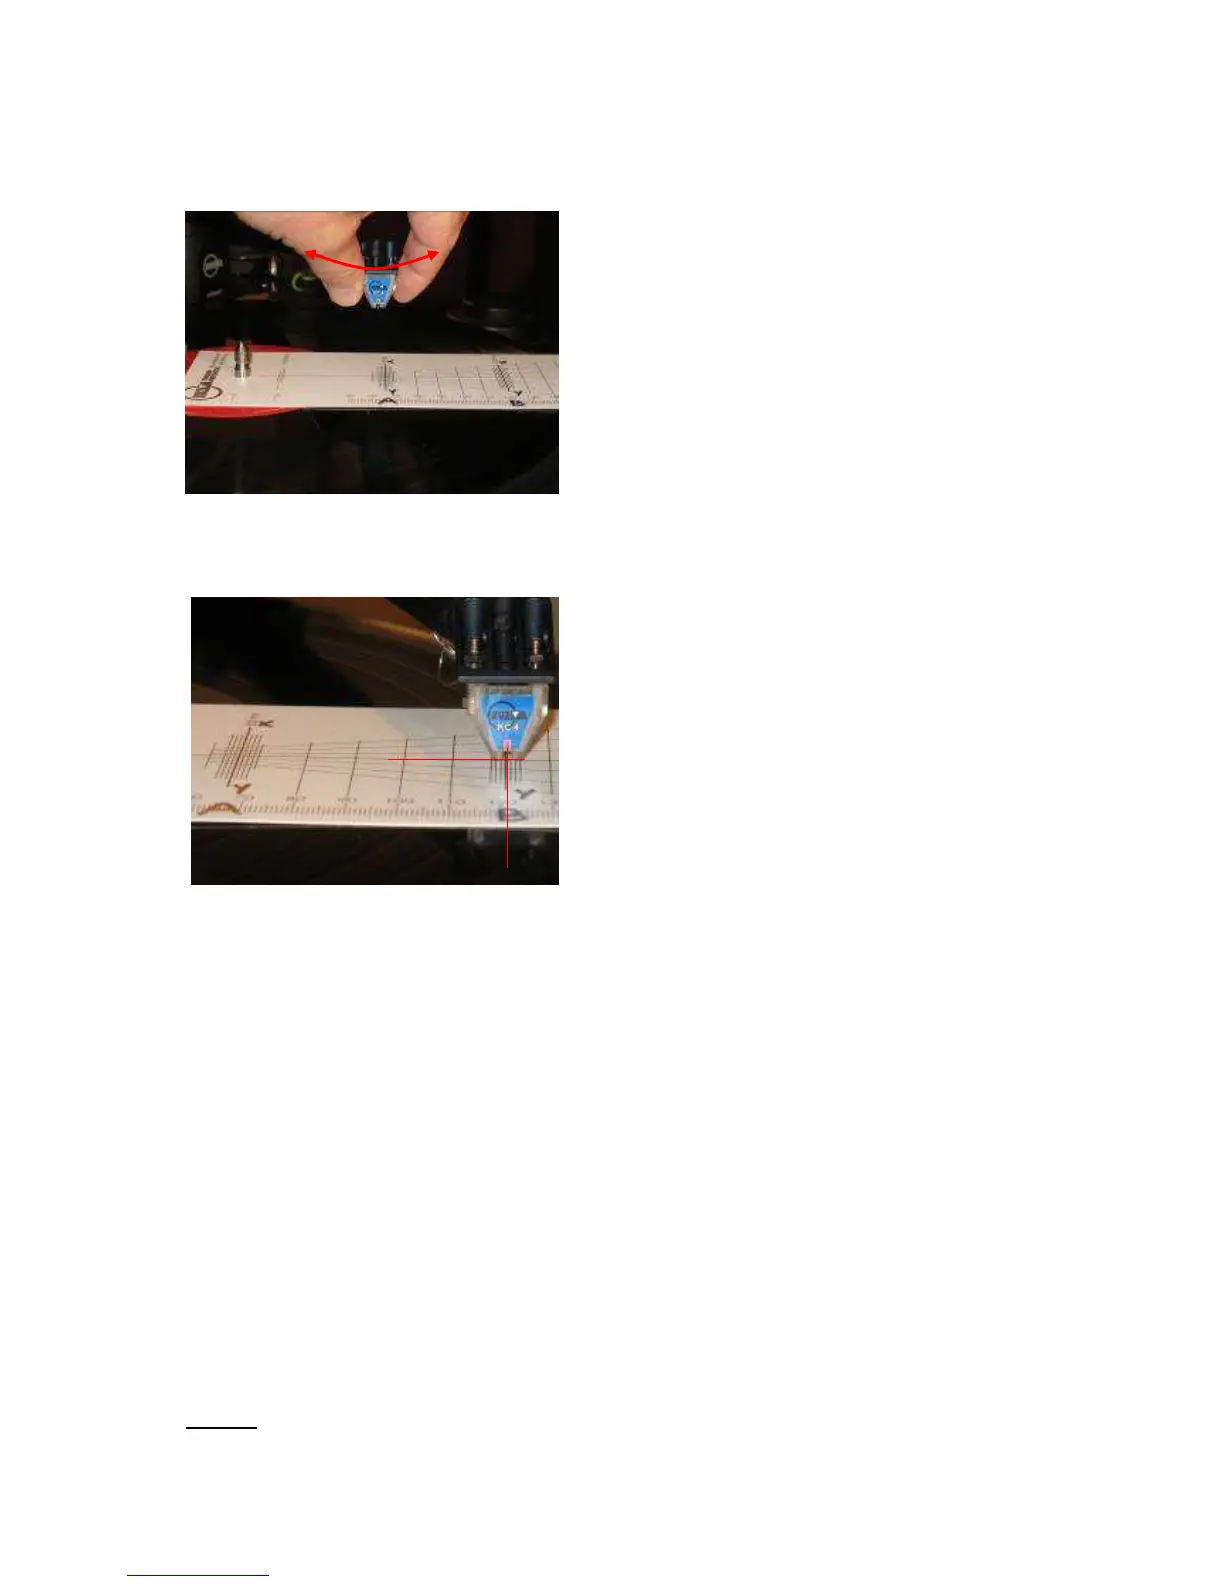
10. Now rotate protractor and again position stylus at zero point A as described in 5 and 6
above, ensuring that the position of the cartridge in the slots alongside is not changed but only
rotated for alignment of the cantilever in zero point A. (Fig.17)
Fig.17 Rotation at A
11. Recheck alignment of the cantilever at zero point B. If cantilever is not aligned here,
rotate protractor to find where on line “x- y” the cantilever is aligned again. (Fig.18&15)
Fig. 18 Alongside line “X-Y” alignment at B
If the stylus is still in front of zero point B on the line “x-y” as before, but nearer to point B,
then again pull cartridge slightly forward for distance “S” and repeat the whole process by
aligning at zero point A until the stylus will be at zero point B.
If stylus end up behind the zero point B on line “x-y” then move cartridge in opposite
direction to before, backwards and realign it at zero point A.
If stylus is still behind the B point, the cartridge should be pushed back and realign at zero
point A and realigned again at zero point B.
12. Continue until the stylus is in alignment at both points.
REMEMBER STEPS:
a) Put stylus at zero point A and by rotation align cantilever along XY line.
b) Align cantilever along XY line at zero point B by rotating protractor and see where stylus
is on the line XY- in front or behind zero point B.
c) Move cartridge along (not rotating it) for the same distance as stylus is overhanging zero
point B for the same distance to increase the overhang.
d) Repeating these steps (a,b,c,a,b,c,…) will ensure that stylus& cantilever are in alignment at
both zero points A&B.
NOTE:
Ensure that cantilever is not twisted due to bias force.