Setting Guide
Introduction
Sold by: KDDI CORPORATION,
OKINAWA CELLULAR TELEPHONE COMPANY
Manufactured by: KYOCERA Corporation
When Using the Product
Note the following when using the product.
●The battery isn't charged adequately at the time of purchase. Charge the battery sufficiently
before use.
●To maintain water and dust resistance, attach the back cover firmly.
●If the confirmation screen such as terms and conditions, etc. appears when you use
applications and functions of the product, follow the on-screen instructions.
●If the confirmation screen for communication charges appears when you use applications
and functions of the product, follow the on-screen instructions.
Initial Settings
At the first time of power-up, a screen for making initial settings is displayed, and you can set
your au ID. "au ID" identifies the customer who uses au services. Register your au phone
number as your au ID. By setting an au ID, you can use various services provided by au such
as "au スマートパス (au Smart Pass)", "My au", and "au WALLET".
●From the standby screen, press
k
→ [Settings] → [au ID Setting] to set.
k
Confirm the contents
→
k
Confirm the contents
→
k
k
Confirm the contents
→ [OK]
The confirmation screen
for "au ID利用規約" (au ID
Terms of Use) appears
→ [同意して次へ (Agree
and Next)]
* At the first time of
registering au ID, follow
the on-screen
instructions.
au ID setting is
complete
* Continue by following the
on-screen instructions.
To exit the setting,
.
→ [はい (Yes)]
To Enter Numbers (Switching Character Type)
When a security code input screen such as ID confirmation,
etc. appears, select the
security code entry field
and press
j
(Char.) to
change the character
type to numbers.
Switching to English Display
You can switch the display from Japanese to English.
From the standby
screen, press
k
→ [設定 (Settings)]
[その他の設定
(More settings)]
[言語と入力
(Language & input)]
j
to switch
[言語 (Language)] [English] →
k
* The message "起動中のアプリ、メール送受
信、ダウンロードなどが終了される場合がありま
す 。変 更 し ま す か ? " (Applications, mail
transmission/reception, and
downloads may be terminated. Change
the language?) appears, confirm the
content and then [はい (Yes)].
Setting Wi-Fi
®
You can use a household wireless LAN (Wi-Fi
®
) environment or a public wireless LAN
environment when outside to connect to the Internet.
* The battery is consumed faster when the wireless LAN (Wi-Fi
®
) function is ON. You are recommended to
turn wireless LAN (Wi-Fi
®
) function OFF when not using wireless LAN (Wi-Fi
®
) function.
From the standby
screen, press
k
→ [Settings]
[Frequently used] [Wi-Fi]
[Wi-Fi]
* To turn wireless LAN (Wi-
Fi
®
) function ON, mark
the checkbox.
Available Wi-Fi
®
networks are listed.
• Select a Wi-Fi
®
network to connect →
k
→ Enter a password
as required →
o
(Connect) to connect the Wi-Fi
®
network.
• If the Wi-Fi
®
network you want to connect is not detected,
press
u
(Menu) → [Add network] and connect to the Wi-Fi
®
network manually.
E-mail
To use e-mail (@au.com/@ezweb.ne.jp), subscription to LTE NET is required.
If you did not subscribe when you purchased the product, contact an au shop or Customer
Service Center.
Your e-mail address is determined automatically after initial setting. You can change the e-mail
address later.
■■ Initial■Settings
From the standby
screen, press
j
Confirm the contents →
[接続する (Connect)]
Confirm the contents →
[閉じる (Close)]
You cannot make initial settings in Wi-Fi
®
communication only, and an error message is
displayed. You can set Wi-Fi
®
settings to off in the following operations.
From the standby screen, press
k
→ [Settings] → [Frequently used] → [Wi-Fi] → Unmark
"Wi-Fi".
■■ Checking■E-mail■Address
From the standby
screen, press
j
→
u
(Menu) → [E-mail
settings]
[E-mail information] Your E-mail address is
displayed.
*
From the standby screen,
you can also check your
E-mail address by pressing
k
→
0
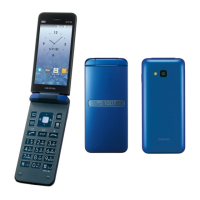
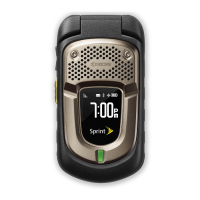
Thank you for buying the "GRATINA" (simply
called the "product" from here on).
This manual describes the settings and precautions
for using the product. For explanations of basic
functions, refer to "Basic Manual"
.
Company names and product names referred
to in this manual are registered trademarks or
trademarks of the respective companies. TM or
® may be omitted in this manual.
The illustrations and screenshots in this manual
may look different from the actual product or
screens. Also, please note that the contents of
the screen may be partially omitted.
In this manual, "au Nano IC Card 04 LE" is
abbreviated as "au IC card".
In this manual, "microSD™ memory card (sold
separately)" and "microSDHC™ memory card
(sold separately)" are abbreviated as "microSD
memory card" or "microSD".
April 2019, 1st Edition