Do you have a question about the La Crosse Technology 513-21867 and is the answer not in the manual?
Details the type and quantity of batteries required for the clock's operation.
Step-by-step guide to manually adjust the clock's time settings.
Confirms availability of 12-hour or 24-hour time formats in settings.
Explains the meaning of DST AUTO, DST OFF, and DST ON settings.
Details the clock's ability to receive WWVB atomic time signals.
How to set a desired hour and switch between desired and local time.
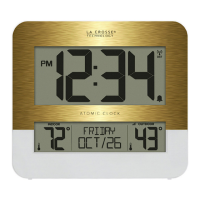
Explains how to change the calendar display format (e.g., Month/Date/Year).
Details the backlight's intensity levels and how to adjust it.
How to select different display modes for time and temperature.
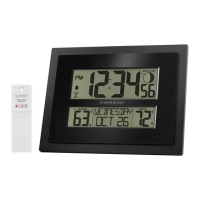
Instructions for installing and connecting an add-on temperature/humidity sensor.
Explains what 'HI' or 'LO' readings for temperature indicate.
Explains 'HI' or 'LO' readings for humidity and low humidity limits.
Explains the 'NO' indicator for lost sensor connection and reconnection attempts.
Steps to perform a factory reset on the clock.
This document provides a comprehensive guide for the 513-21867 clock, designed for weather enthusiasts who value accurate and reliable timekeeping. It covers setup, positioning, troubleshooting, and maintenance, ensuring optimal performance of your device.
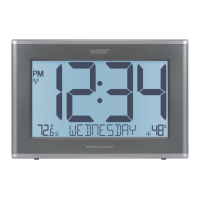
The 513-21867 is a versatile clock that offers precise timekeeping, including atomic time synchronization, and can display various environmental data. Its core function is to provide accurate time, which can be manually set or automatically synchronized via the WWVB Atomic Time Signal. The clock also features a calendar display with multiple formats, and the ability to show temperature readings, either indoor or from an optional outdoor sensor. A backlight ensures visibility in various lighting conditions. The device is designed to be user-friendly, with clear settings and troubleshooting steps to help users maximize its utility.
The clock operates on 6 "AA" batteries. For optimal performance, it is recommended to use fresh batteries with an expiration date at least six years in advance of the current year, ensuring a minimum voltage of 1.48V per battery.
To manually set the time:
The settings menu allows configuration of:
The clock searches for the WWVB Atomic Time Signal upon power-on. If no reception occurs, it will search automatically at UTC 17:00, 18:00, 19:00, 10:00, and 11:00. If still no reception, it searches every 2 hours until the signal is received. The atomic time signal icon flashes during search and becomes solid upon connection. You can manually initiate a search by pressing the "Atomic Time" button from the normal time display.
This feature allows you to set a "Desired Hour" to match other time zones, while the clock remains accurate via the Atomic Time Signal. Only the hour can be changed.
Press the "Calendar" button to cycle through display formats:
The clock features a backlight with five intensity levels (OFF, 1, 2, 3, 4). A power cord is required for constant backlight. Press and release the "Backlight" button to adjust intensity or turn it off. Intensity levels are 0% (OFF), 1.5%, 20%, 50%, and 100%.
Press the "Display" button to adjust the data shown on screen:
For outdoor readings, an add-on Temperature & Humidity Sensor can be purchased separately.
If your outdoor temperature reading shows "HI" or "LO," it indicates that the temperature is outside the sensor's measurable range.
If a sensor loses connection to the clock, "NO" will appear after 30 minutes.
To perform a factory reset:
This comprehensive guide ensures that users can effectively set up, operate, and troubleshoot their 513-21867 clock, providing a reliable and enjoyable experience for monitoring time and environmental conditions.
| Display Type | LCD |
|---|---|
| Power Source | Battery |
| Atomic Time | Yes |
| Calendar | Yes |
| Temperature Display | Yes |
| Humidity Display | Yes |
| Backlight | Yes |
| Color | Black |
| Time Display Format | 12/24-hour |