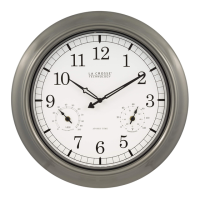
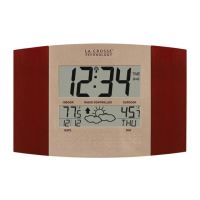
INSTALLATION
Plug the supplied AC/DC adaptor (Input voltage 230V AC) (Output voltage 6V DC) to an AC
household outlet, and then plug the DC jack to the back of the clock radio. Your clock radio is ready
to work for you.
BATTERY BACK-UP INSTALLATION
1. Slide opens the battery cover at the bottom of your unit.
2. Insert 3 x AAA batteries into the battery compartment by observing the correct + / - polarity
signs.
3. Replace the battery cover.
4. When only batteries are being used, the always-on backlight is disabled.
TO SET TIME
1. Press SET / MEM to enter time set mode, the time digits flash.
2. Press / to set your desired time. Press and hold / will accelerate setting in
faster speed.
TO SET 12HR OR 24 HR TIME FORMAT
1. Press SET / MEM again, the clock display shows 24Hr and flashes.
2. Press / to select 12Hr or 24Hr. When 12Hr time format is selected, the PM icon will
appear on the clock display to indicate the afternoon time.
TO SET THE SNOOZE DURATION (5 TO 60 MINUTES)
1. Press SET / MEM again, the clock display shows Zz and 05 flashes.
2. Press / to set your desired snooze duration from 5 to 60 minutes.
3. Press SET / MEM again (or if no key is pressed within 5 seconds) to return to normal clock
display mode.
TO SET THE ALARMS
1. To set Alarm 1, press AL 1 or 2 once, the LCD shows
and alarm digits 6:00 flash.
2. Press
/ to set your desired alarm time. Press and hold / will accelerate setting
in faster speed.
3. Press SET / MEM one at a time to select Wake-by-Buzzer ( appears) or Wake-By-
Radio
(
appears). To turn off Alarm 1, press SET / MEM until both and disappear.
4. To set Alarm 2, press AL 1 or 2 once, the LCD shows and alarm digit 6:00 flash,
repeat Step 2 and 3 above.
TO STOP AND RESET THE ALARM TO COME ON THE NEXT DAY
When Alarm 1 sounds, press the AL 1 or 2 once to stop the alarm sound and automatically reset it to
come on the following day. Similarly, stop the alarm by pressing AL 1 or 2 when Alarm 2 sounds.
TO USE THE SNOOZE ALARM
When alarm sounds press SNOOZE/DIMMER once, the alarm will be silenced and come on again
according to the set snooze duration.
TO USE THE PROJECTION CLOCK
Press PROJECTION button to turn on or off the projection clock. Turn the focus knob on the projector
to adjust the image of the projected time onto the wall or ceiling.
EN. 2