Do you have a question about the La Spaziale S40 Series and is the answer not in the manual?
Ensure electric, water, and drainage systems are ready for installation by the customer.
Appliance must be installed where use and maintenance are restricted to trained staff.
Read warnings for safe use and maintenance. Use only for intended purpose.
Electrical safety requires proper earthing. Manufacturer not liable for earthing issues.
Do not touch with wet hands, use barefoot, pull cord, allow children or unqualified people.
Place on flat, stable surface at least 1.2m from ground. Hole of 10x10cm needed for connections.
Explains symbols for power switch, water tap, drain siphon, and clearances.
Tap required between mains and inlet pipe. Water pressure must be 1-5 bar.
Appliance supplied without plug. Requires multi-pole power switch with 3mm gap.
Drain pipe must connect to a suitable siphon. Avoid basins to prevent bacteria.
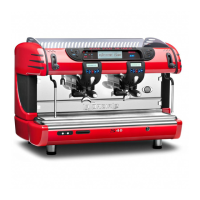
S40 coffee machine designed by LA SPAZIALE S.p.A. to reduce operating costs.
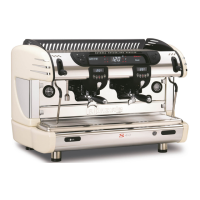
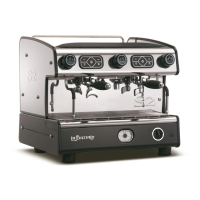
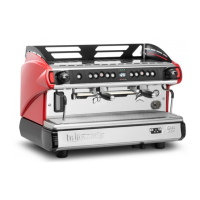
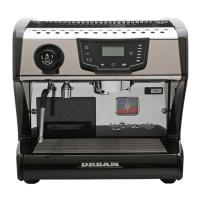
Diagram and legend identifying machine parts like control panel, wands, and pressure gauges.
Details the programming keyboard, value increase/decrease buttons, and cup heater button.
Explains indicators for temperature, alarms, technical assistance, and status lights.
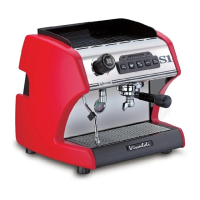
Identifies display, continuous delivery, and coffee dispensing buttons for the Classic model.
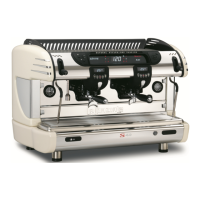
Identifies display, programmed dose buttons, and continuous delivery button for the Suprema model.
Emphasizes checking, cleaning, and replacing labels for readability and compliance.
Shows placement of warning symbols and the technical data plate with specifications.
Check machine integrity after unpacking. Keep packaging away from children due to potential danger.
The appliance weighs over 30 kg and requires more than one person to move.
Dispose of packaging according to the norms in force in the country of use.
Lists optional accessories such as water softener, impurity filter, pressure reducer, and detergent.
Open water supply tap as arranged for installation and check for leaks.
Turn on the main switch as arranged for installation.
Move the switch to the 'I' position. Machine automatically fills the boiler with water.
Fasten filter holders, open steam taps, flush steam wands, and wait for operating temperature.
Remove filter holder, fill with coffee, tamp, and attach firmly to the delivery group.
Operate button (D) until desired coffee quantity is obtained. Interrupt by pressing the same button.
Use programmed dose buttons (A-B-D-E) or continuous dispensing (C).
Press button (C) to stop a dispensing operation started with a programmed button.
Position jug, press button (12). Dispensing stops automatically after programmed time.
Do not deliver water before placing jug under wand. Danger of scalds and burns.
Insert wand into jug, move lever upwards to adjust flow. Shut off steam and clean wand after use.
To avoid burns, do not dispense steam before inserting the steam wand into the jug.
Press the 'cup heater' button to enable the supplementary electric cup heater for pre-heating.
Press '+' for 3 seconds to increase boiler temperature by 2°C in cold conditions. Display shows 'UP'.
Keeps coffee dose moist in filter holder by dispensing water when a unit is inactive for >30 mins.
Do not remove filter holders during E.G.S. cycle to avoid burns from boiling water.
Press and hold 'hot water dispensing' button for 3 seconds to dispense water for 2 minutes.
Press and hold a continuous dispensing button for 15 seconds to start alternating dispensing cycles.
Press and hold 'cup heater' button for 15 seconds to display the total number of coffees dispensed.
Insert wand (5) into milk, press button. Delivery stops at set temperature. Clean wand after use.
Do not press milk foaming button before inserting wand to prevent burns.
Covers volumetric, auto-levelling, and temperature sensor faults with solutions.
Signals high/low boiler temperature. Reset by disconnecting power.
Indicates sensor short circuit or interruption. Contact service center.
Indicates M.A.T. sensor fault. Contact service center. Note: Milk foaming possible by holding button.
Interprets symbols for service controls, filter thresholds, and blocked programming.
Follow instructions for efficiency. Unplug machine, ensure it's cold, wear gloves for cleaning.
Substitute boiler water, clean filter holders and filters, clean dispensing units.
Clean coffee dispensing area underneath units with a small brush. Clean drip tray and cup grid.
Remove and clean shower heads, ensuring all holes are clear. Reassemble correctly.
At end of workday, deactivate machine via electrical switch and close water tap.
Do not use water jets. Clean machine body with mild detergents. Avoid abrasive sponges.
Follow manufacturer instructions for water softener regeneration if recommended.
Provides dimensions (L, H, P) and weight for S40 models (2, 3, 4 GR).
Details voltage, frequency, and wattage (W) for S40 models (2, 3, 4 GR).
| Brand | La Spaziale |
|---|---|
| Model | S40 Series |
| Category | Coffee Maker |
| Language | English |