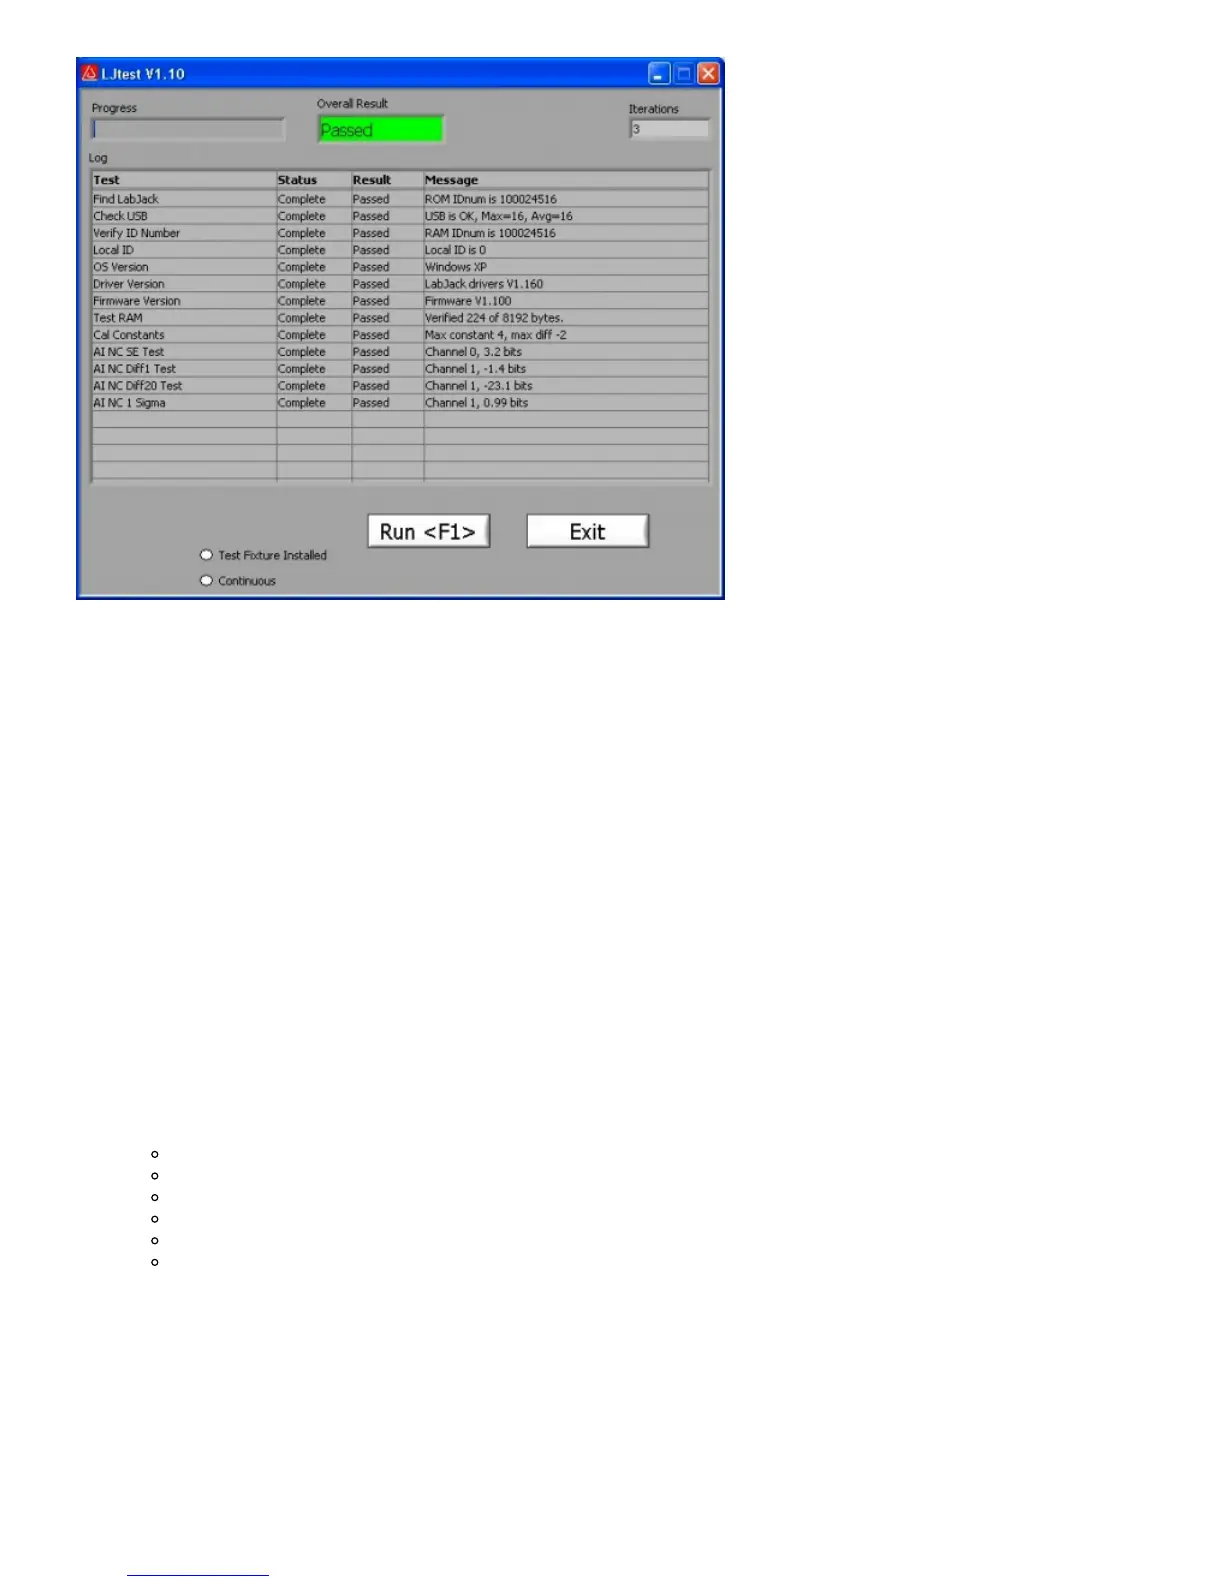
Figure 3-14. LJtest
If all tests fail except “OS Version” and “Driver Version”, it generally indicates LJtest does not detect a LabJack U12 at all. Check
for proper blinking of status LED upon power-up, and if using Windows 98 SE check out the related file (Win98sehid.zip) from the
downloads page at labjack.com.
If “Find LabJack” is the only failure, it is often because more than 1 LabJack U12 is connected.
“Check USB” performs some basic tests to detect any obvious problems with the Universal Serial Bus. Proper LabJack U12
communication is required for this test.
“Local ID” will show a yellow warning if the Local ID has been changed from the factory default of 0.
Failures from “Test RAM” or any of the “AI …” tests could indicate damage to the unit. Make sure there are no connections to the
LabJack U12 (except for the USB cable), and contact LabJack support if the failures continue. Yellow warnings on any of the “AI
…” tests (make sure nothing is connected to the AI channels) could indicate that a self-calibration needs to be performed (see
below).
A yellow warning from the “Cal Constants” test is usually because the constants have all been set to zero. Most often this is due to
selecting “Test Fixture Installed” and running LJtest without the proper connections. Follow the below procedure to correct this
issue.
To write new calibration data, a self-calibration should be performed using LJtest and 12 small (1.5” will work) jumper wires:
1. Make the following initial connections:
AI0 <=> AI2 <=> AI4 <=> AI6 <=> +5V
AI1 <=> AI3 <=> AI5 <=> AI7 <=> +5V
IO0 <=> IO1
IO2 <=> AO0
IO3 <=> AO1
CNT <=> STB
2. Start LJtest and select “Test Fixture Installed” and “Prompt During Cal”, and then click on the “Run” button.
3. LJtest will step through various tests and then prompt to connect GND to all 8 AI channels (AI6<=>GND and AI7<=>GND),
then to connect CAL to the even channels (AI6<=>CAL), then to connect CAL to all 8 AI channels (AI7<=>CAL), and finally to
connect GND to the even channels (AI6<=>GND).
4. When finished, remove all wires and unplug the USB cable. Reconnect the USB cable and the new calibration constants will
be loaded at power-up. Run LJtest again with “Test Fixture Installed” unselected, to make sure the unit passes the normal
self-test.
3.8 - LJSHT
 Loading...