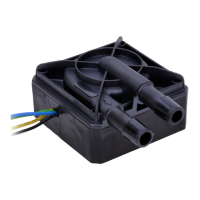
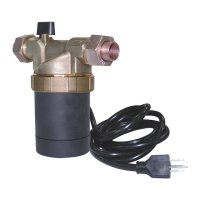
E-10 & E-14 Spa Circulation Pump Instruction Manual Installation, Operation and Warranty
E-10 circulation pumps E10-NSHNDNN2W-05 E-14 circulation pumpsE14-NSTNDNN2W-01
Resellers - Please ensure that the pump owner receives a copy of this manual
Warning
This appliance is not intended for use by persons (including children) with reduced physical, sensory or mental capacities, or lack of experience and
knowledge, unless they have been given supervision or instruction concerning use of the appliance by a person responsible for their safety.
Children should be supervised to ensure they do not play with the appliance.
If the supply cord is damaged, it must be replaced by the manufacturer, its service agent or similarly qualified persons in order to avoid a hazard.
Unpacking
When unpacking the unit, inspect carefully for any damage that may have occurred in transit. Check for loose, damaged or missing parts. Any problem
- contact the supplier purchased through. Do not attempt to repair or modify in any way or warranty may be void.
Installation
These pumps have been evaluated and authorised for water use only in spa / pool applications.
Ensure the power source is correct: 220v-240v, 50 / 60Hz
Maximum operating head pressure for E-10 & E-14 pumps - 2 bar.
Maximum water temperature - 60 degrees C.
Ensure installation is in a clean, dry, weather & humidity protected location with adequate air ventilation. Ensure the power cord is run in such a way
that any water that may get on it, cannot run down the cord to the motor. This unit cannot be submerged - ensure it cannot flood.
Protect cords from sharp objects, hot surfaces; avoid kinking or coiling of the cord. Replace damaged cords immediately.
Locate pump as close as possible to the fluid source thus making the suction line as short and direct as possible, using tubing on the suction that
cannot collapse, such as a reinforced type.
Support the tubing independently of the pump. Use clamps to secure and seal the tube to the pump.
These pumps are liquid lubricated. How they are mounted, and water condition/quality are important.
Thoroughly clean and flush the system before installing the pump
Plumbing valves, fittings, etc. should be positioned to avoid leakage onto the pump.
Ensure plumbing is designed and installed in such a way that the pump will fill with water when the plumbing system fills, to avoid air locking and dry
running.
If replacing an older Laing SM9xx series circulation pump, ensure that any inline strainer is removed prior to installing an E-10. The increased flow of
this pump through a restriction in the suction (such as a strainer) can result in pump starvation and dry running damage.
Mounting
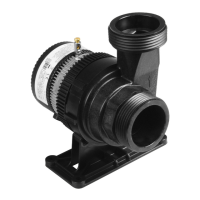
For installation purposes, the arrows on the side of the pump housing indicate the direction of water flow through the pump. Ensure the pump and pip-
ing is adequately supported. Do not mount the motor above the wet end. Correct orientation of the pump includes mounting horizontally or vertically
with suction facing upward only. The pump can roll on its foot (E-10) to allow different angles of discharge alignment. Do not position with discharge
port lower than inlet / suction port. This helps prevent air locking.
Ensure the pump mounting is secured to a solid base with pan head self tapping screws.
Operation
Completely fill the plumbing system before operating the pump. Do not start the pump until the plumbing system has been filled. Make sure isolation
valves are fully open and the pump is flooded with water.
Purge air from the plumbing system prior to operating the pump. This can be achieved by loosening the plumbing connection at the pump to allow any
air present, to escape.
These 2 steps are very important. The pump can never be allowed to run dry as this can severely damage the pump and will void warranty.
Operate the pump. Ensure water is pumping through the plumbing system. Turn off immediately if no water is flowing within 30 seconds. Once running
correctly, recheck after 5 minutes to ensure continued proper operation.
It may be necessary to open a discharge valve, port or fixture to ensure all air is purged. The pump should be running quietly. If gurgling is heard,
it may mean that air is still in the system. Turning the pump on and off several times will generally clear remaining air. If gurgling noises persist,
recheck and purge the system (note that ozone injection can make a gurgling sound at the injector and not be a pump issue).
Dry run protection. Pump motors are fitted with dry run protection to preserve the MOTOR. If a dry run condition occurs, the motor will stop and
restart numerous times in the attempt to purge air. This does not guarantee protection of the wetend / rotor bearing as dry running will cause failure
NOT covered by warranty. This dry run motor protection prevents motor failure provided it’s addressed when noise is audible from the pump. If left
unchecked it can result in seizure and windings or electronic failure. A failed rotor only, due to dry running or chemical / water condition damage, can
be ordered from the supplier and replaced rather than a complete pump. If the windings or electronics are damaged, a replacement pump is required.