Arc Thermal Imaging CameraInstallation Guide
Page 1
1 Introduction
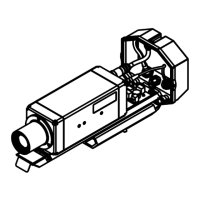
This guide gives you information on how to install the ARC thermal imaging camera
and its installation accessories.
These instructions are provided as a series of simple installation diagrams, covering
the installation of the Arc thermal camera and its mountings, accessories and
services.
The equipment must be used, maintained and serviced by properly trained personnel,
capable of following the procedures given in these instructions. Safety may be
impaired if the system is not used as indicated.
It is important to check the equipment with which you have been supplied and then
read these instructions thoroughly before proceeding with installation.
1.1 Points to note on installation
• When choosing a location to install the Arc thermal imaging camera, ensure that
the camera has an unobstructed view of the target to be measured.
• Try to choose a mounting location that permits easy access to the system
components wherever possible, as this will speed up any system maintenance
and repair.
• Ensure that the mounting locations chosen for the camera and its accessories
are as free as possible from vibration, dust, steam and smoke etc.
• Ensure that the mounting locations chosen for the camera and its accessories
allow for the lengths of interconnecting cables that you have ordered. Also,
ensure that all cable runs are as secure and unobtrusive as possible.
1.2 Using compressed air for air purging
If your application requires the use of the air purging and you intend to use
compressed air to supply air to the purge, then the following points must be noted:
• If possible, connect the compressed air supply to the purge via a 1m length of
35mm diameter smooth bore tube. This will increase the air ow rate slightly.
• The minimum recommended air pressure is 20 psi (1.4 bar).
• The minimum recommended ow rate is 350 l/min.
• Occasional cleaning will be required to prevent the build up of everyday dirt on
site when the purge is off.