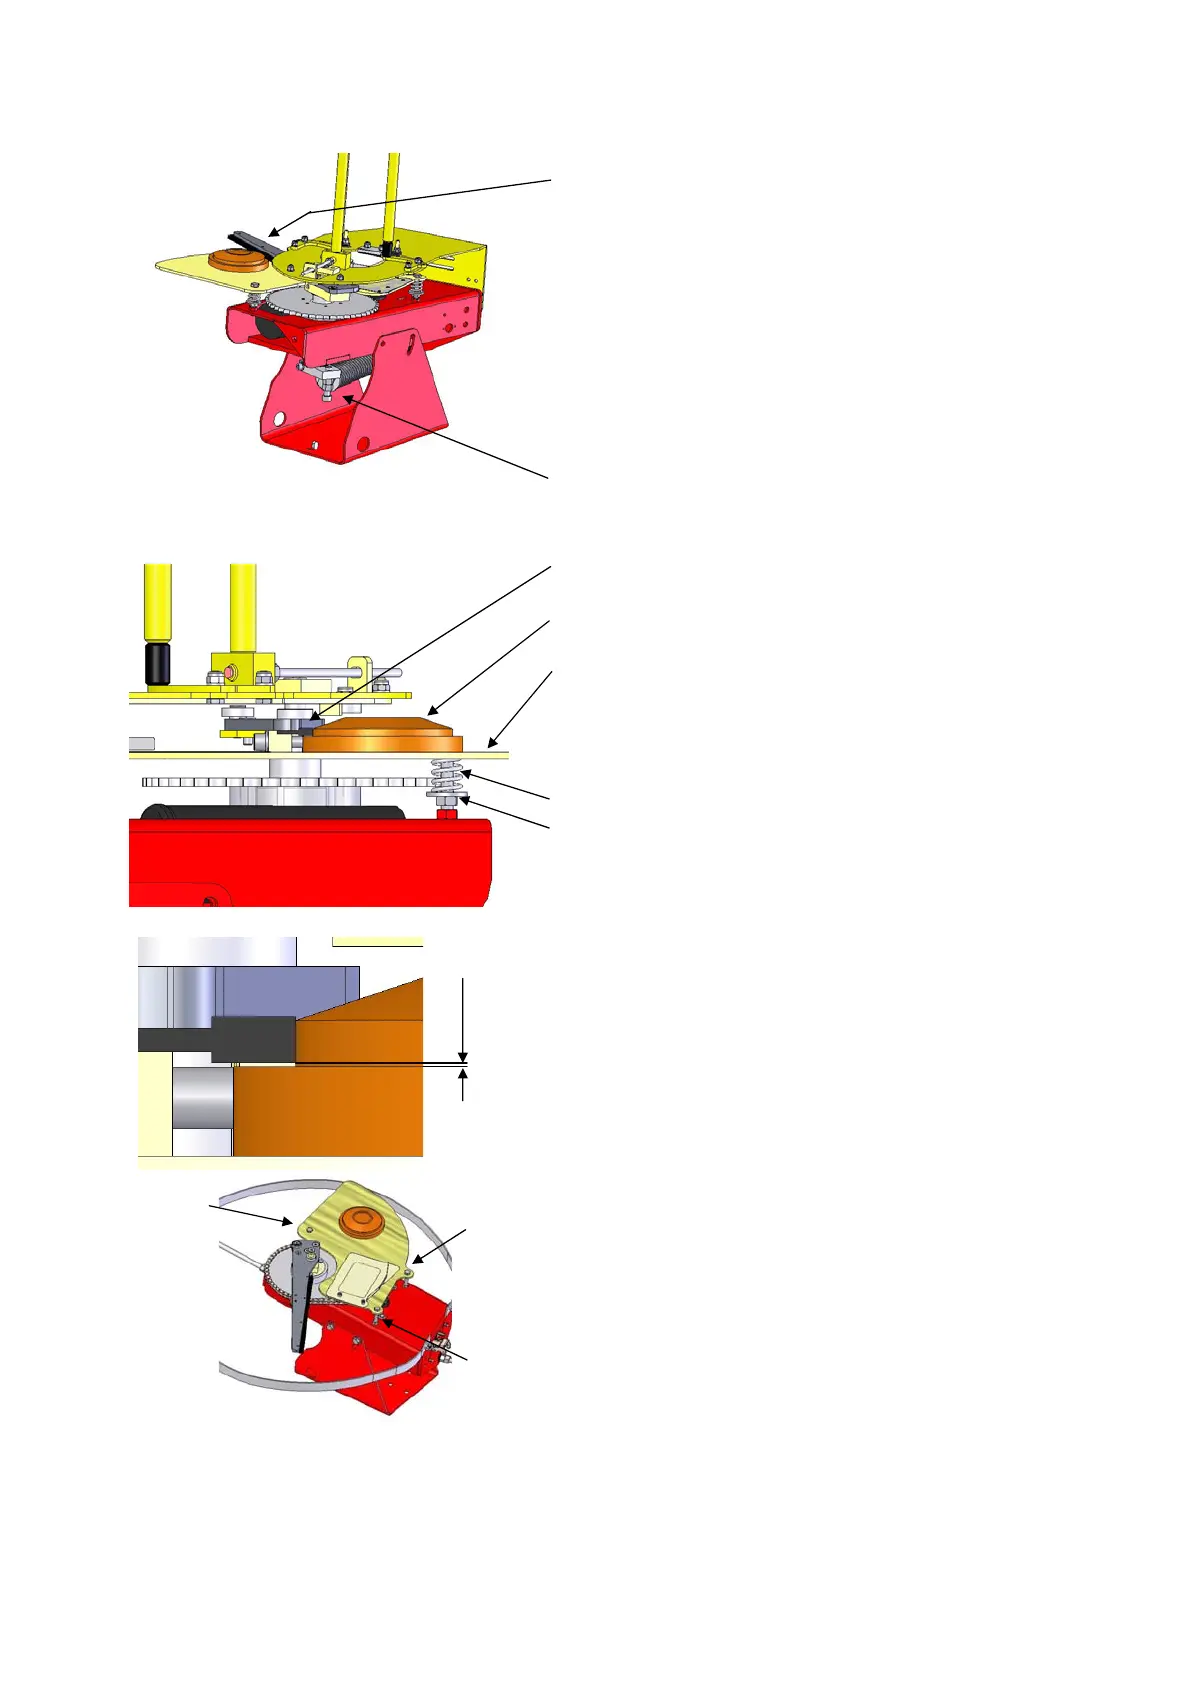
ADJUSTMENT OF THE THROWING PLATE
REGLAGE DE LA PLAQUE DE LANCEMENT
check that the arm is not bent
Bras de lancement
Vérifié que le bras n'est pas tordu
WARNING! Before any
manipulations unassemble
WARNING! Before any
adjustments dis-connect
ATTENTION !!! Avant toutes
manipulations désassembler
le ressort d'armement,
Arm Rubber Réglette
Clay Plateaux
Throwing Plate Plaque de lancement
Adjustment screw Vis de reglage
nut Contre-écrou
1- Unscrew the nut
2- Turn the screw to adjust the throwing plate up or down
in order to obtain a gap of about 1mm between
the clay and rubber
1 mm 3- Pivot (rotate) the arm round to check that the adjustment
is the same on the entire throwing plate trajectory
4- Repeat this operation on the 3 other adjustment
screw 1
1 -Débloquer le contre-écrou
screw 2 2 -Actionner la vis de réglage pour monter ou
descendre la plaque de lancement afin d'obtenir
un espace d'environ 1 mm entre le plateau et
la réglette
3 -Faire pivoter le bras pour obtenir un réglage
constant sur toute la surface de la plaque de
screw 3 lancement
4 -Répéter l'opération sur les 3 vis de réglages
5 -Serrer tous les contre-écrou
CHAP 1 PAGE 8
screws of the throwing plate
5- Tighten all the nuts
Throwing Arm
the cocking spring
the main spring