3
www.lasertools.co.uk
Instructions
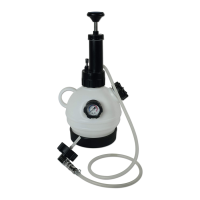
This manual brake bleeder is designed for
use with most brake master cylinder
reservoirs measuring 1 1/4” to 3 1/2”.
Safety Precautions
• Release all pressure from the Brake
Bleeder and empty Fluid container
when not in use.
• Do not use if damaged.
• Clean after use with a clean dry cloth.
• Keep the hose and adaptor clean for
future use.
Instructions
• Fill the container at the Cap (5) to the
marker just below the pressure gauge.
• Refit the cap firmly
(do not over tighten).
• Place the container in a secure position.
• Remove the cap from the vehicle’s
brake reservoir.
• Check the level of the brake fluid and top
up to the maximum line if necessary.
• Fit the brake bleed adaptor with the
quick connector over the reservoir neck.
• Make sure the system is sealed.
• Pump the handle until 10psi is reached
(Do not exceed 30psi).
• If the system does not hold the
pressure, recheck the connections,
tighten and try again.
• The system is now primed and ready for
the brakes to be bleed without fear of
bleeding them dry.
Bleeding the brakes
• Repeat the following procedure on all
wheels ideally starting at the off-side
rear, near side rear, off-side front and
near side front.
• Wipe each bleed screw.
• Place a clear plastic hose (compatible
for use with brake fluid) over the
fitting and the other end into a
suitable empty container.
• With a ring spanner (to avoid damage
to the screw) loosen the bleed screw by
1/4 turn to release fluid into the clear
pipe (The screw only needs
to be open for a couple of seconds or
less).
• Close the bleed screw gently
(not too tight).
• Check the brake fluid in the clear pipe
for air bubbles.
• Continue repeating these steps until
no air bubbles appear (This could be
repeated up to 10 times for each
wheel).
• As the brake fluid is discharged
through the brake nipple the pressure
on the system will siphon fresh fluid
from the fluid container.
• After each wheel check the pressure on
the gauge. If this has dropped pump
the hand pump to build up any lost
pressure.
• Repeat on all wheels.
• When the job is complete push down
the Hand Pump and release the
pressure release valve.
• Check the pressure has dropped to its
lowest point.
• Disconnect the hoses and all
connections.
• Before you drive the car make sure
all nipples are tightened, wheels are
secured correctly and the brakes have
been checked and feel firmer and more
responsive.
 Loading...