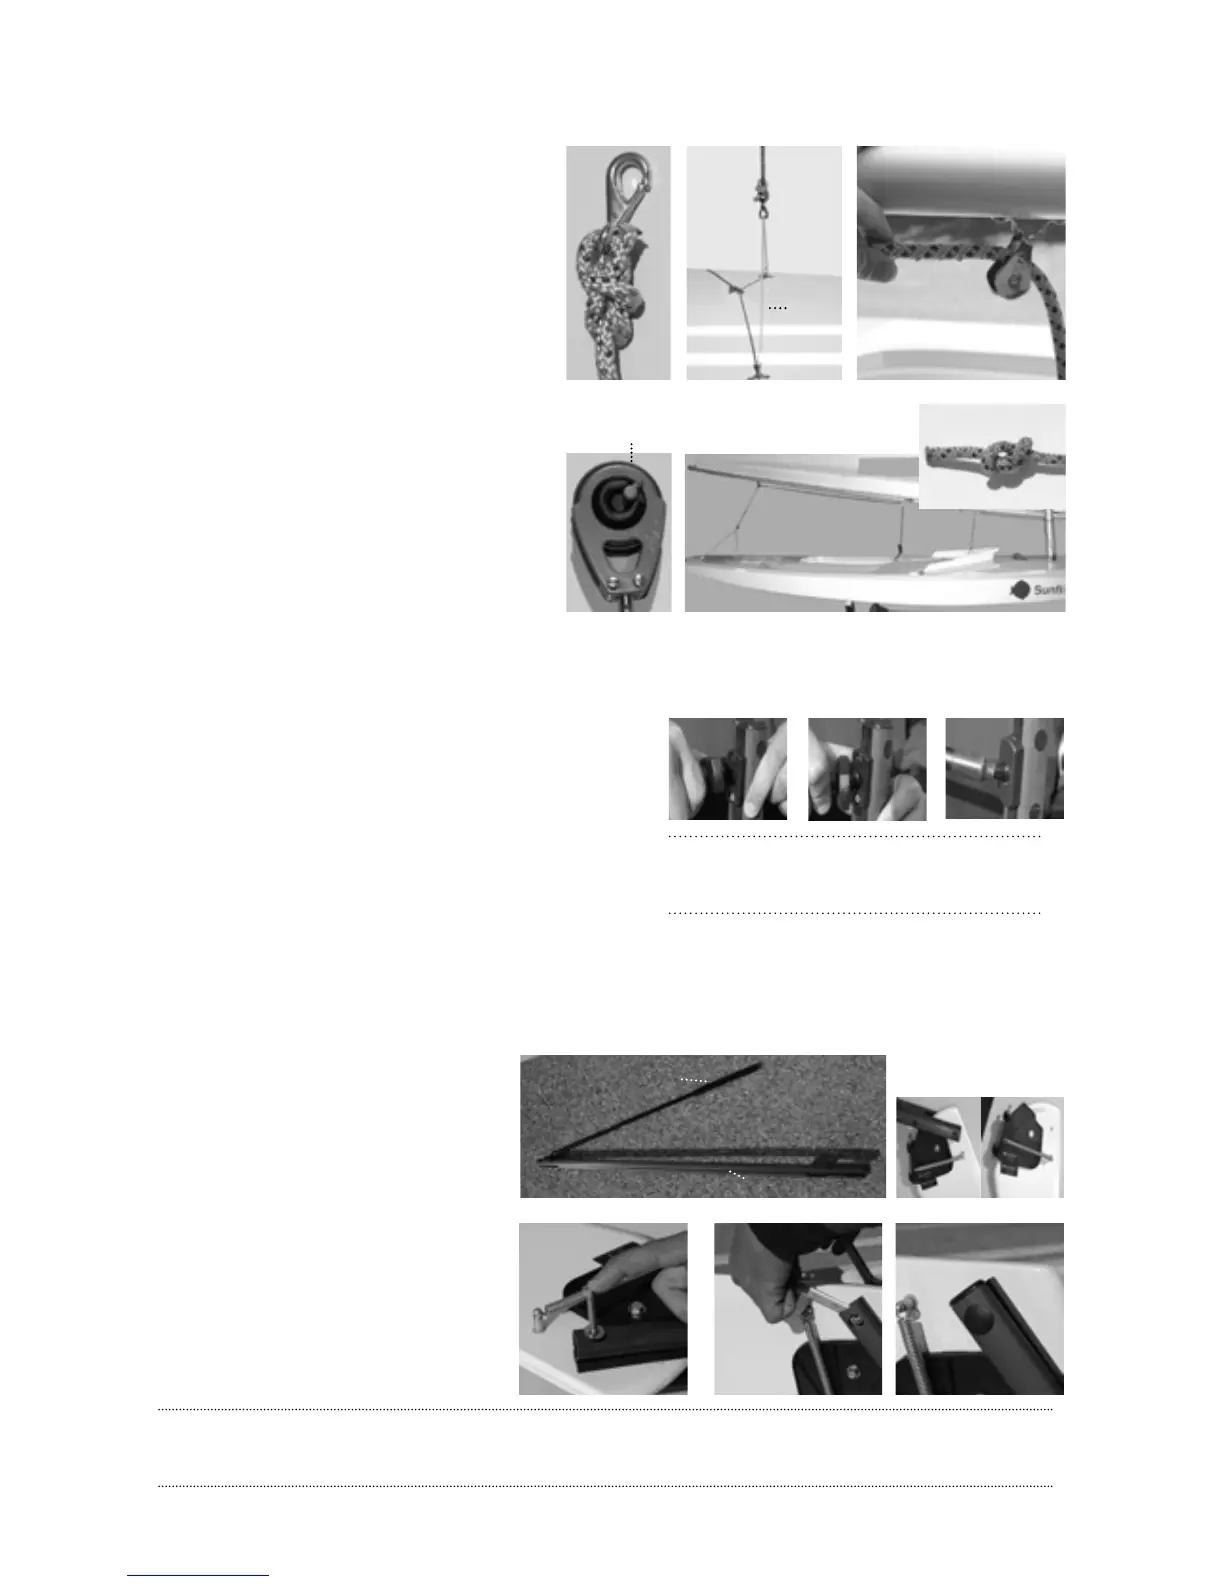
1. Retrieve the mainsheet from the line bag. Tie a
bowline to the mainsheet snap shackle with one
end of the mainsheet (figure 49).
2. Snap the mainsheet shackle onto the bridle
(figure 50).
3. Feed the free end of the mainsheet up and
through the aft most boom block and continue
towards the bow along the boom, making sure to
go through the second boom block before
leading down to the mainsheet block attached to
the deck (figure 51).
4. Lead the line down through the ratchet
block. Making sure that while pulling in the
mainsheet the block makes a ratcheting noise.
If the block does not make a ratchet sound one
of two things could be the problem. First try
running the mainsheet through the block the
opposite way. If this does not work, locate the
lever on the mainsheet block and switch it to
the ratchet position (figure 52).
figure
49
figure 50 figure 51
figure 52
13. Rigging the Mainsheet
COMPLETE MAINSHEET
BRIDLE
LEVER
figure 53
15. Assembling the Rudder and Tiller
Locate the rudder and tiller from the delivery kit. Remove the tiller bolt and
the two plastic washers from the end of the black tiller straps.
1. Align the hole in the end of the tiller with
that of the rudder head. e contour of the
tiller should match that of the rudder cheek.
2. Align the washer and bolt and insert into
the end hole of the tiller twisting it through
to the other end.
3. Align the second washer and lock nut on
the end of the bolt and using a 7/16” socket
head driver and 7/16” crescent wrench com
-
plete the install of the rudder head bolt.
4. Place the plastic end caps on tiller ends
and rubber bolt holes.
TILLER EXTENSION
UNIVERSAL
TILLER
14. Tiller Extension Assembly
Tip: Because the socket of the wrench will need to fit into the outer hole of the tiller, be sure you are using a socket with a thin outer wall.
On the other end, place the closed (circular) end of the crescent wrench in the tiller end and then place the lock nut in the wrench before
screwing the bolt all the way through.
1. Insert tab of tiller extension into slot of tiller extension
mount, this should slide in with a snug fit.
2. Once tiller extension tab is fully inserted into the mount,
align the mount cover and push down on mount to secure
fitting.
Tip: Some sailors wrap vinyl electrical tape around both
ends of the mount and tiller to ensure the extension does
not disconnect while sailing.