LaserPoint s.r.l. - Plus 2 - Quick Start Guide - All Rights Reserved 3
2.2.
C
ONNECTING THE HEAD TO THE
P
LUS
2
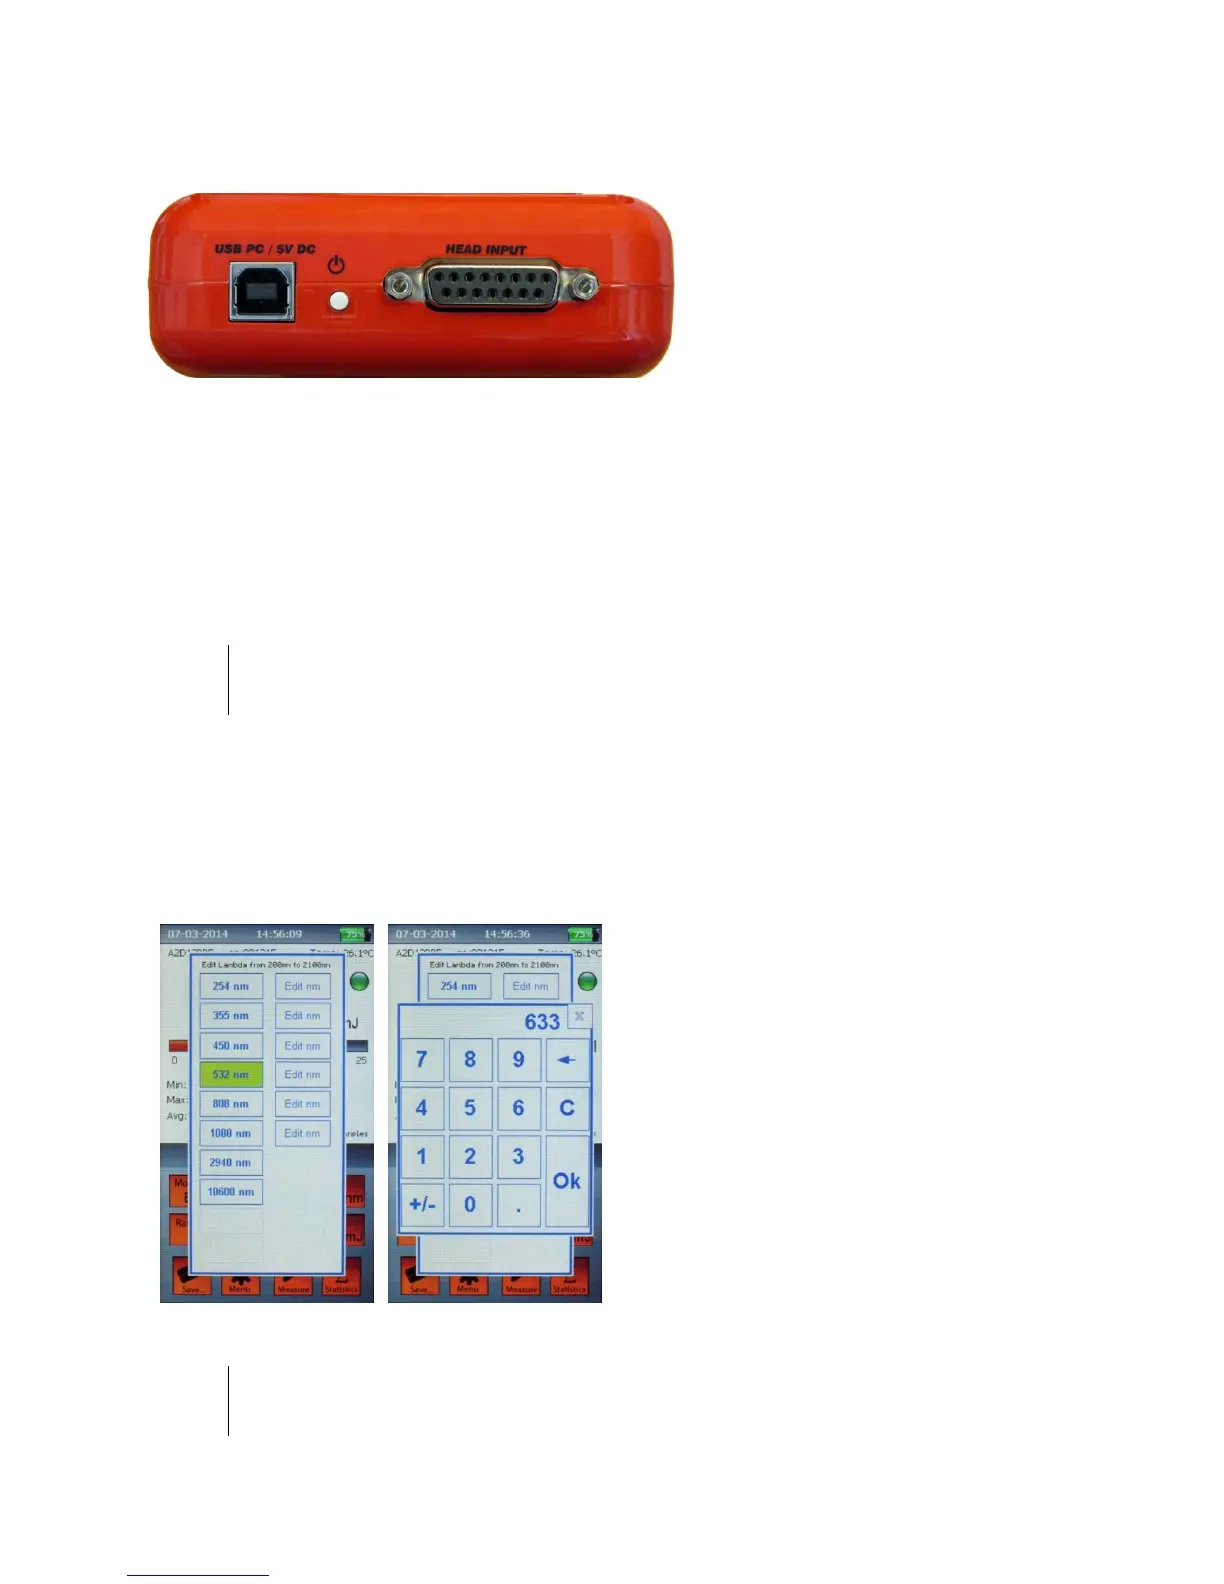
Insert the measuring head IIS
Connector (Intelligent Identification
System) into the socket marked "Head
Input" on the top panel of the Plus 2.
(Figure 2)
Figure 2
Top Panel View
2.3.
S
WITCHING
ON
/
OFF
THE
P
LUS
2:
Press the on-off button on the top panel (Figure 2) to switch on the Plus. The main screen will be
shown as in Figure 1.
Note:
The head must be plugged in before the unit is switched on. Otherwise the blinking writing "NO HEAD"
will appear and the Plus 2 will turn off in a few seconds (while in battery mode).
To turn off the Plus 2 press the on-off button for 2-3 seconds, then release it. The current Plus 2
configuration will be automatically saved.
2.4.
S
ETTING THE WAVELENGTH OF LASER BEING USED
:
a) Touch the Wavelength button on the
screen of the Plus 2.
b) The “edit lambda” menu (Figure 3) will
be displayed.
c) Select a lambda from the list, or touch
“edit nm” to input the wavelength you need
(Figure 4). The wavelength must be within
the available range, that is shown on top of
the wavelength menu.
Figure 3 Figure 4
Note:
The wavelengths available, and the editable wavelength range depend on the Sensor head
characteristics and the Sensor head calibration.