LaserPoint s.r.l. - Plus 2 - Quick Start Guide - All Rights Reserved 8
f) Exit the Data Logging page by clicking on the “OK” button.
Note:
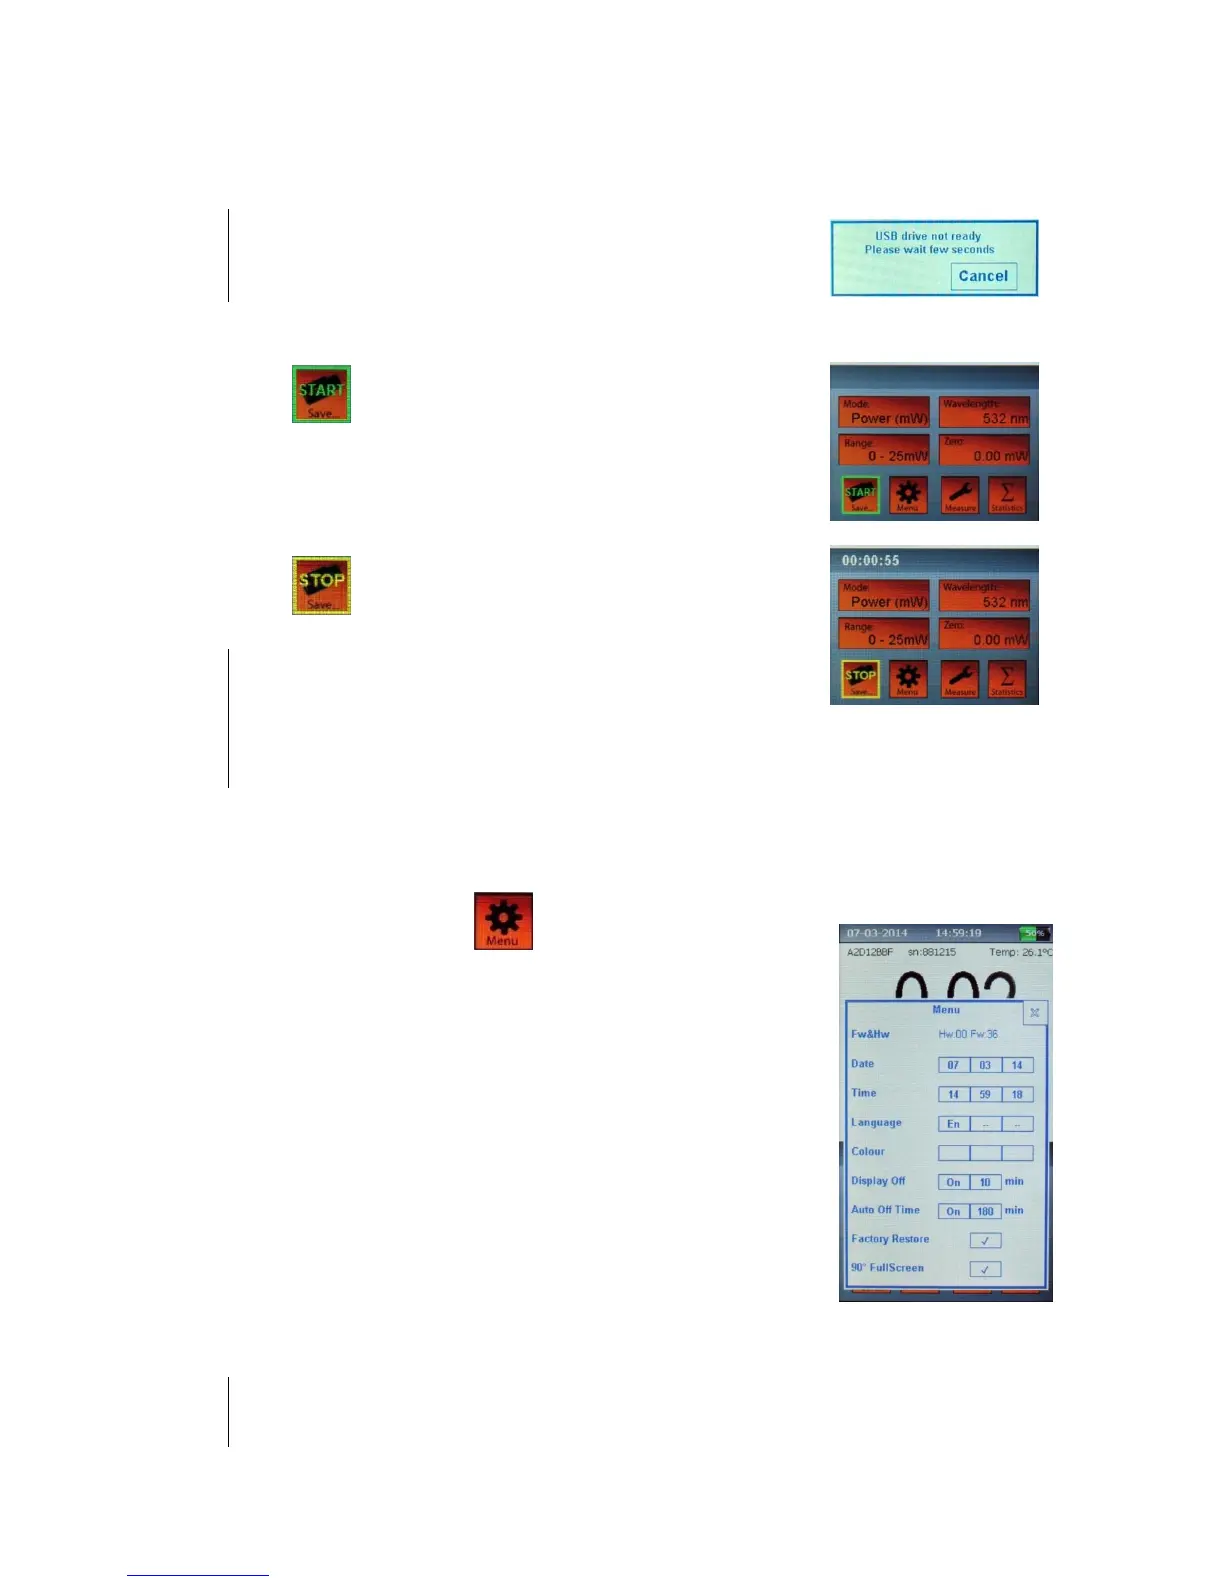
Depending on the USB flash memory speed, it may happen that the USB
drive is not yet ready. In this case a ”USB not ready” message will be
displayed, please wait few seconds until the message disappears.
g) The “Save..” button has now a “START” green writing.
Touch to begin logging data.
h) While the data logging is active, a timer showing the elapsed
time or the time left will be displayed. During data logging
the “Save..” button has a “STOP” yellow writing.
Touch to stop the data logging.
Note:
Data are saved in the USB drive, in the folder:
X:\PLUS2\”head serial number”\
with file names:
“DATA_nnn.txt” for values
“STAT_nnn.txt” for statistics
a) Touch the “Menu” button to open the Menu window.
b) The first menu lines are self-explicative: Date and Time
settings, Languages and Display Colour choices (not yet
available).
c) Display off: this is the inactivity time before the screen turns
off, to save energy. You can select ON/OFF to
activate/deactivate, and set a time from 1 to 30 minutes.
d) Auto off is the inactivity time before the Plus 2 will turn off.
You can select ON/OFF to activate/deactivate, and set a time
up to 600 minutes.
Note
both the “auto off” and “diplay off” work only when in battery mode. If plugged to the power line
the Plus 2 and the display will remain on.
 Loading...