The provided manual outlines the operation and maintenance of a LaserPro Spirit laser cutter, a versatile machine designed for cutting and engraving various flat materials. This document serves as a starting point for users to safely operate the device and explore its capabilities, emphasizing safe practices and proper material handling to prevent damage to the machine.
Function Description
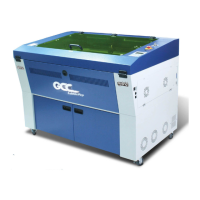
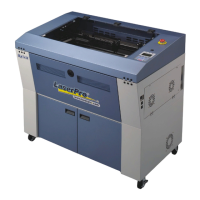
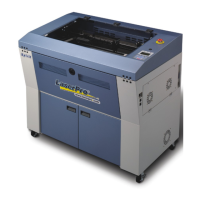
The LaserPro Spirit is a 25-Watt laser cutter capable of both cutting and engraving. It utilizes a laser to process flat materials such as paper, cardboard, wood, acrylic, textiles, and rubber. The machine distinguishes between vector-hairlines, which are cut, and wider lines or images, which are engraved. It is important to note that the machine is not designed to cut metal. The laser's operation is controlled through a computer interface, specifically using CorelDraw software, which allows users to prepare their designs and set parameters for cutting and engraving. The machine's working surface measures 640 x 460 mm, accommodating a range of material sizes. It can handle materials up to 4mm thick for MDF or triplex and up to 8mm for plexiglass.
Usage Features
The workflow for using the LaserPro Spirit involves several key steps, starting with design preparation and ending with material removal and cleanup.
Design Preparation:
- Users can utilize up to 16 colors in a single drawing, with specific colors assigned to different actions: red for cutting (must be a 100% RGB red hairline vector) and black for engraving (can be a thicker line or an image).
- It is recommended to engrave first and then cut.
- For precise designs, especially those with multiple cutting colors, it's best to laser from the inside out to prevent material shifting. The laser processes colors from top to bottom as they appear in CorelDraw's settings, allowing users to control the order of operations.
- Files should be saved on a designated server in a user-specific folder.
- Designs are prepared in CorelDraw using a "Spirit laser" template, which matches the laser cutter's bed size. The origin point is always the top-left corner.
- Accepted file types include AI (version 8), DXF, DWG (2004), SVG, EPS, JPG, and PNG.
Printing (Sending Job to Laser Cutter):
- After preparing the design, users send the print command (Ctrl+P) from CorelDraw.
- The "Spirit" printer is selected, and settings are adjusted under "Preferences."
- In the "Mode" section, "Manual Color Fill" is chosen.
- Under the "Pen" tab, users define the action (vector for cutting, raster for engraving) and set speed and power values for each color based on the material type. Lower speed means deeper cuts, and higher power means more intensity.
- The "Advanced" tab allows setting the starting position. "Home" sets the laser to the upper-left corner, while "Relative" allows manual positioning.
- Once settings are confirmed, the job is added to the laser's waiting list.
On the Lasercutter:
- Before starting, ensure the compressor and suction are turned on.
- The machine is powered on using a switch on the right side.
- Material is placed in the upper-left corner of the machine bed.
- The laser head is unlocked using dashboard arrows and manually moved above the material.
- If "Relative" positioning was chosen, the laser head is manually moved to the desired starting point.
- An autofocus pen is attached to the laser head, and the "Autofocus" button is pressed. If autofocus fails, manual focusing is performed by adjusting the bed height with arrow buttons until the distance is approximately 29.5 mm, using a wooden guide. The wooden guide must be removed before moving the bed.
- After focusing, "Back" is pressed to display the job name, and the autofocus pen is removed.
Control (Test Run):
- With the lid open, "START/STOP" is pressed for a test run without the laser firing.
- Users verify that the red pointer does not go beyond the material edges.
- If satisfied, "START/STOP" is pressed again to stop the test.
Cutting / Engraving:
- The lid is closed, and the red "START/STOP" button is pressed.
- After the machine beeps, users wait 10 seconds before opening the lid to allow the suction to remove gases.
- Crucially, users must remain near the laser cutter at all times. If a fire starts, lifting the lid will stop the laser and extinguish the flame.
Maintenance Features
The manual emphasizes several aspects related to the care and maintenance of the LaserPro Spirit, primarily through proper usage and material selection.
Material Restrictions:
- A critical aspect of maintenance is adhering to strict material restrictions. Certain materials are explicitly forbidden because they can damage the machine or produce toxic fumes.
- DO NOT USE:
- PVC (polyvinylchloride): Produces toxic fumes that damage the lens.
- PC (polycarbonate): Burns when cut by the laser.
- Thermosets (all non-meltable plastics like PU and bakelite): These materials are not suitable for laser processing.
- Users are advised to consult a lab supervisor if unsure about a material's suitability. The manual highlights the cost of a new lens (400 euros) to underscore the importance of careful material selection.
Clean Up:
- After cutting, the main sheet of material and cut-out designs are removed.
- Leftover material should be sorted into recycling bins by material type.
- Small pieces of material that get stuck in the grill underneath the bed must be removed using a vacuum cleaner or a small brush provided next to the laser. This prevents debris buildup that could interfere with future operations or pose a fire hazard.
Flat Material Placement:
- To ensure consistent focus and accurate cuts, it is essential that the material lies flat on the bed. If the material curves, the focus will vary, leading to incomplete cuts in certain areas. This practice helps maintain the laser's performance and prevents uneven wear on the lens.
Test Cuts for New Materials:
- For new materials not listed in the provided notebook of speed and power values, users are strongly advised to perform a small test cut (e.g., a small circle). This "print selection" test should be done on a scrap piece of material, not on the actual design material. This allows users to determine optimal speed and power settings without risking their main project. If successful settings are found, users are encouraged to add them to the notebook for future reference, contributing to the collective knowledge base and facilitating easier use for others. This proactive approach to testing helps prevent machine damage from incorrect settings and ensures efficient operation.