LAUNCH
Knowledge of SmartLink C Dongle
The SmartLink C dongle can be applied in the following situations(*For other application
scenario, see User Manual):
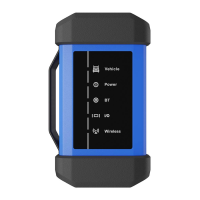
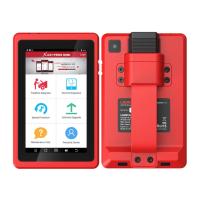
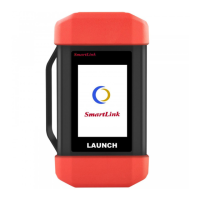
OBD-16 Diagnostic Connector
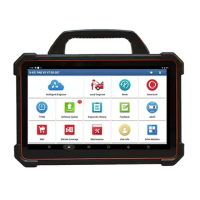
3.97 Inch Touch Screen
LAN/WAN Port
DC-IN Port
Data I/O Port
*Warning: The SmartLink C dongle obtains power through the vehicle's DLC, and it is
prohibited to connect to an external DC power supply. No responsibility can be
assumed for any damage or loss caused as a result of not strictly following the above
method.
The SmartLink C dongle can work as a VCI (Vehicle Communication Interface) device,
together with the LAUNCH-specific diagnostic tool, or as a SmartLink Customer device,
requesting technical assistance from a master technician (SmartLink B).
(Connects the crossover
cable. Only applied in
the “SmartLink” mode.)
(Connects the data cable.)
1. orks as a VCI deviceW
2. ork as a SmartLink C(Customer) dongle (In the case of SmartLink Diag.) W
WiFi/BT
USB
/
Diagnostic Tool
(Using " "
function)
SmartLink
Diagnostic Tool
(Using " "
function)
Diagnose
Internet
Quick Start Guide
(Currently disabled and
for manufacturer use only.
See “*Warning”.)
OBD II Extension Cable
OBD II Extension Cable
Vehicle's DLC
Vehicle's DLC
In this mode, it needs to work in conjunction with the Diagnose module of the diagnostic
tool, which is used to obtain vehicle data, and then send it to the diagnostic tool for
analysis via WiFi / BT / USB communication (*The available communication method depends
on the hardware of the diagnostic tool).
It can be used if users need remote technical assistance from master technicians. In this
mode, it does not communicate with the diagnostic tool, but it needs to work together with
the SmartLink module of the . The diagnostic tool is mainly used to issue
remote diagnostic requests, and the SmartLink C dongle is networked to receive and
execute commands from the remote SmartLink B (Business).
diagnostic tool
*Remarks:
especially during remote online programming,
it is recommended that the vehicle battery is
connected to a charging power source. Doing so
can prevent the vehicle from running out of
power and failing to start due to long diagnosis
time.
During the SmartLink diagnosis,
98********00
Password Envelope
1
2
2
WLAN Setup
Register & Update (Continued)
The tablet has built-in WLAN module that can be used to get online. Once you're online,
you can register the tool, update diagnostic software & apk, surf the Internet and send
email on your network.
1. Tap on [Settings] on the home screen and then [WLAN] to configure WLAN setting.
2. Select the desired WLAN connection from the list (Password may be required for
secured networks).
3. When “Connected” appears, it indicates that it is properly connected to the network.
Register & Update
3. Activate VCI (SmartLink C): Input the Product S/N and Activation Code (can be
obtained from the included Password Envelope), and then tap on “Activate”.
4. Finish Registration & Download Diagnostic Software: Tap on “Yes” to enter the vehicle
software download screen. Tap on “Update” on the update page to start downloading.
Once downloading finished, the software packages will be installed automatically.
*Note: All software is updated periodically. It is recommended to check regularly for updates
and install the latest software version for the best service and functions.
Initial Use
1. Launch App: tap on the application icon on the home screen, and then tap on “Login”
on the upper right corner of the screen. Tap “New Registration” to go to Step 2.
Login
Username
Password
Retrieve password New Registration
Login
Create an Account Activate VCI Finish Registration
Register
Select Country
*
Password
*
Confirm Password
*
Email
*
CAPTCHA
*
CAPTCHA
Username
*
Register
2 3
1
2. Create an App Account: Input the information (items with * must be filled) and then tap
on “Register.”
Create an Account Activate VCI Finish Registration
YesNo
Register
Congratulations! You have successfully completed your registration. Do you want to download
the diagnostic software now?
1
2
3
Create an Account Finish Registration Activate VCI
Register
1
Serial Number
Activation Code
3
2
Where is my activation code?
>> Skip
Activate