LAUNCH TireChangerTWC-581
11
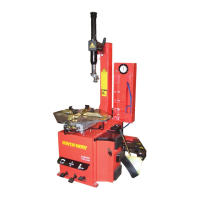
Fig.22
Mount / demount Head (Early Head)
Checking
Mount a 15 inch diameter aluminum alloy rim
(external clamping preferred) onto the turntable.
Lower the
mount / demount head onto the rim
and lock.
By means of the appropriate gauge kit, check
measurements as indicated in Fig.23 for
mount/demount head with roller) and
fig.24(mount / demount head with insert).
If the measurements do not correspond proceed as
follows:
Calibration
Loosen all screws securing the mount / demount
head.
Lower the mount / demount head onto the rim
and lock.
Finger-tighten screws A3-A4(Fig.27 and Fig.28 in
order to turn the mount / demount head and
obtain the correct position.
Tighten screws A1-A2 (Fig.25,29)
mount/demount head with roller; Fig.26, 30
mount / demount head with insert) to tilt the
mount / demount head and obtain the correct
position and then finger-tighten screw B.
Unlock and raise the hexagonal column, then
lower it onto the rim and lock again.
First tighten screws A1-A2-A3-A4 in torque of
50Nm and check by means of gauges that the
measurements remain the same.
Lastly, tighten screw B to a torque of 50Nm and
carry out checks once again with the gauges.
Periodic checks
After use of the machine for half a year, do regular
check to ensure correct measurements as stated in
Checking. If they are incorrect proceed as follows:
Check that the screws(A1-A2-A3-A4-B) are
tightened properly and repeat calibration as per
Calibration.
If measurement 2 for the mount / demount head
with roller (fig.23) or measurement 1 for mount /
demount head with insert (fig.24) are changed,
the cause may be that adjusting nut (fig.21) has
loosened.
Tighten or loosen the nut to increase or reduce
lifting range.
Fig.23