20
14. Ensure that the bag is taut on the top cloth area
between the front bag handle and the rear bag hanger
handles. If the bag is too tight or too loose, adjust it as
follows:
A. Remove the bag from the rear bag hanger.
B. Remove the bolts and knobs that secure the hanger
clamps to the handle sections (Fig. 37).
C. Assemble the hanger clamps to the handle sections
using the set of holes that best holds the bag taut.
Note: Using the lower holes in the hanger clamps tightens
the bag assembly; using the upper holes in the hanger
clamps loosens the bag assembly.
15. Connect the wire to the spark plug.
Note: Under normal use, the bag will deteriorate and
wear. Check the grass bag often and replace it when
necessary with a genuine Lawn-Boy replacement bag. A
weakened or inferior bag may let objects pass through and
cause damage or an injury.
Keep hands, sticks or other objects out of the
grass chute while the blade is turning; thrown
objects or blade contact can result in serious
injury.
Always stop the engine when emptying the grass
bag and disconnect the wire from the spark plug
before cleaning a clogged chute, a bag tunnel, or
the underside of the lawn mower housing.
Warning
16. Connect the wire to the spark plug.
Installing the Mulch Plate
An uncovered discharge opening could allow the
lawn mower to throw objects in the operator’s or
bystander’s direction and result in serious injury.
Also, contact with the blade could occur.
Never operate the lawn mower unless you install a
cover plate, a mulch plate, or a grass chute and
catcher.
Warning
1. Stop the engine and wait for all moving parts to stop.
2. Disconnect the wire from the spark plug (Fig. 8).
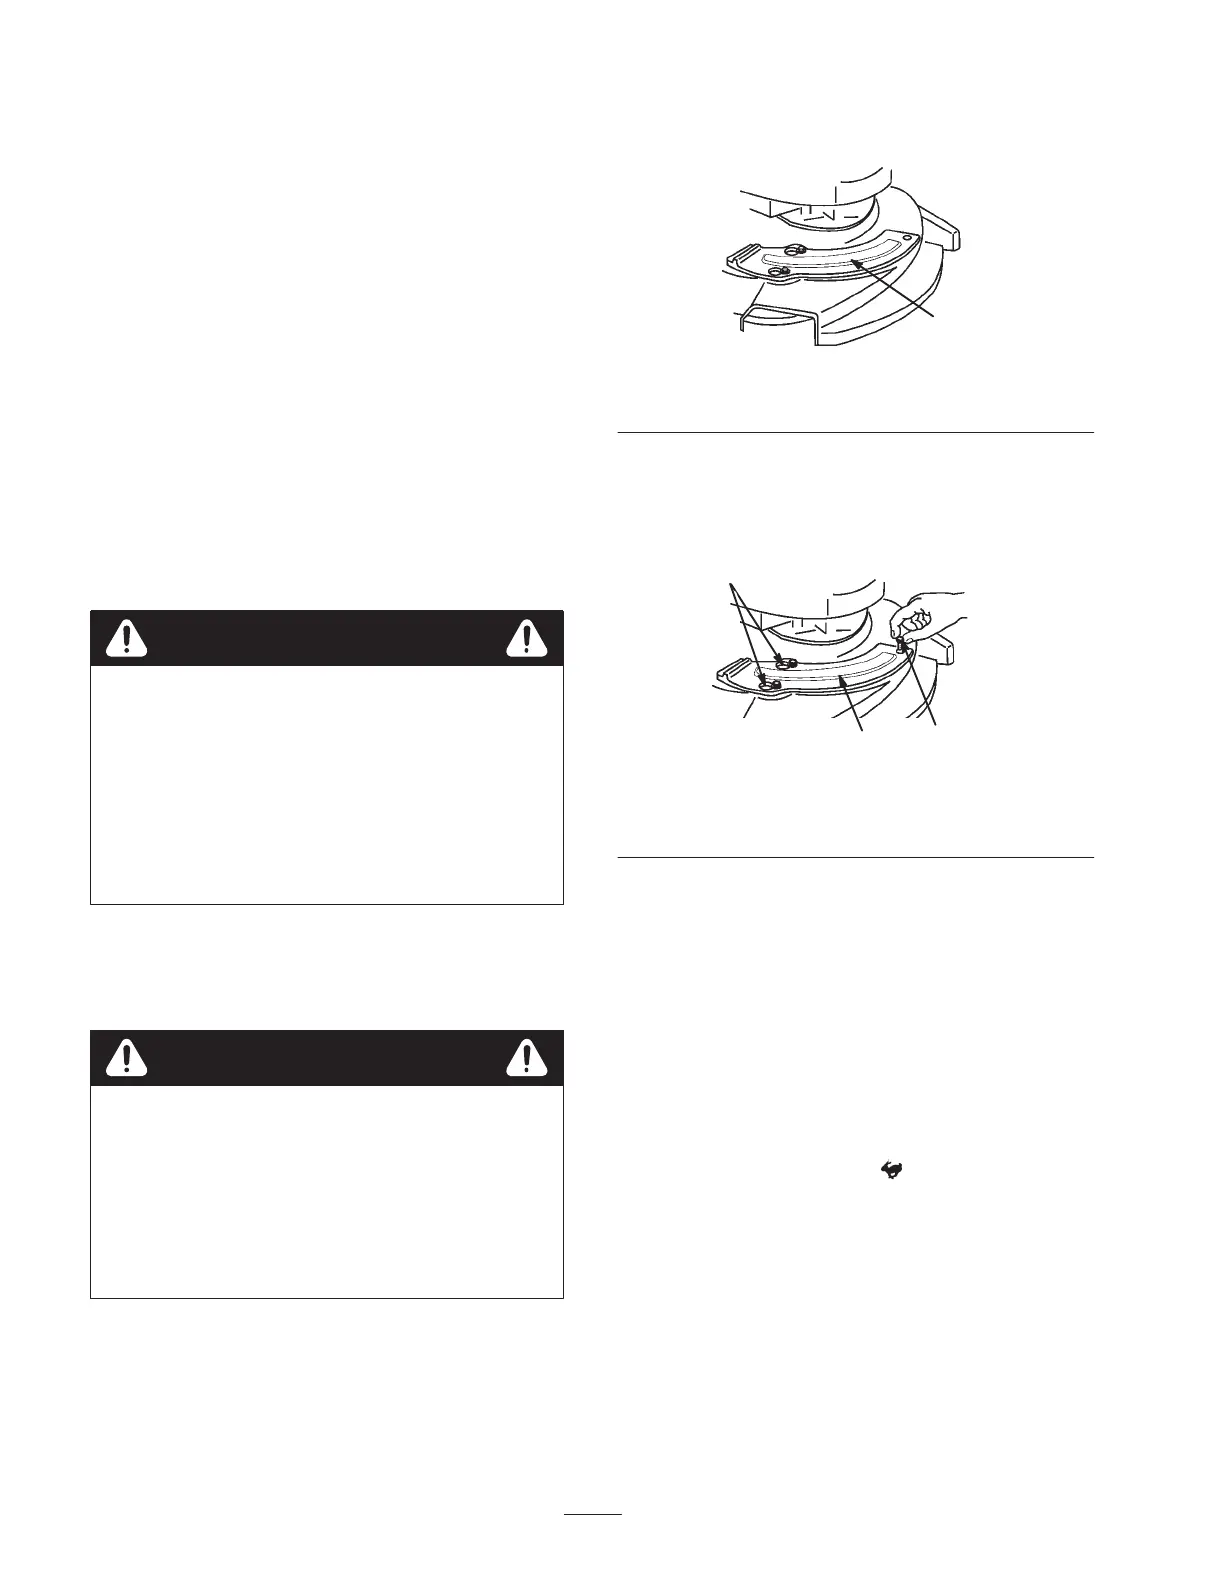
3. Insert the mulch plate into the housing opening
(Fig. 40).
1123
1
Figure 40
1. Mulch plate
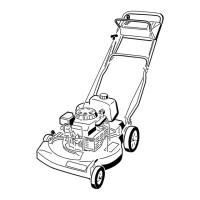
Note: You do not need to loosen or remove the two
shoulder bolts on the housing that protrude through the
slotted holes in the mulch plate. The mulch plate moves
over the shoulder bolt heads (Fig. 10).
1755
3
1
2
Figure 41
1. Mulch plate
2. Shoulder bolts
3. Cap screw
4. Slide the mulch plate clockwise to install it or
counterclockwise to remove it.
5. Secure the mulch plate with the cap screw (Fig. 41).
6. Connect wire to the spark plug.
Note: Use only a genuine Lawn-Boy replacement cutting
blade. Other blades may strike the mulch plate when you
start and run the engine.
Mulching Operation
Move the throttle control to the (Fast) position.
Cutting the grass at the maximum engine speed provides
the best possible mulching of grass and leaves.
To achieve the best mulching action, set the cutting height
so that no more than a third of the grass stem is cut off or
a maximum of one-inch (25 mm) long clippings. If you
attempt to mulch more or if the grass is very lush, the
mulching action will be poor. Under these conditions, use
the side discharge or catch the grass clippings instead of
mulching them.



 To Next Page