Page 8
Hardware Used In This Step
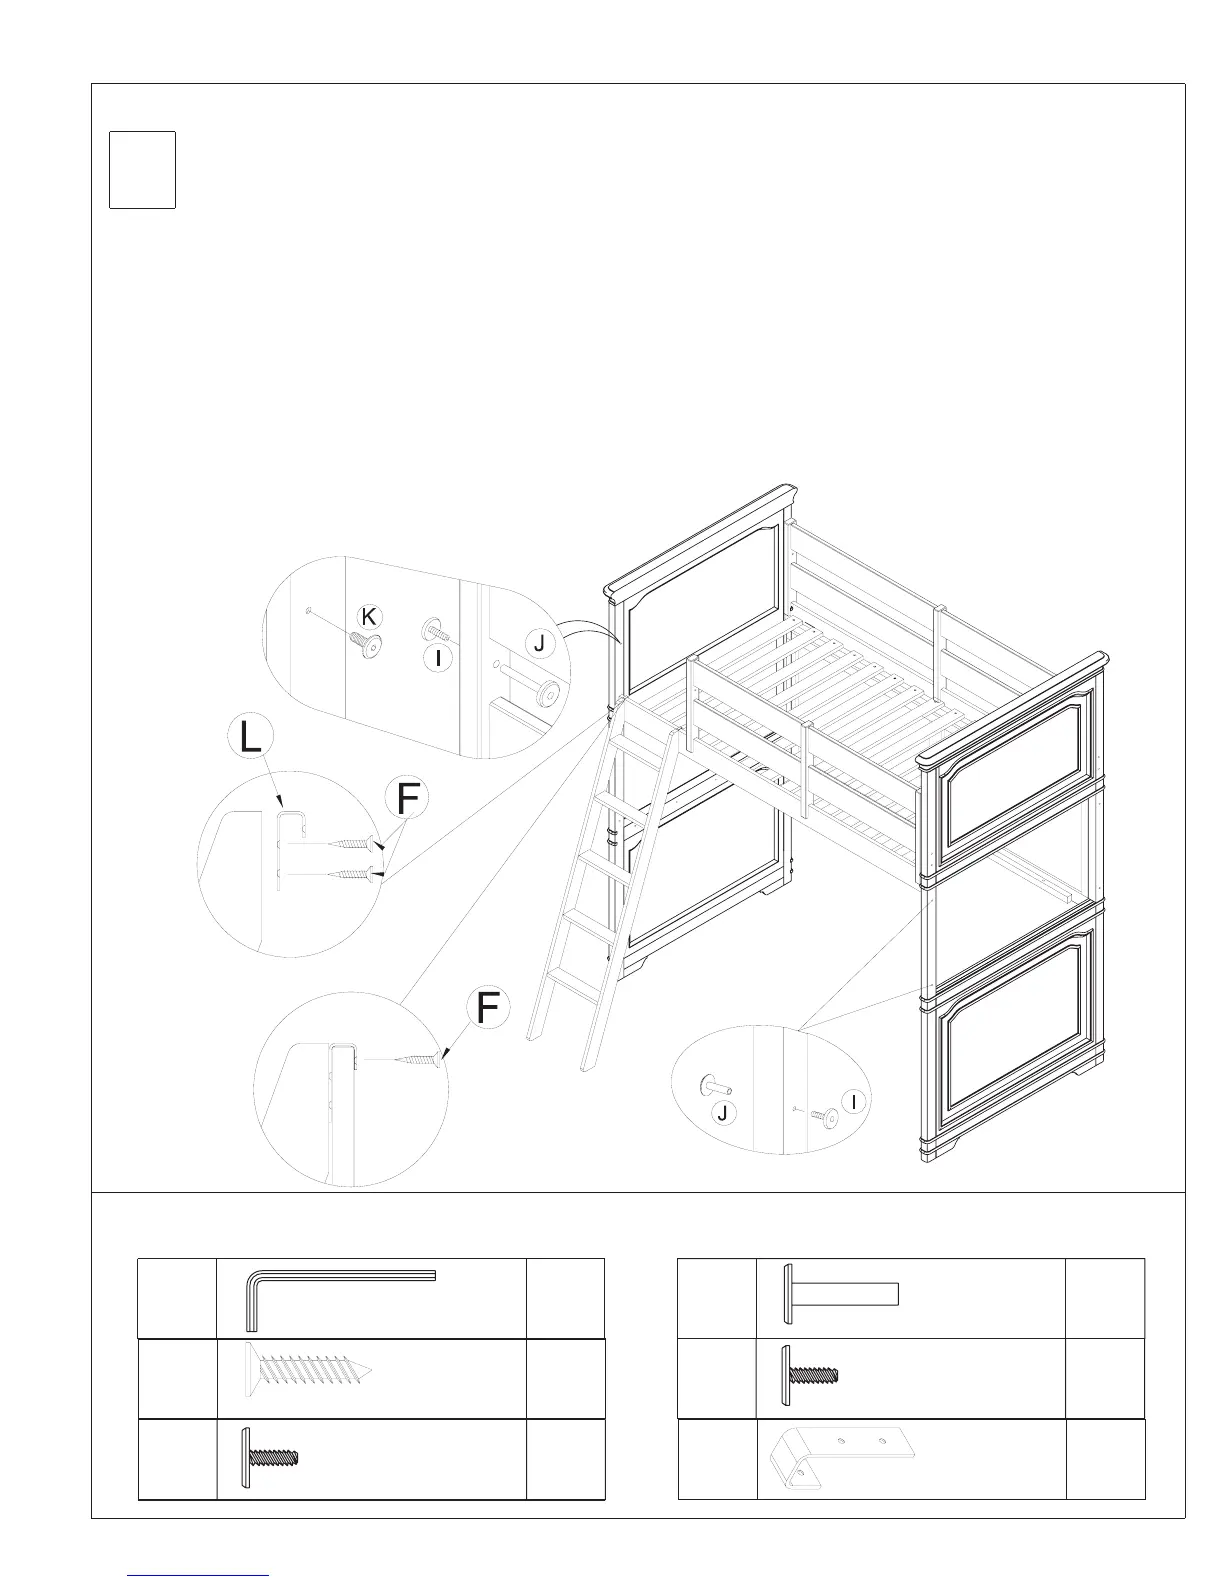
Step
5
1. Select the and attach the ( ) to each end at the top of the
using two ( ) for each ( ) as illustrated ( ).
2. Position the in place by hooking it over the top edge of the in the location
shown. Secure the in place by screwing a ( ) through each
( ). See .
3. Use the ( ) to tighten ( ) and ( ) to tighten
each ( ) and ( ) to cover the unused holes in the
and as shown ( ).
4. Use the ( ) to tighten each ( ) and ( ) to
cover the unused holes in the ( ).
5. Be sure to note the in the back of this booklet. In order to
avoid the possibility of falling or entrapment, these specifications must be strictly followed.
Ladder Ladder Hooks L Ladder
3/4” Wood Screws F Ladder Hook L Figure 1
Ladder Bed Rail
Ladder 3/4” Wood Screw F
Ladder Hook L Figure 2
Hex Wrench D Connector Bolt K Hex Wrenches D
Connector Bolt I Connecting Nut J Short
Guard Rail Bed End Figure 3
Hex Wrenches D Connector Bolt I Connecting Nut J
Posts Figure 4
BEDDING SPECIFICATIONS
5mm Hex Wrench
Qty
D
ID #
2
F
Qty
ID #
6
3/4” Wood Screw
5
Qty
ID #
I
Connector Bolt 1/4” x 18mm
Connecting Nut 1/4” x 30mm
Qty
J
ID #
5
1
Qty
ID #
K
Connector Bolt 5/16”x3/4”
L
Qty
ID #
2
Ladder Hook
Figure 3
Figure 1
Figure 2
Figure 4
 Loading...