4
Step
Hardware Used In This Step
Page 7
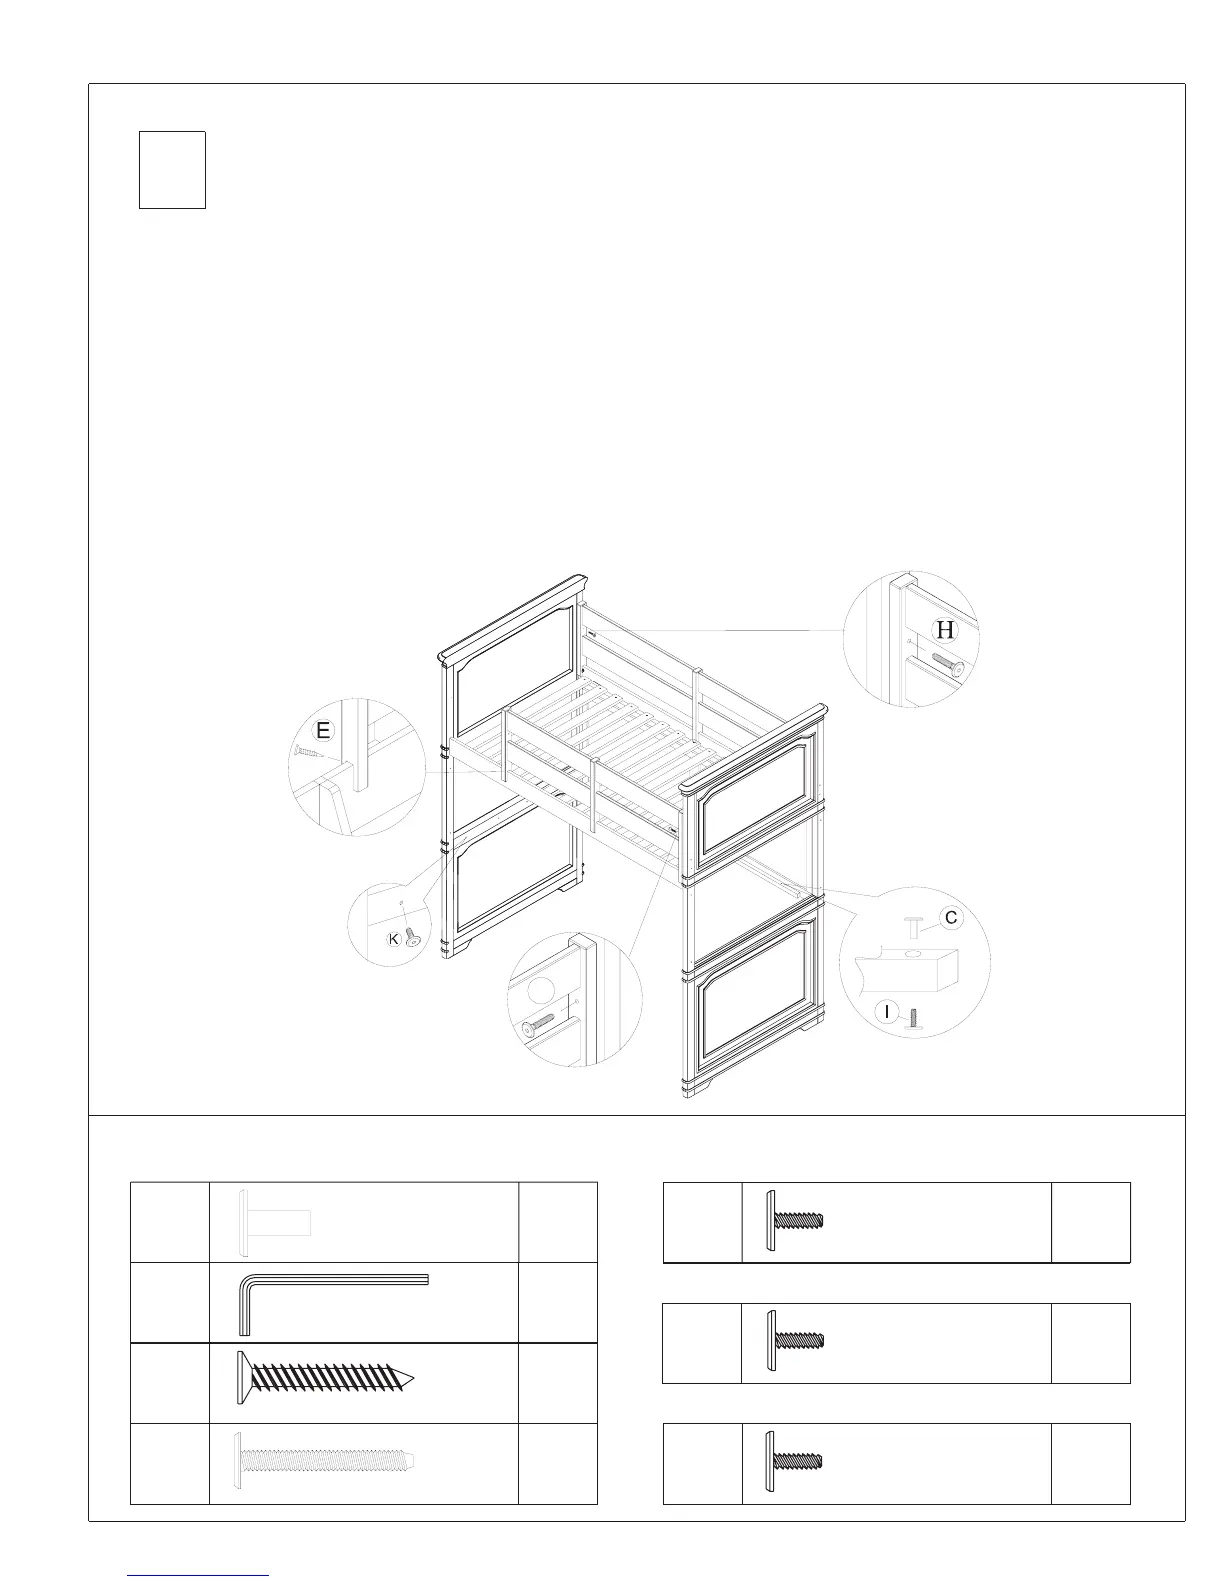
1. Position the onto the as shown.
2. Use a ( ) to tighten the ( ) to each end of the
and into the ( ).
3. Position the onto the . : The position of the ladder
should be decided prior to attaching the .
4. Use the ( ) to tighten the ( ) to one end of the
(opposite side of the Ladder opening) into the as shown (
).
5. Use the ( ) to tighten the ( ) to cover the unused holes
in the interior of the lower ( ).
6. Screw the ( ) through the predrilled holes located on the back side of
the ( ). If the is placed next to a wall, the
should be placed against the wall.
7. Use the ( ) to install the ( ) and ( )
to cover the unused holes in the cleat that is attached to the ( ).
Long Guard Rail Bed Rail
Hex Wrench D Connecting Bolts H Long
Guard Rail Bed Ends Figure 1
Short Guard Rail Bed Rail Note
Short Guard Rail
Hex Wrench D Connecting Bolt H Short
Guard Rail Bed End Figure
2
Hex Wrench D Connecting Bolt K
Loft Bed Figure 4
1” Wood Screw E
Short Guard Rail Figure 3 Note: Bunk Bed
Long Guard Rail
Hex Wrenches D Connector Bolts I Connecting Nuts C
Cork Panel Figure 5
5mm Hex Wrench
C 3
ID #
Qty
Qty
D
ID #
2
1" Wood Screw
Qty
E
ID #
1
Connecting Nut 1/4” x 17mm
Qty
H
ID #
3
Connecting Bolt 5/16” x 2”
3
Qty
ID #
I
Connector Bolt 1/4” x 18mm
8
Qty
ID #
K
Connector Bolt 5/16” x 18mm
This quantity of the hardware is for the 3/3 Loft Bed
This quantity of the hardware is for the 4/6 Loft Bed
12
Qty
ID #
K
Connector Bolt 5/16” x 18mm
H
Figure 3
Figure 1
Figure 5
Figure 2
Figure 4
 Loading...