EasyManua.ls Logo

Leakwise ID-220 SERIES - User Manual

Leakwise ID-220 SERIES
92 pages
Print Icon
To Next Page IconTo Next Page
Loading...
LEAKWISE
®
Oil on Water Detection & Monitoring
ID-220 SERIES MODEL
SLC-220 Smart Leakwise Controller
&
SLR-220 Smart Leakwise Receiver
for Remote SLC-220’s
Connected to
Any ID-220 Sensor
USER GUIDE
Rev. 2.0 June 2018
With 2
nd
Generation of Main and Outputs Boards
And Firmware Version 4.1 and later

Questions and Answers

  • P
    petersashleyAug 13, 2025
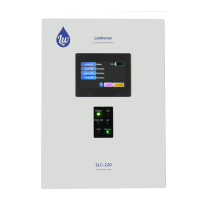
    What to do if the Leakwise ID-220 Controller LCD and power light are off?
    • M
      Ms. Sarah ThorntonAug 13, 2025
      If the LCD and/or power light are off, and there's no 4-20mA output or relay output change, check the following: * Verify the connection to the mains or power source and ensure the internal on-off switch is on. * Confirm the power supply conforms to the required specifications. * Check the wiring against the wiring diagram. * Inspect the relays: if the small LED on the left side of the relay doesn't change as expected, replace the faulty relay or the outputs board.
  • S
    Stephanie PearsonAug 20, 2025
    How to fix a Leakwise ID-220 showing an OIL indication when there is no oil?
    • K
      Kristin FinleyAug 21, 2025
      If your Leakwise Controller indicates oil presence when there is no oil, consider these potential causes and solutions: * Ensure the sensor is installed vertically. * If the sensor "jumps" due to turbulence, install the sensor assembly in a stilling tube or increase the response delay. * Check for and carefully release any entanglement of the flexible cable between the sensor and the stilling cage. * Recalibrate the system.
  • T
    Timothy ThompsonAug 25, 2025
    What to do if remote recorder receives less than 20mA from Leakwise ID-220?
    • J
      James HenryAug 25, 2025
      If the remote recorder receives less than 20mA when 20mA is expected, check the following: * Verify the analog output settings according to chapter 2.2.3. * Ensure the load is below 400 ohms; reduce it if necessary.
  • B
    Becky CollinsAug 28, 2025
    Why Leakwise ID-220 won't communicate with PC using SLC-Manager?
    • C
      Christopher CarpenterAug 28, 2025
      If you are experiencing communication issues between the Leakwise Controller and the PC with the SLC-Manager program, consider the following: * Verify that the serial port is set to 115200 Baud, 8 data bits, 1 stop bit, no parity, and no flow control. * Check the integrity of the communication cable and ensure correct connection of Tx and Rx wires (straight connection, not crossed).
  • J
    Jessica NelsonSep 1, 2025
    Why isn't the Leakwise ID-220 Controller's light or LCD indication changing with liquid status?
    • A
      apatelSep 1, 2025
      If a change in liquid status does not result in the appropriate lights or LCD indication, consider the following: * Ensure the liquid level is not less than the level specified in the Sensor Test Certificate. * Recalibrate the system. * Check and correctly set up the lights according to chapter 4.5.
  • D
    destiny53Sep 4, 2025
    What causes relay malfunctions in Leakwise ID-220 Controller when the LED is OK?
    • W
      williszacharySep 4, 2025
      If the relay malfunctions while the corresponding relay LED tracks the expected state, the cause may be a faulty relay. Replace the outputs board.
  • L
    Lauren CruzSep 8, 2025
    What to do if Leakwise ID-220 relay malfunctions and LED doesn't track the state?
    • M
      Mr. Thomas Bullock MDSep 9, 2025
      If the relay malfunctions and the corresponding relay LED does not track the expected state, the sensor thresholds or relay setup may be set improperly. Correct the settings.
  • B
    beverlyjohnsonNov 15, 2025
    Why is the FAIL indicator on for my Leakwise ID-220 Controller?
    • P
      Paul DiazNov 16, 2025
      The FAIL indicator may be on due to several reasons: * A faulty sensor. Check each channel to identify the faulty one. Try connecting the sensor to a known good channel to isolate the problem. * Improperly connected sensor. Verify the sensor cables against the wiring diagram. * Sensor out of calibration. Ensure the sensor signal is within the AIR and WATER limits; otherwise, recalibrate the channel. * Abnormal signal output from the sensor due to malfunction. Disconnect the sensor, connect it to an external 12 VDC power supply, and measure the DC current. Compare the readings to the Sensor Test Certificate. If they don't match, contact your distributor. * If safety barriers are installed, a safety barrier failure may have occurred. Check the resistance between points 1 and 3 of ...

Summary

Important Notes for Using a Leakwise System

Warnings

General Description

Block Diagram

Illustrates the functional overview of the SLC-220 system components and their interconnections.

SLC-220 Unit Types

Details the different models of SLC-220 units available, including Multi, Basic, and SLR-220.

System Configuration with Multiple Units

Illustrates how multiple SLC-220 units can be connected to form a larger system.

Installation

Sensor Installation

Instructions for placing and installing Leakwise sensors according to specific types.

Mounting and Wiring the SLC-220 Unit

Guidance on physically mounting and electrically connecting the SLC-220 controller unit.

Connecting the Power Cable

Step-by-step instructions for connecting the power supply to the SLC-220 unit.

Connecting Sensor Cables

Details on how to connect up to four Leakwise sensors to the SLC-220 terminal block.

Sensor Input LEDs and Hazardous Area Connections

Describes sensor input status LEDs and connections for hazardous area installations using safety barriers.

Connecting Analog Outputs

Instructions for connecting analog output boards for 4-20mA or 0-5V signals.

Configuring Analog Output Range

Explains how to set the range (4-20mA or 0-5V) for analog outputs using jumpers.

Connecting Relay Outputs

Guides on wiring relay outputs from the Outputs boards for sensor status indication.

Relay Output Terminal Assignments

Details terminal block assignments and contact types for relay outputs.

Managing Outputs Boards and Self-Test

Covers adding/removing output boards and performing self-tests.

Front Panel Status Lights and Buzzer

Explains the function and modes of front panel status lights and the on-board buzzer.

Changing Status Lights Modes

Instructions on how to change the operating mode of the status lights.

New Type of Lights Board and Buzzer Enable

Describes a new type of lights board and how to enable the on-board buzzer.

Connecting RS-485 SCADA Port

Details how to connect the SLC-220 to a SCADA system using Modbus via RS-485.

Connecting RS-485 Interconnect Port

Explains the RS-485 port for future SLC-220 networking and SLR-220 connections.

Connecting a PC via RS-232

Instructions for connecting a PC for setup, calibration, and monitoring using the SLC-Manager program.

Maximum Sensor Cable Lengths

Provides maximum allowable cable lengths for sensors based on area classification and wire gauge.

Cable Requirements and Safety Barriers

Details cable specifications for hazardous areas and Zener safety barrier information.

Sensor Signals, Processing & Calibration

Sensor Signal Description

Explains the three wires of the sensor cable and typical signal values for different sensors.

Set Points and Sensor Status Diagram

Illustrates the relationship between sensor signal values, set points, and status messages.

Status Decision Logic and Set Points

Details how the SLC-220 makes status decisions based on sensor signals and programmed parameters.

Status Descriptions and Parameter Definitions

Defines various sensor status indications and explains key calibration parameters.

Advanced Parameters and Calibration Rules

Covers hysteresis, over-range, under-range parameters, and essential calibration rules.

Using the SLC-Manager Program

SLC-Manager Program Installation

Guide to installing the SLC-Manager software on a PC.

SLC-Manager Entry Screen

Describes the initial screen of the SLC-Manager software and its options.

System Access Levels and Connection Status

Explains user access levels, connection status indicators, and serial number/firmware version display.

Main Sensors View Screen

Shows the main screen displaying the status and signal of all connected sensors.

Sensor Settings Screen Overview

Introduces the screen for viewing and changing individual sensor parameters.

Editing Sensor Parameters

Details how to change sensor parameters like name, model, calibration, and alarms.

Advanced Sensor Settings and Save Options

Explains advanced sensor parameters, season setting, and saving/loading options.

Basic and Advanced Sensor Parameters

Details parameters like threshold, filter level, alarm cycles, and readings.

Sensor Filter Levels and Current Readings

Explains sensor filter levels and displays current sensor positive and negative readings.

Viewing Sensor Outputs

Shows how to view the status of relays and 4-20mA outputs associated with a specific sensor.

SLC-220 General Settings

Covers general parameters for the SLC-220 unit, including sensors, lights, and outputs.

Relay Fail-Safe, Outputs, and Communication Settings

Details relay fail-safe modes, 4-20mA output control, and MODBUS settings.

Technician Password and Power Supply Voltage

Explains technician password settings and displays power supply voltage for viewing.

Advanced SLC-220 Parameters

Covers advanced parameters such as administrator password, hysteresis, and test mode.

Battery Status and Sensor Supply Limits

Details low battery thresholds and legal limits for sensor supply current.

Using the Optional Front Panel LCD

System Overview Screen

Displays sensor status, names, and a bar-graph for each active sensor.

Editing Parameters via LCD Keypad

Shows how to use the LCD keypad for editing sensor names and other parameters.

LCD Keypad Modes and Numeric Input

Demonstrates switching between character and numeric keypads on the LCD.

LCD Operation Notes

Provides notes on self-test, saving changes, PC connection behavior, and display backlight.

Using the Optional GSM Modem

GSM Modem Status Message Format

Defines the format of SMS status messages sent by the SLC-220.

GSM Modem Notes and SIM Card Installation

Provides notes on GSM modem behavior, message handling, and SIM card installation.

GSM Configuration Messages

Explains message formats for configuring GSM users and active sensors.

Configuring Sensor Name and Update Interval

Details how to set sensor names and message re-send intervals for GSM communication.

Configuring Sensor Sample Interval

Explains how to set the interval for turning on and sampling specific sensors via GSM.

GSM Calibration Messages

Describes message formats for setting calibration points and seasons via GSM.

GSM Calibration Commands and Confirmation

Covers automatic calibration, writing calibration data, and confirmation messages.

GSM Inquiry Messages

Details message formats for inquiring about user, calibration, sensor, season, and status information.

Testing the GSM Modem

Instructions on how to test the GSM modem functionality and verify user settings via the LCD.

Setting GSM Users via LCD

Shows the LCD interface for configuring user phone numbers and notification preferences.

SLR-220;SGM Overview

SLR-220 Sensor Configuration Examples

Provides examples of how the SLR-220 can support various combinations of local and remote sensors.

SLR-220 Remote Sensor Data Handling

Explains how SLR-220 handles data from remote sensors and potential error messages.

Troubleshooting Guide

Troubleshooting Common Issues

Provides solutions for common problems like no power, no communication, or relay malfunctions.

Troubleshooting Relay and Status Issues

Addresses issues with relay malfunctions, incorrect status indications, and oil indications.

Troubleshooting Sensor Failures and Connections

Covers troubleshooting sensor failures, connection problems, and safety barrier issues.

Appendix A: Installation in Hazardous Area

Hazardous Area System Diagram

Shows a diagram illustrating the installation setup in a hazardous area with safety barriers.

Hazardous Area Installation Notes and Barrier Specifications

Provides notes on installation compliance and specifications for shunt Zener safety barriers.

Appendix B: Connecting a PC to SLC-220

PC Connection Setup (RS-232 and USB)

Guides on connecting a PC using RS-232 or USB-to-Serial converters and Device Manager.

Configuring Communication Settings for PC Connection

Details how to configure communication settings in SLC-Manager for PC connection.

Appendix C: Updating SLC-220 Firmware

Firmware Update Procedure

Step-by-step guide on how to update the SLC-220 firmware using a PC.

Verifying Firmware Update and Settings

Instructions on verifying the firmware version and saving settings after an update.

Troubleshooting Firmware Update Failures

Provides steps to resolve firmware update failures, including installing a temporary jumper.

Appendix D: Ferrites for EMC Compatibility

Ferrites on SLC-220 Power Cable

Shows installation of ferrites on the SLC-220 power cable for EMC compatibility.

Ferrites on Sensor Cables (ID-221; ID-225)

Details ferrite installation on sensor cables for EMC compatibility.

Ferrites on Sensor Cables (ID-223; ID-227)

Details ferrite installation on sensor cables for EMC compatibility.

Appendix E: SLC-220 Drawings

Enclosure Drawings

Provides mechanical drawings of the SLC-220 enclosure.

SLC-220 Enclosure Details

Detailed views of the SLC-220 enclosure, including component placement.

SLC-220;Multi Enclosure Drawings

Mechanical drawings specific to the SLC-220/Multi enclosure.

Enclosure Drawings for Specific Models

Drawings for specific enclosure models, including mounting and thread details.

Enclosure Drawings for N7;BASIC Models

Drawings for N7/BASIC enclosure models, detailing dimensions and materials.

Enclosure Drawings for MULTI;EExd Models

Drawings for MULTI/EExd enclosure models, including safety and material specifications.

Wiring Diagrams

Shows the overall wiring diagram for SLC-220 sensor connections and power.

Wiring Diagram - Outputs Boards Connection

Illustrates the wiring connections for the SLC-220 outputs boards, relays, and analog outputs.

Wiring Diagram - 12-24 VDC Sensors Connection

Details the wiring diagram for 12-24VDC power input and sensor connections.

Wiring Diagram - Analog Outputs and Relays

Shows analog output and relay wiring details for the outputs boards.

Leakwise ID-220 SERIES Specifications

General IconGeneral
BrandLeakwise
ModelID-220 SERIES
CategoryController
LanguageEnglish

Related product manuals