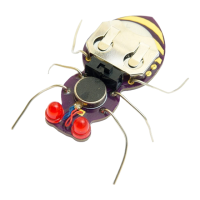
Next comes the On/Off Switch. This part
can be placed in either way, it is the circuit
board that makes the logic connection to
the bug on and off. Solder all three
connections. Then snip the extra length of
the switch.
4.
5.
STEP 4: ON/OFF SWITCH
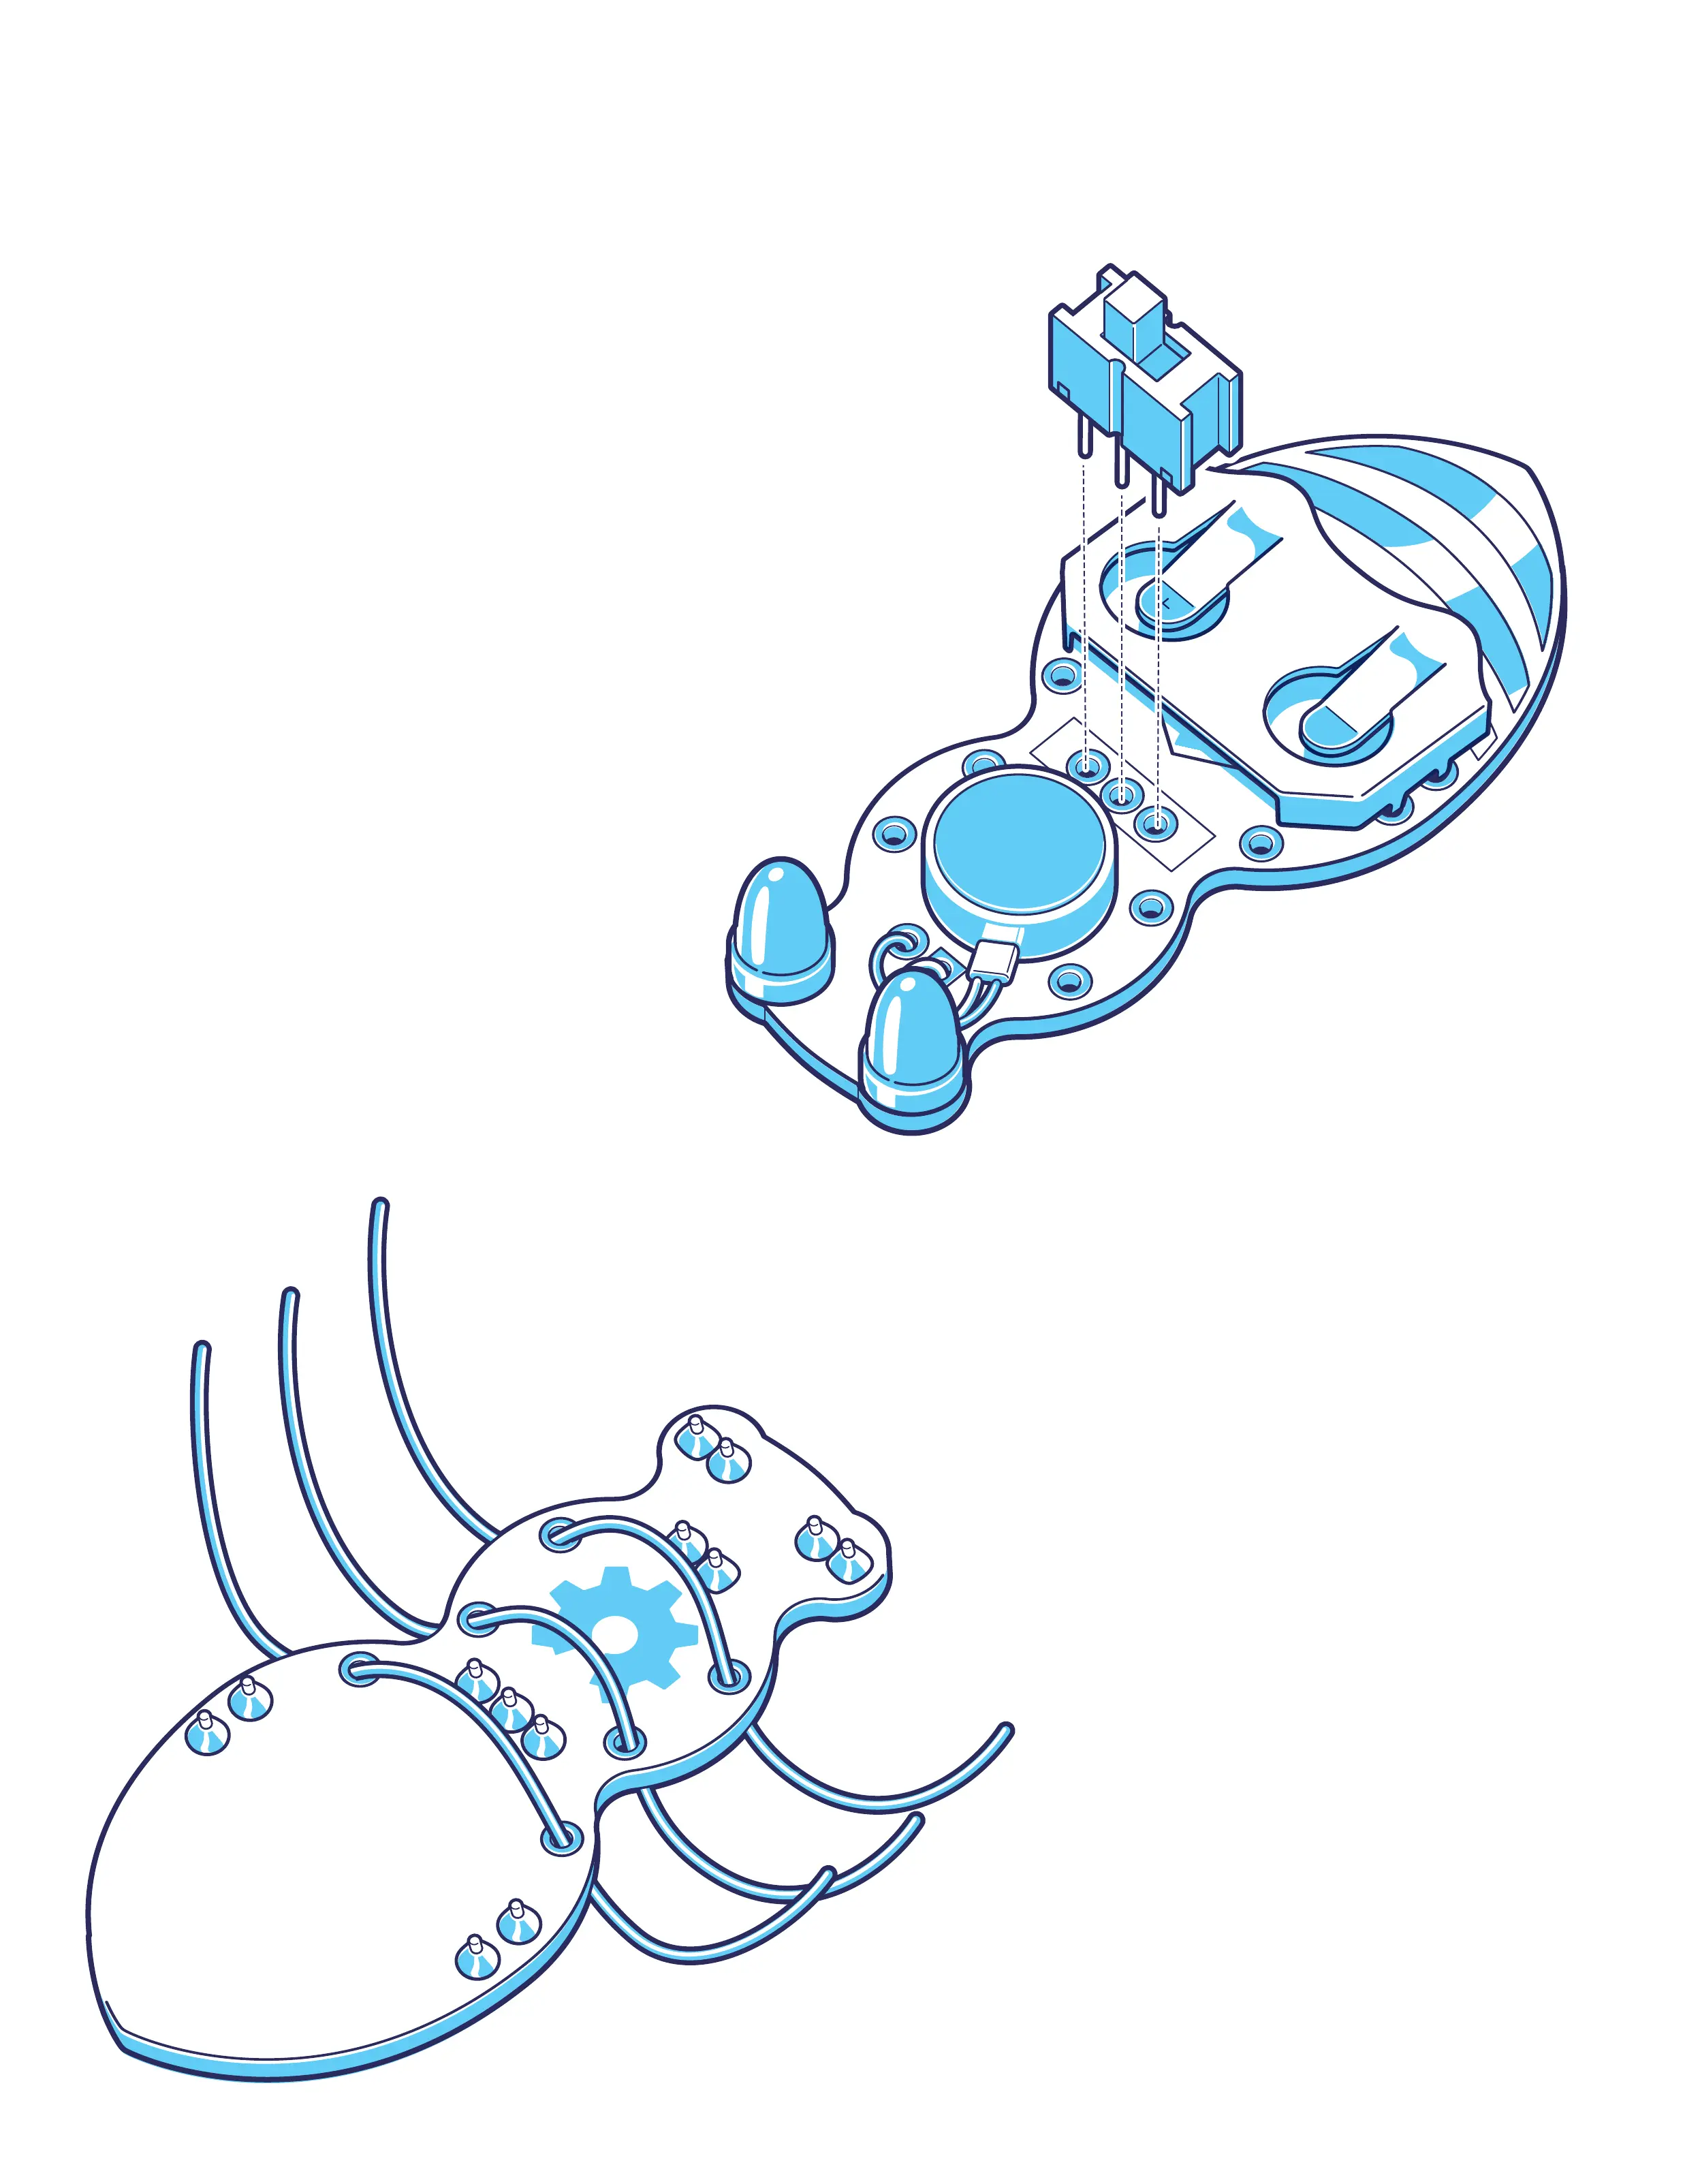
Now time for the legs! Unroll the
length of wire and cut it into three
parts. Thread each one through the
top, under the bottom, and back out
the top. It takes a little wiggling to get
it into place. Once you have the wire
placed solder each connection. Then
cut the legs to your desired length.
Make sure all legs make contact with
the table surface when flipped over.
STEP 5: LEGS
BE CAREFUL! COVER THE BOARD WITH
YOUR HAND SO THE BITS DON’T GO
FLYING AND MAKE SURE YOU’RE
WEARING YOUR SAFETY GLASSES.