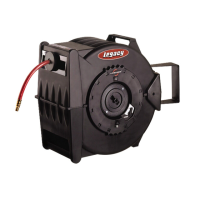
Levelwind Reels
Latch Pawl & Spring Replacement in Latch Sideplate:
Tools Required:
• Phillips Screw Driver
• 3/4” Socket Wrench or 3/4” Combination Wrench
1) Lay reel on its side with latch sideplate (8) facing you.
2) Place wrench on hex in center of tension cover (9). HOLD WRENCH FIRMLY, DO NOT
ALLOW SPRING TO UNWIND UNCONTROLLED.
3) Remove two Phillips screws fastening the tension cover to the latch sideplate.
4) Carefully unwind tension by allowing the tension plate to rotate counter-clockwise
and keep track of the number of complete revolutions as you unwind the spring.
5) Remove tension cover from drum axle shaft.
6) While placing fingers on grooves located on the top and bottom of sideplate (3),
depress locking tabs at the same time with thumbs. Rotate sideplate either way until
sideplate unlocks. Remove sideplate.
7) Turn sideplate so the inside is exposed. Use fingers to pinch tabs of mode lever and
remove lever from latch pawl. Remove spring ends from latch pawl and sideplate.
8) Use Illustration (next page) to position spring ends in latch pawl and sideplate.
Position the latch pawl correctly using illustration, and push mode lever thru
sideplate and into pawl. Be sure locking tabs have fully locked thru pawl. Try flipping
mode lever to be certain pawl is moving correctly, and positions match those shown
in illustration.
9) To ease installation of the latch sideplate, place the latch switch in “Free Run” position.
Replace sideplate so that the plate snaps flush ot side of reel. Turn sideplate until
locking tabs connect to sideplate.
10) Place tension cover on drum axle shaft, and rotate clockwise the number of turns
that you counted when you unwound the tension. Replace screws.
11) Place switch in “Latching” position and return the reel to service.
Lubrication & Pumping Equipment • Hose & Hose Reels
Legacy Manfacturing Company • 6281 N. Gateway Dr. • Marion, IA 52302 • Ph: 319.373.7305 • Fx: 319.373.7309 • sales@legacymfg.com • www.legacymfg.com
rev. 11-10-08
 Loading...