Figure R1, magnification.
The bolts required for the installation of the rear rack have been supplied with the bike. CAUTION: Bolts need to be installed
straight, at a 90 degree angle to the frame and it is easy to screw them into the frame. If bolts are inserted at an incorrect angle it
will feel hard to screw them in. Stop immediately to avoid damage to the frame thread. Unscrew the bolt and try again. It may not
be possible to repair a damaged frame thread.
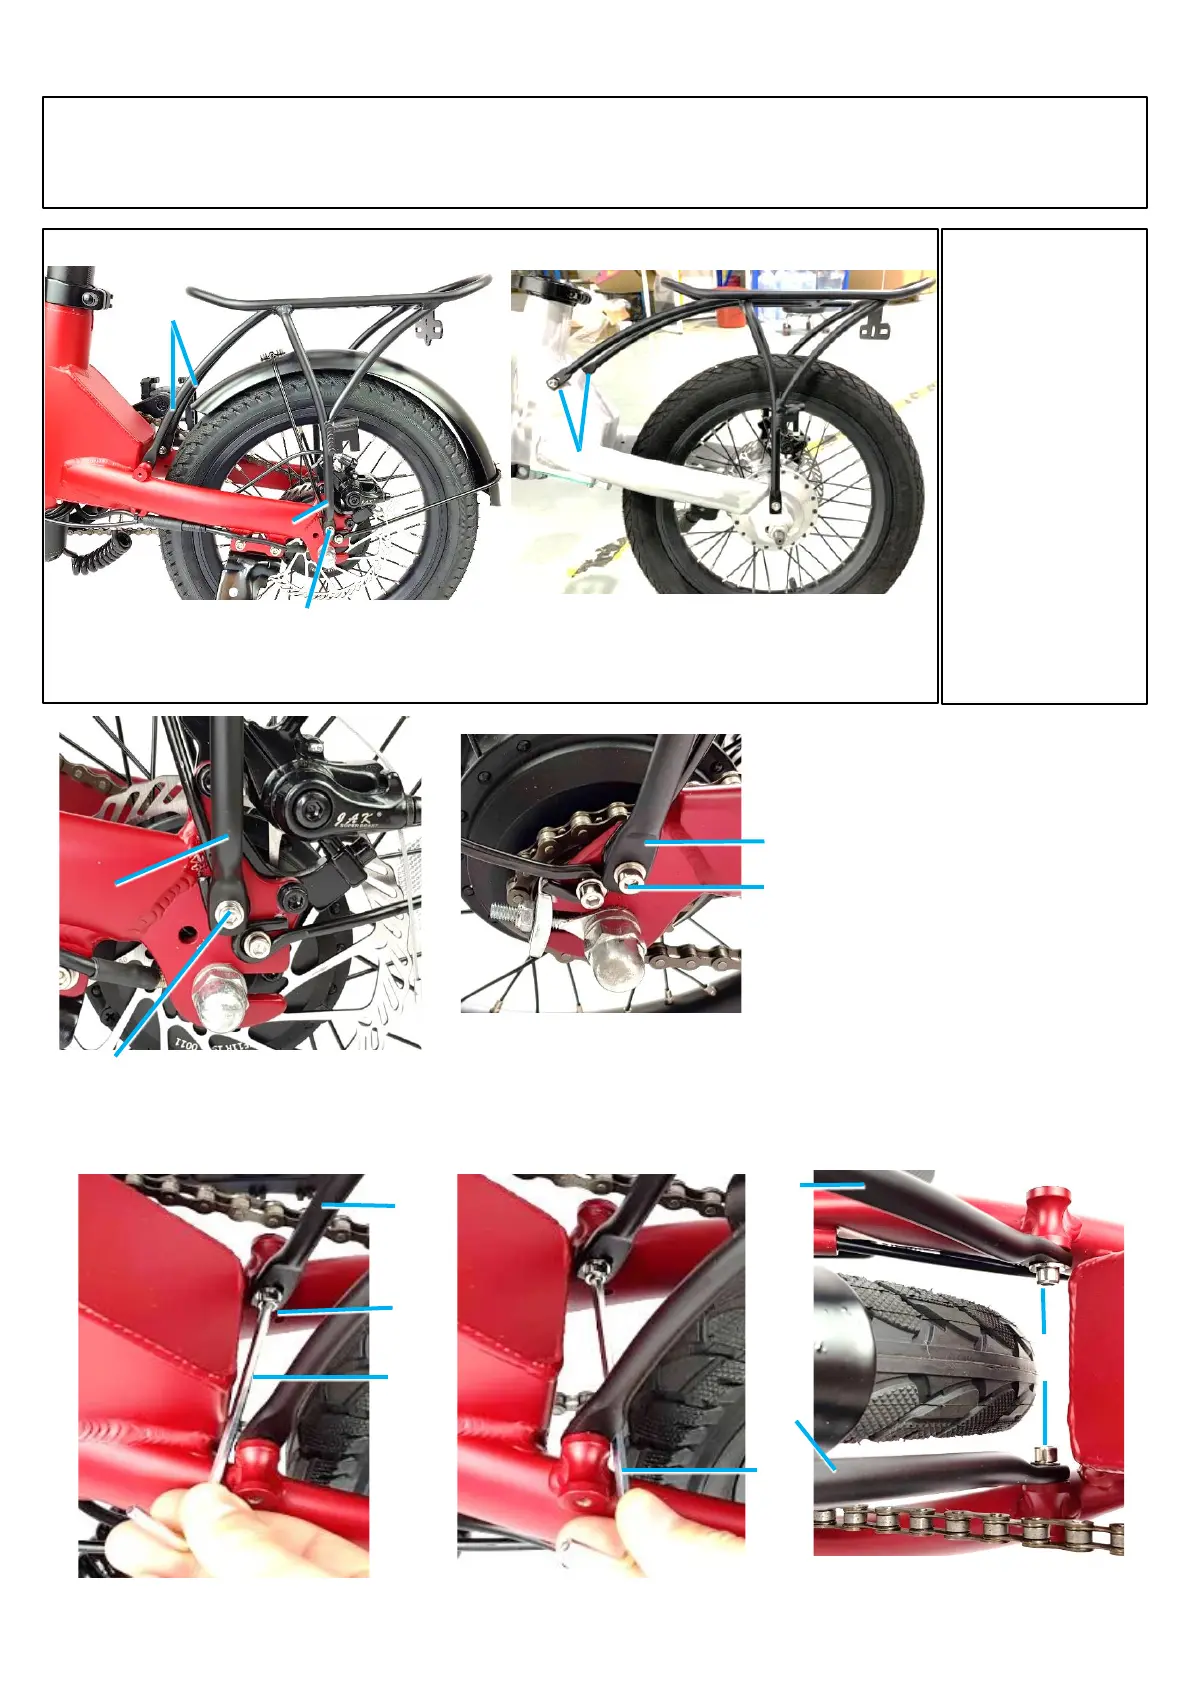
Installation of the rear rack (optional, sold separately)
1
1
© Leitner Pty Ltd 2020
12
Figure R1: RackAriaINNER: The front arms (5)
attach to the inside of the the frame near the rear
wheel.
1
• Attach the left rear arm (2) using a
washer and bolt (1).
• Attach the right rear arm (3) using a
washer and bolt (4).
• RackAriaOUTER: To attach the
front arms (8) use a washer and
bolt and an Allen key.
• RackAriaINNER: To attach the front
arms (5) use a washer and bolt (6)
and an Allen key (7). It takes some
patience to install the bolts (6) as it
is a bit tricky to reach. Don’t use
force to avoid damaging the frame.
Make sure the bolts (6) are straight,
at a 90 degree angle to the frame.
Use the Allen key (7) at a flat angle
as shown in figures R3 and R4. I
2
2
3
4
5
Figure R2: Rear rack, view
from the right.
5
5
6
Figure R5: Installed front arms (5),
view from the top. RackAriaINNER.
6
5
7
7
Figure R3: Installation of front arms (5)
using an Allen key (7). RackAriaINNER.
Figure R4. RackAriaINNER.
Figure R6: RackAriaOUTER: The front arms (8) attach
to the outside of the the frame near the seat tube.
8
The two versions of the rear rack
WARNING! Make
sure that the rear
rack is installed
securely before use.
Tighten all bolts to 16
Nm. The rack must
not rub against the
chain. Test before
riding. Maximum
weight limit on rear
rack: 20kg. Make
sure that your
luggage does not
affect the bike
negatively and that it
is not getting caught
in spokes which
could cause serious
injury or damage.