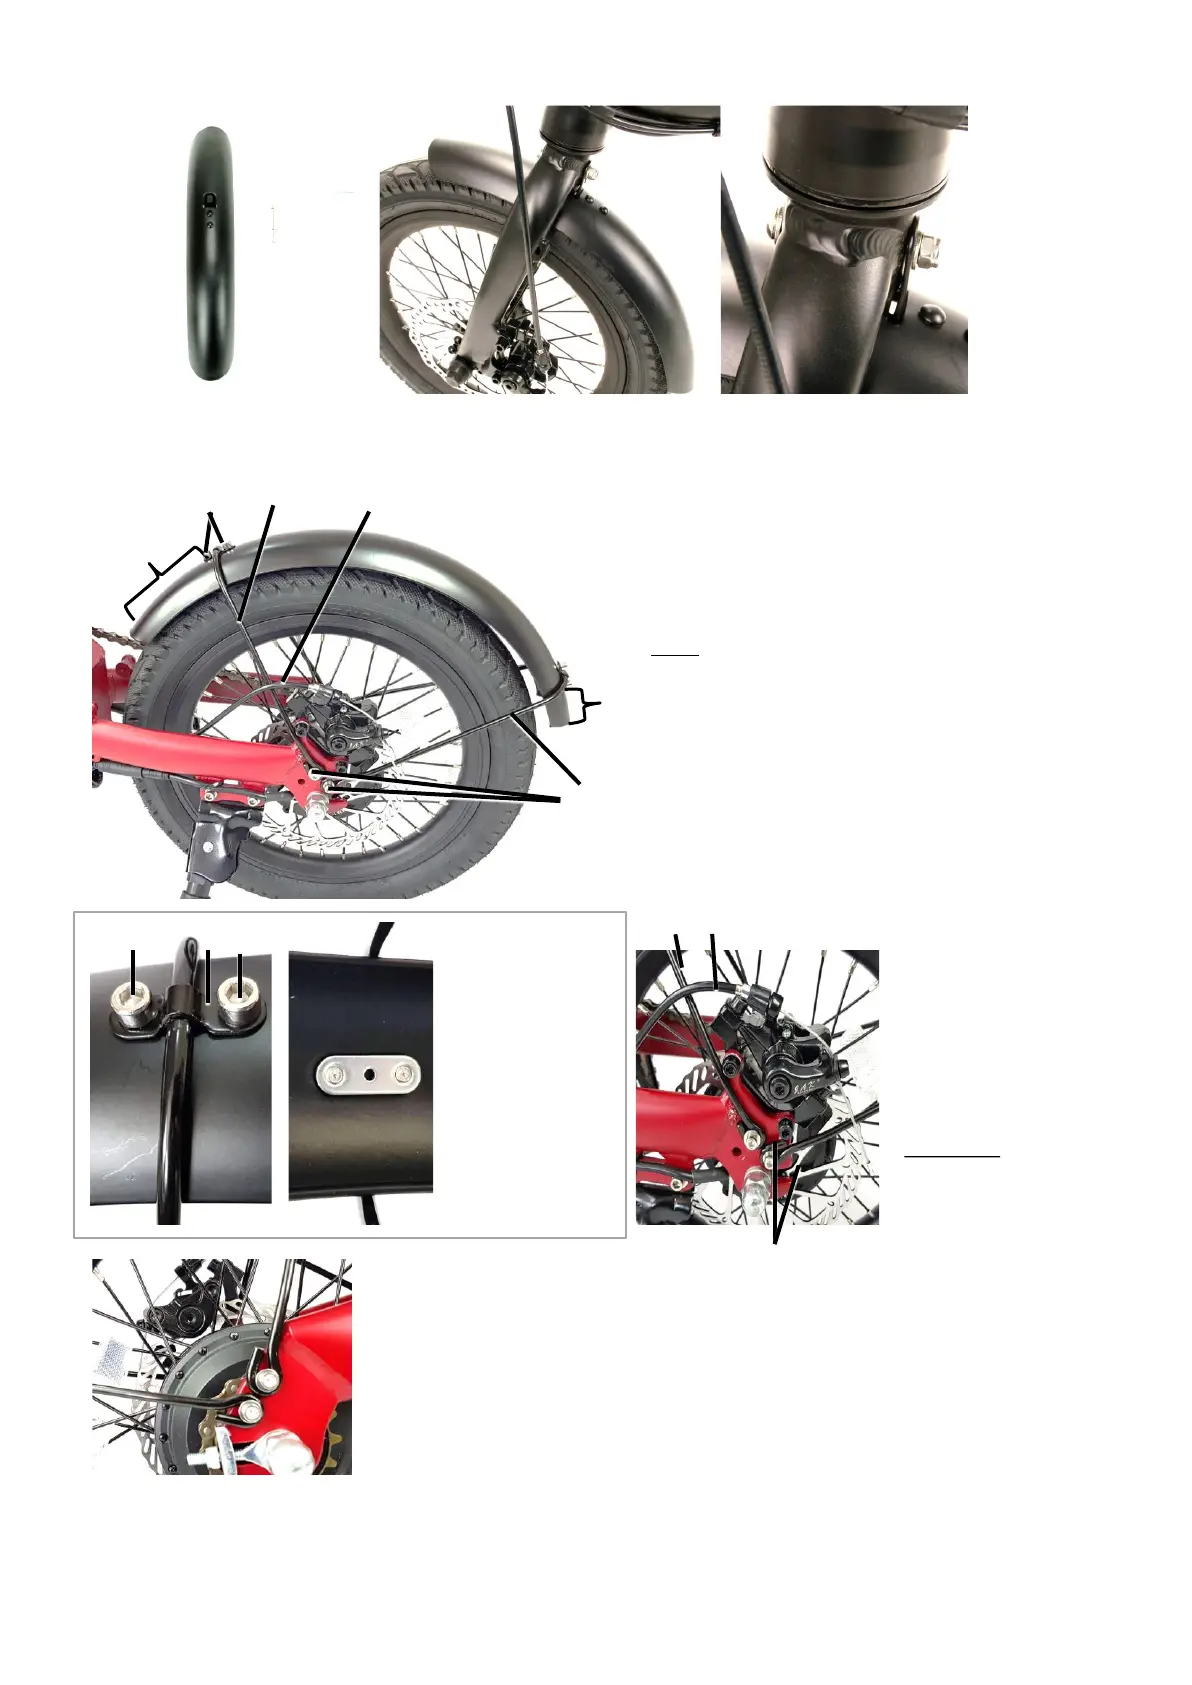
Installation of the front mudguard (optional)
Installation of the rear mudguard (optional)
WARNING! The mudguards must be installed securely.
Wheels must not rub on mudguards. Test before riding.
Maintenance. Steel mudguards may corrode. To
prevent corrosion, treat with a rust preventative,
especially if scratched.
Keep any spare bolts. You will need them for the
installation of other optional accessories such as the
rear rack.
Figure M2: Correctly installed rear mudguard.
Read instructions carefully before installing to
avoid time-consuming mistakes.
Long part (1) facing forward. Short part (2) facing
backward.
Short wire (3) at front. Short wire must be on the
inside of the brake cable (7). Long wire (4) at back.
Short bolts (5) (5 mm thread length) to attach
wire to mudguard. Longer bolts (6) (10 mm thread
length) and washer to attach wire to frame.
CAUTION: If it is feels hard to screw bolts into the
frame, stop immediately. Unscrew the bolt and try
again, inserting the bolt at a 90 degree angle.
Using force may damage the threads on the frame
which may not be possible to repair. Threads
damaged during installation are not covered under
warranty.
1
2
3
4
5
6
7
Figure M3: Left:
Correctly attached
wire to mudguard
(view from top).
Use two small bolts
(5) with 5mm
thread length, black
washer (8).
Right: View from
bottom. Use silver
washer (9) at
bottom.
Figure M4: Correctly
attached wires to
frame. Left side of
bike). Use longer
bolts (6) with 10mm
thread length and
washer. Front wire
(3) must be
underneath brake
cable (7).
3
7
6
5
8
9
Figure M5:
Correctly attached
wires to frame.
(Right side of bike).
© Leitner Pty Ltd 2020
11
5