4
Loading Labels Getting to Know Leitz Icon Software
For details on all of the Leitz Icon Software features, click Help.
Printing Labels
Using the Leitz Icon printer, you can print a wide variety of adhesive labels as well as non-adhesive
name badges, notes, and appointment cards.
This section describes how to print a basic Address label. For detailed information about printing
other types of labels, refer to the Leitz Icon Software Help (available from the Help menu).
1. Click to start Leitz Icon Software.
2. Click Address on the label selection pane.
The label selection pane expands to display the available types of Address labels.
3. Click Address Label.
The label selection pane expands to display the available Address label templates.
4. Click Address Label.
The label selection pane collapses and an Address label is displayed.
5. Click once on the displayed label to edit the text.
6. Type an address or other text on the label.
7. If desired, use the formatting pane to change the text formatting.
8. Click Print to print the label.
Additional Information
Visit the Leitz website at www.leitz.com/icon for additional information, including the latest
software, firmware, user guides, news, and FAQs.
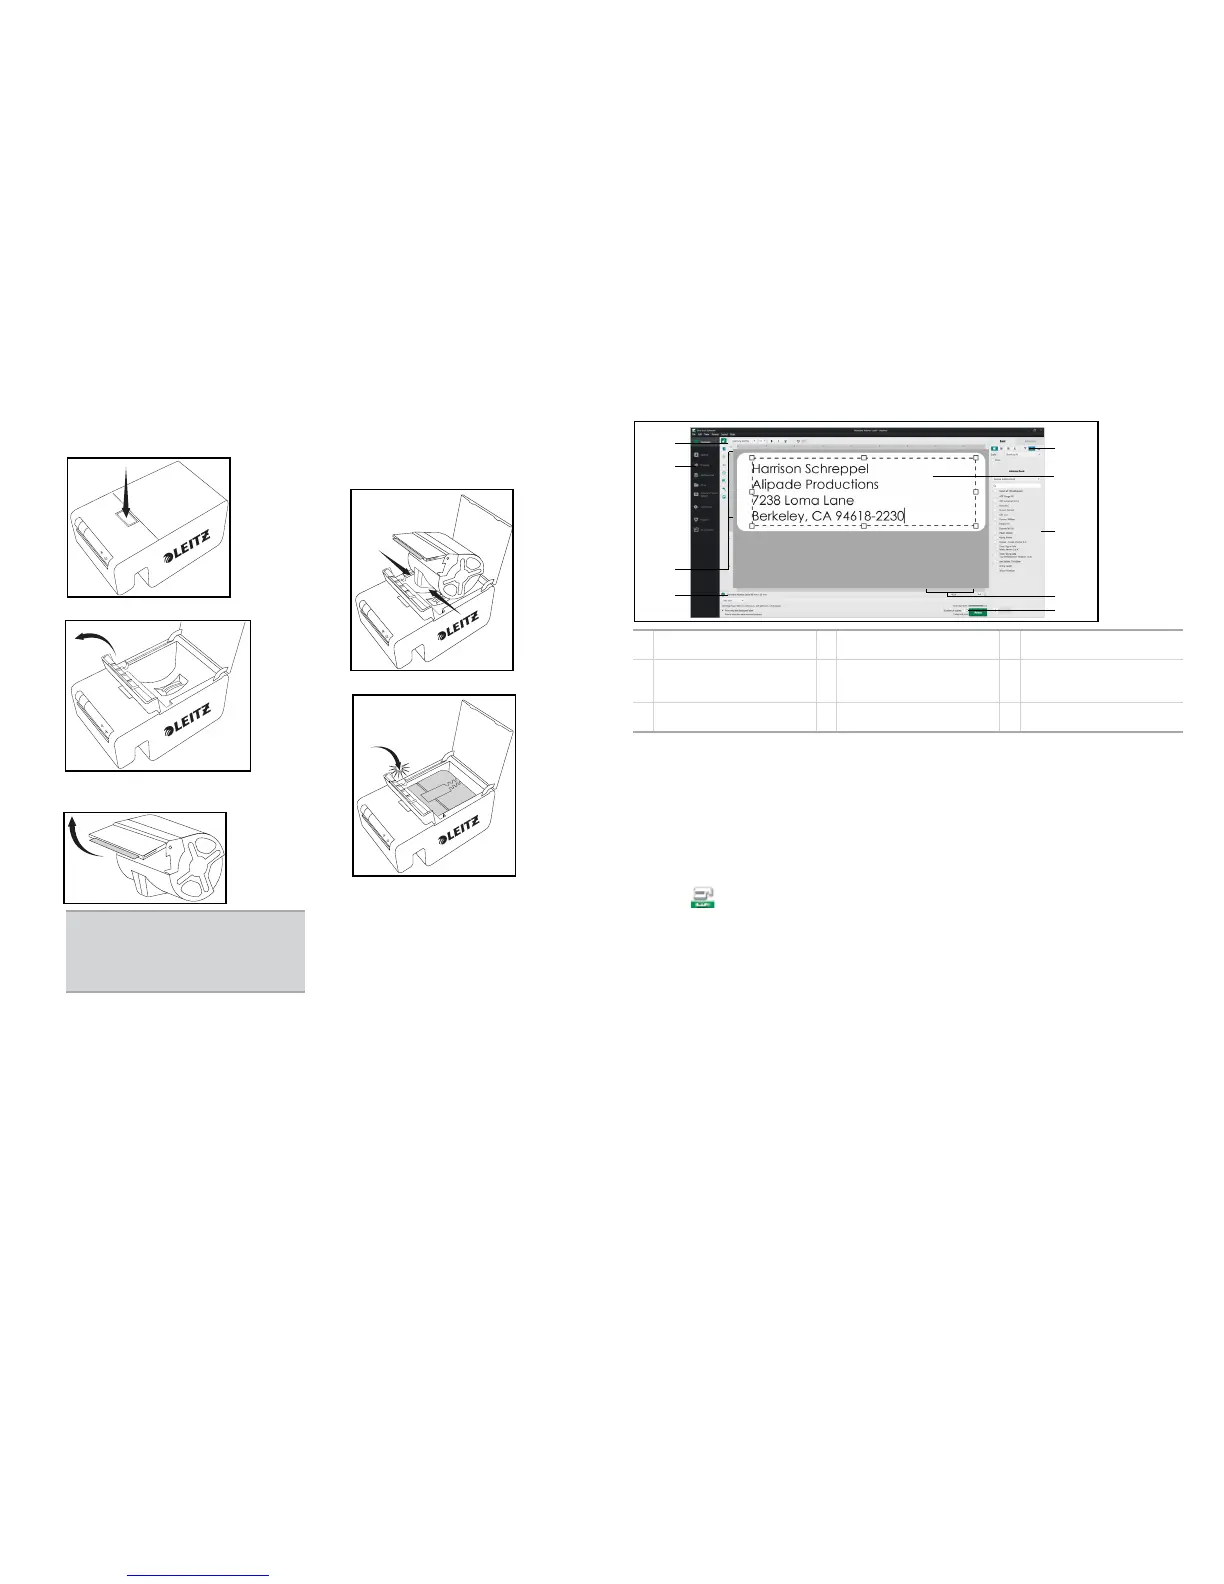
A Select a printer D Lock/unlock label design G
Create a custom Address Book
or use your Mac Contacts
B
Add addresses, text, counters,
the date and time, barcodes,
shapes, or images
E
Format objects and customize
object properties
H Zoom the displayed label
C
Select the label category, type,
and template
F Edit the label I Print a label
Copyright
© 2014 Esselte IPR AB. All rights reserved.
Leitz, Leitz Icon, Smart Labeling System, Intelligent Label Cartridge are trademarks of Esselte IPR AB or its affiliates.
Windows and Windows XP are registered trademarks of Microsoft Corporation in the United States and other
countries.
The DYMO and DYMO Label trademarks are registered trademarks of Sanford, LP. Esselte is not affiliated with,
endorsed, or sponsored by Sanford, LP.
Revised 10/2014
1. Push the button on the top of the printer to
open the cartridge door.
2. Lift the label guide latch as shown.
3. Pull open the folding label guide on the
label cartridge until it locks into place.
4. Place the cartridge into the printer as
shown. Make sure the cartridge is
centered and seated securely in the
printer.
5. Lower the label guide latch.
6. Close the cartridge door.
The printer automatically feeds the labels
to the starting position.
NOTE
Avoid handling the cartridge
identification chip as this may
damage the chip. If the chip becomes
damaged, the label cartridge may not
work properly.
 Loading...
