6
Version:1.0
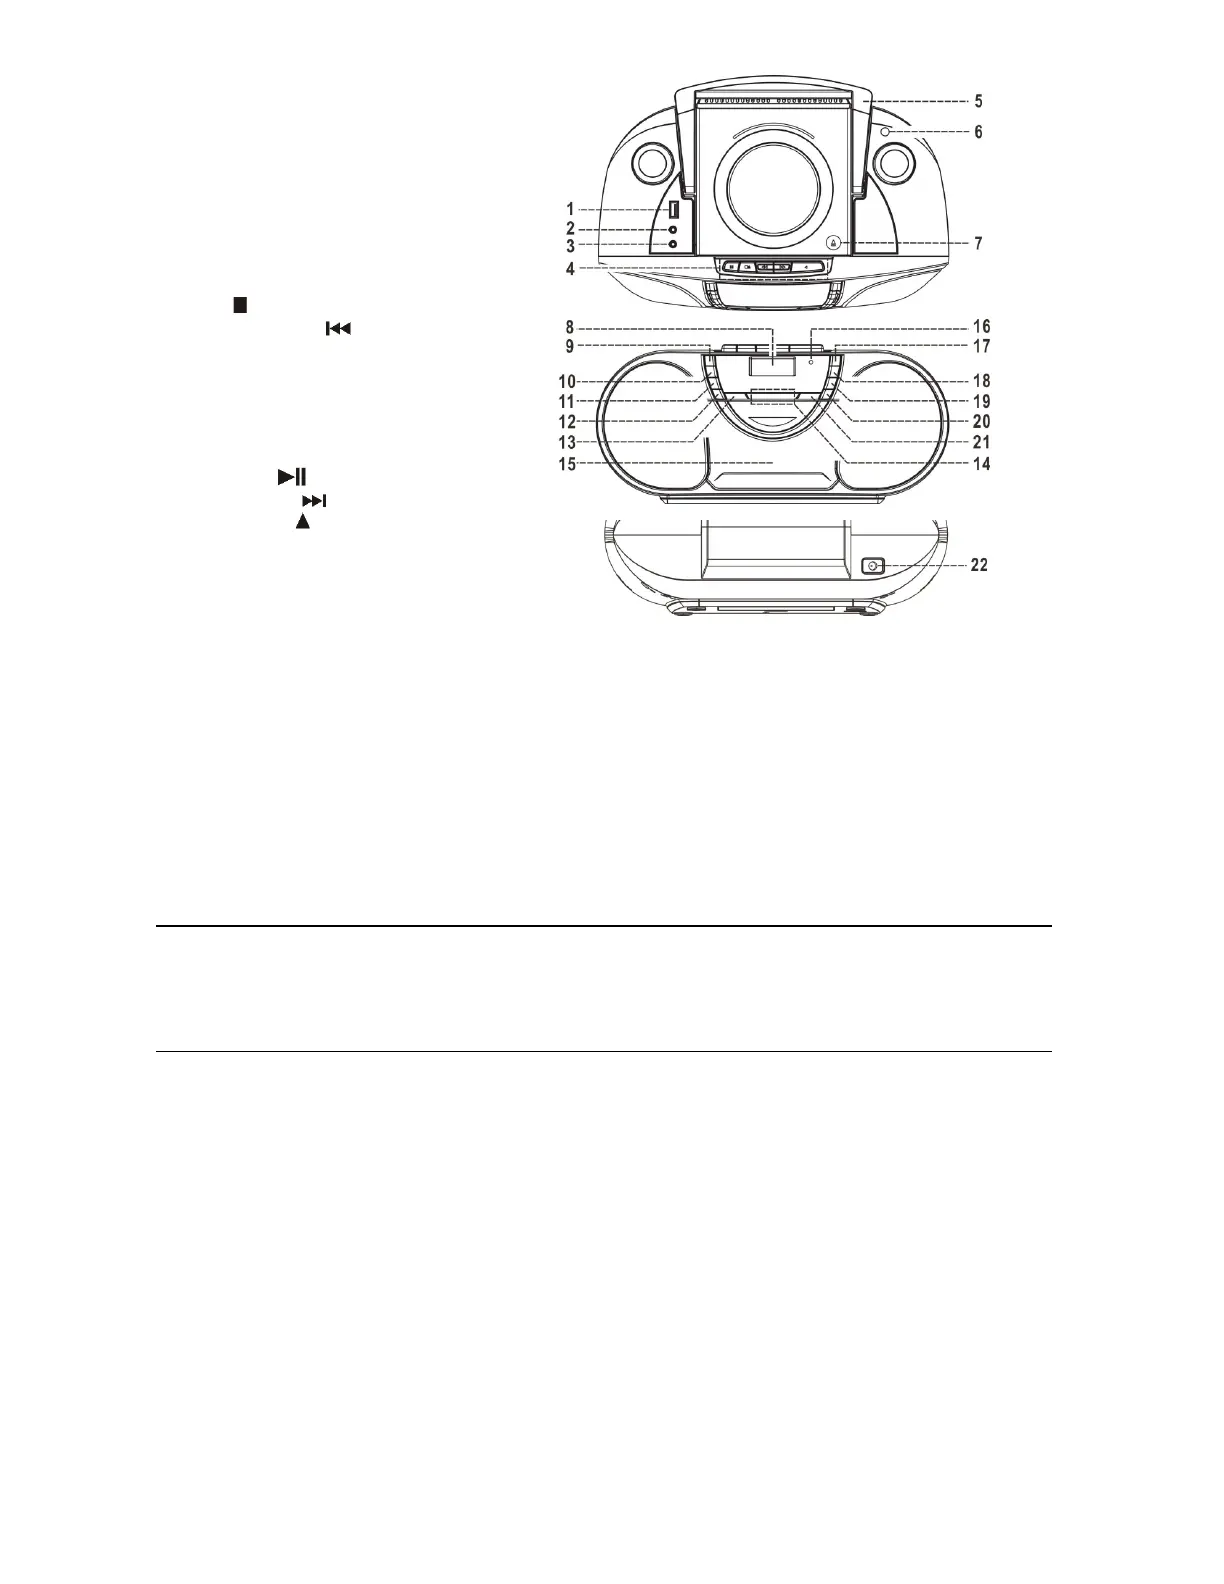
LOCATIONOFCONTROL
1) USBsocket
2) Auxinsocket
3) 3.5mmheadphonejack
4) Cassettebutton
5) Handle
6) FMantenna
7) CDdooropen/close
8) LCDdisplay
9) Functionbutton
10) Stop /Enterbutton
11) Skip/Tuningdownbutton
12) Menu/Mem/clock‐adjustbutton
13) Timerbutton
14) Volumeup/downbutton
15) Cassettedoor
16) StandbyLED
17) On/Offbutton
18) Play/pause /Scanbutton
19) Skip/tuningupbutton
20) Pre/Folderup button
21) Info/Playmodebutton
22) DCjack
Caution:
Usage of controls or adjustments or performance of procedures other than those specified herein may result in hazardous
radiationexposure.
Thisunitshouldnot
beadjustedorrepairedbyanyoneexceptqualifiedservicepersonnel.
Important:
Since movementof thecd mechanism andthe sensitivecircuitry maycause interferencetotheradio tuner nearby,switchthis
unitoffwhileoperatingotherradiodevices.
DuetothecomplexityofMCUcontrol,pleaseun‐plugthemainpowersupplyoftheunitiffoundtheunithangup
duringoperation!
Thisisnotamalfunctionofthesystem!
Precautionsforuse
Installation
Unpackallpartsandremoveprotectivematerial.
Donotconnecttheunittothemainsbeforecheckingthemainvoltageandbeforeallotherconnectionshavebeenmade.
Donotcoveranyventsandmakesurethatthereisaspaceofseveralcentimetersaroundtheunitfor
ventilation.
Connection
1. ConnecttheDCplugoftheincludedAC/DCadaptortoDCjack(22)thentheAC/DCadaptorconnecttotheACoutlet.
2. Whenyoufirstplugtheunitintothemains,theunitwillgointostandbymode.TheStandbyLEDwilllightup
3. Turn onthe unit
bypressing“On/Standby” button (17). If the LCD display (8) isonwith backlighting, it means thepower
supplyisnormal.Nowthesystemisreadytoplaythemusic.