Page 36
P-Blower/Limit Control S10/K25
Check blower control by operating unit through a heating
cycle. If blower recycles after demand is satisfied, control
should be adjusted. In any case, blower off" settings
above 90F will cause the blower to recycle frequently (af
ter a heating cycle) due to residual heat in the heat ex
change assembly. Blower off" settings above 90F may
also cause nuisance trips of secondary limit S10.
Before adjusting control, disconnect all power to unit. To
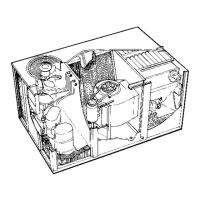
adjust the blower control, move the FAN ON" lever (figure
13) as needed so the FAN OFF" lever can be set. Con
trols in all GCS16, GCS16R and GCS16H units use a bi
metal surestart heater and the the FAN ON" lever is non
functional. Set the FAN OFF" lever to a position below
90F. Reassemble unit, reconnect power, and operate
unit through a heating cycle. If blower recycles after heat
ing demand, repeat procedure and adjust control to a low
er setting.
The limit setting is factory preset and must not be ad
justed.
VIII-INDOOR BLOWER
OPERATION / ADJUSTMENT
A-Blower Operation
NOTE - The following is a generalized procedure and
does not apply to all thermostat control systems.
1- Blower operation is dependent on the thermostat con
trol system option that has been installed in the
GCS16. Refer to the section Control System Op
tions" for detailed descriptions of blower operation.
2- Generally, blower operation is set at the thermostat
subbase fan switch. With the fan switch in the ON"
position, the blower operates continuously. With the
fan switch in the AUTO" position, the blower cycles
with demand (or, with some control systems, runs
continuously while the heating or cooling circuits
cycle).
3- In most cases, the blower and entire unit will be off
when the system switch is in the OFF" position. The
only exception is immediately after a heating demand
until blower control switches off.
B-Determining Unit CFM
1- The following measurements must be made with a dry
indoor coil. Run the blower without the cooling de
mand. Air filters must be in place when measure
ments are taken.
2- Measure static pressure external to the unit (from sup
ply to return).
To Measure Discharge Static Pressure:
a- Measure tap locations as shown in figure 36.
b- Punch a 1/4" diameter hole. Insert manometer
hose flush with the inside edge of hole or insula
tion. Seal around the hole with permagum. Con
nect the zero end of the manometer to the dis
charge (supply) side of the system. Connect the
other end of the manometer to the return duct as
above.
c- With only the blower motor running, observe the
manometer reading.
d- Seal around the hole when the check is complete.
3- The CFM can be adjusted by changing the motor
speed taps. Follow the blower speed change instruc
tions below.
FIGURE 36
STATIC PRESSURE TAP LOCATIONS
MANOMETER
UNIT
C-Blower Speed Adjustment
208v/230v ONLY
All -261, -311, -411 and -413 units (208/230V only) have
four speed leadless blower motors. The speed ports are
arranged as shown in table 17.
TABLE 17
FOUR SPEED BLOWER MOTORS
Speed Tap Number
Low
Medium-Low
Medium-High
High
Common
5
4
3
2
1
All -511, -513, -651 and -653 units (208/230V only) have
five speed leadless blower motors. The speed ports are
arranged as shown in table 18.
 Loading...