1
©2019 Lennox Industries Inc. Dallas, Texas, USA
INSTALLATION
INSTRUCTIONS
VRF SYSTEMS
507906-01
09/2019
THIS MANUAL MUST BE LEFT WITH THE
OWNER FOR FUTURE REFERENCE
Shipping and Packing List
Check the components for shipping damage. If you nd
any damage, immediately contact the last carrier.
Package 1 of 1 contains the following:
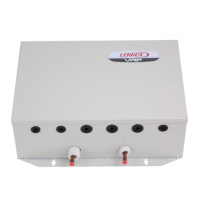
1 - Assembled AHU Control Kit box
1 - Receiver/Digital Display wiring harness
1 - Receiver/Digital Display box
4 - Temperature sensors (T1, T2, T2A, T2B) and
connection wiring harnesses
T1 - Room return air temperature sensor
T2 - Mid-coil sensor
T2A - Coil inlet sensor (cooling mode)
T2B - Coil outlet sensor (cooling mode)
7 - Plastic zip ties for sensor mounting
4 - ST3.9x25 mounting screws
3 - Temperature sensor mounting sockets
3 - Temperature sensor mounting socket clips
3 - Temperature sensor insulation sleeve
1 - Installation and operation manual
2 - Straight pipe/adaptor pipe
AHU Control Kit
These instructions are intended as a general guide and do
not supersede local codes in any way. Consult authorities
having jurisdiction before installation.
CAUTION
As with any mechanical equipment, contact with sharp
sheet metal edges can result in personal injury. Take
care while handling this equipment and wear gloves and
protective clothing.
To ensure proper system performance and reliability,
Lennox does not recommend operation of VRF sys-
tems during any phase of construction. Construction
debris, low temperatures, harmful vapors, and opera-
tion of the unit with misplaced lters can damage the
units. Failure to follow these guidelines will result in the
warranty being voided.
WARNING
Improper installation, adjustment, alteration, ser vice
or maintenance can cause property damage, personal
injury or loss of life.
Installation and service must be performed by a li censed
professional HVAC installer, service agency or the gas
supplier.
Failure to follow safety warnings and these instruc tions
exactly could result in property damage, dan gerous
operation, serious injury, or death.
Any additions, changes, or conversions required in order
for the appliance to satisfactorily meet the ap plication
needs must be made by a licensed profes sional HVAC
installer (or equivalent) using factory-specied parts.
Do not use this system if any part has been under water.
A ood-damaged appliance is extremely dan gerous.
Immediately call a licensed professional HVAC service
technician (or equivalent) to inspect the system and to
replace all controls and electrical parts that have been
wet, or to replace the system, if deemed necessary.
IMPORTANT
The Clean Air Act of 1990 bans the intentional venting
of refrigerant (CFC’s and HCFC’s) as of July 1, 1992.
Approved methods of recovery, recycling or reclaiming
must be followed. Fines and/or incarceration may be
levied for non-compliance.
Designs with these kits require approval by the
Lennox VRF Applications Team prior to installation.