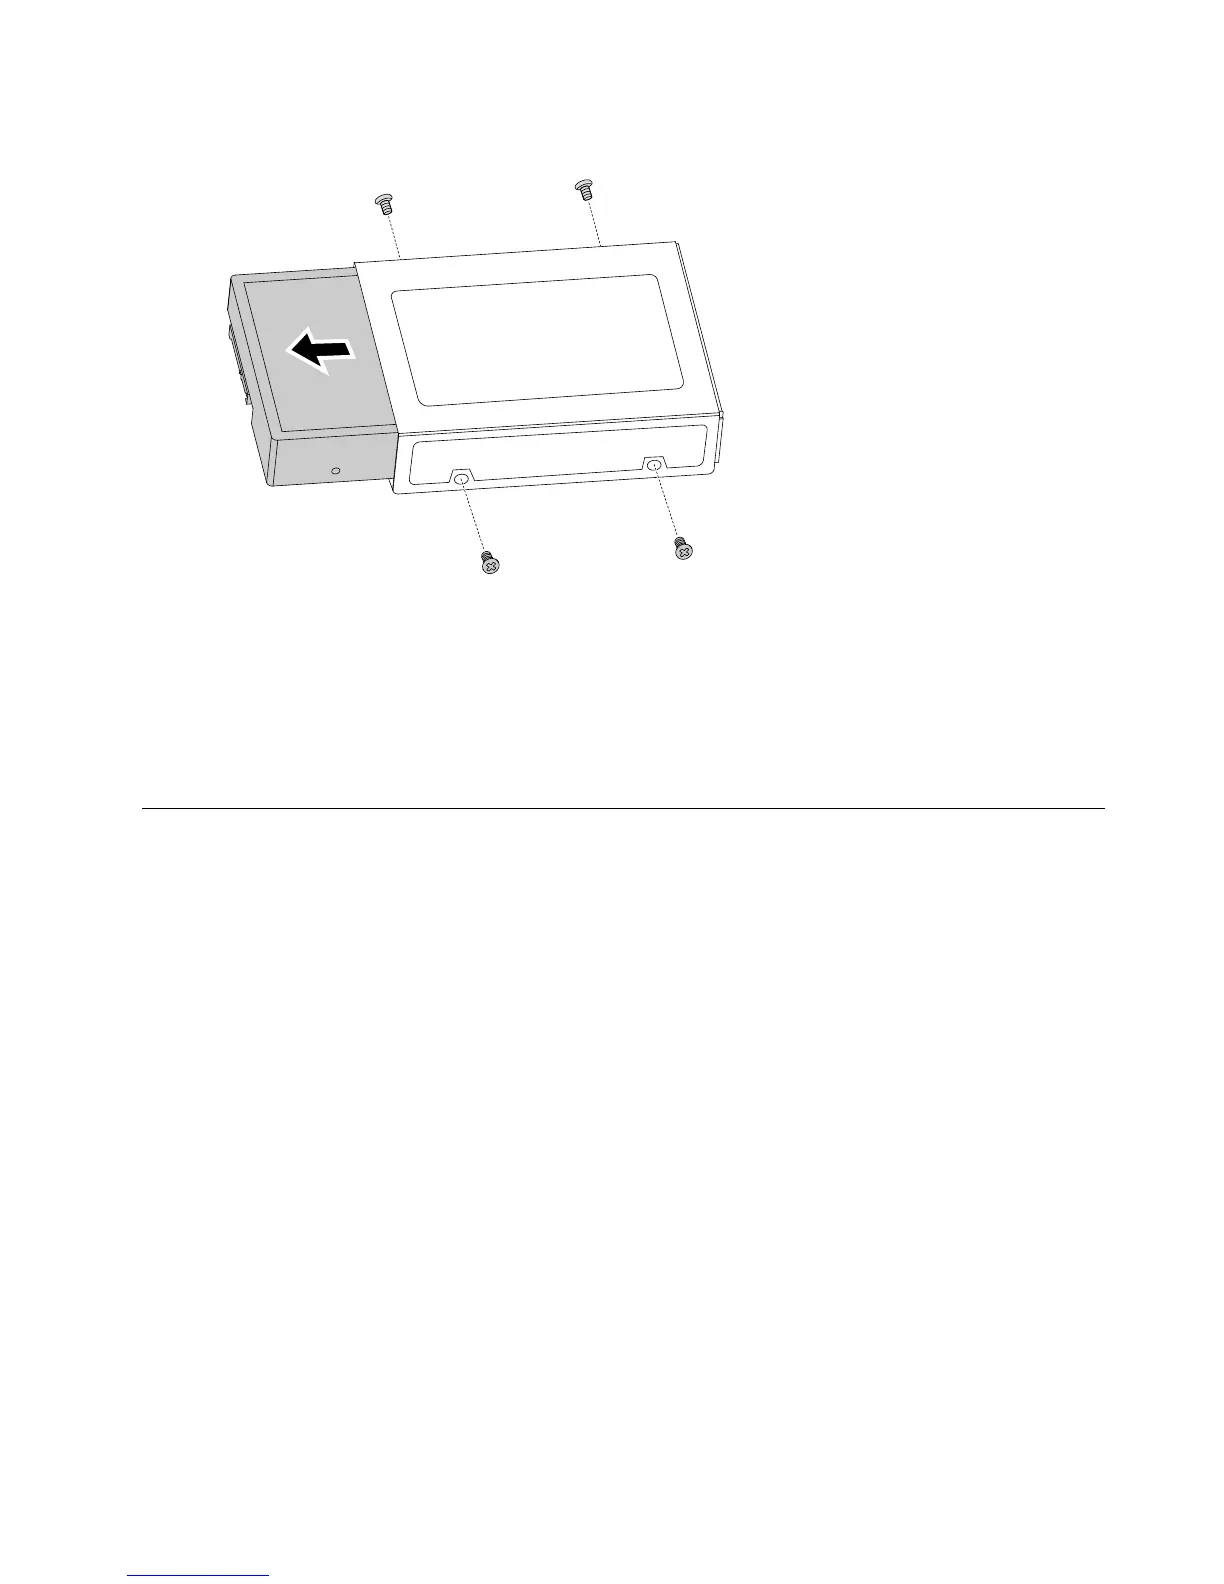
Step10.Slidetheharddiskdriveoutofthebay.
Step11.Installthenewharddiskdrive:
a.Insertthenewharddiskdriveintothedrivebay.
b.Screwbackthe4screwsonthedrivebay.
c.Attachthedataandpowercablestothenewharddiskdrive.
d.Lineuptheharddiskdrivebay,thenslideitin.Reattachittothechassiswiththescrews.
Step12.Reattachtheopticaldrive,frontbezelandcomputercover.
Replacingamemorymodule
Note:Forthisprocedure,ithelpstolaythecomputerflat.
Toreplaceanopticaldrive:
Step1.Removeanymedia(disks,CDs,DVDs,ormemorycards)fromthedrives,shutdowntheoperating
system,andturnoffthecomputerandallattacheddevices.
Step2.Unplugallpowercordsfromelectricaloutlets.
Step3.Disconnectallcablesattachedtothecomputer.Thisincludespowercords,input/output(I/O)
cables,andanyothercablesthatareconnectedtothecomputer.Referto“Leftandrightview”
and“Rearview”forhelpwithlocatingthevariousconnectors.
Step4.Removethecomputercover.Referto“Removingthecomputercover”.
Step5.Locatethememorymoduleconnectors.Referto“Locatingcomponents” .
Step6.ForLenovoH30–00refertothebelowinstructions:
Chapter8.Replacinghardware35
 Loading...